01
Apr 19

Epoxying a mug

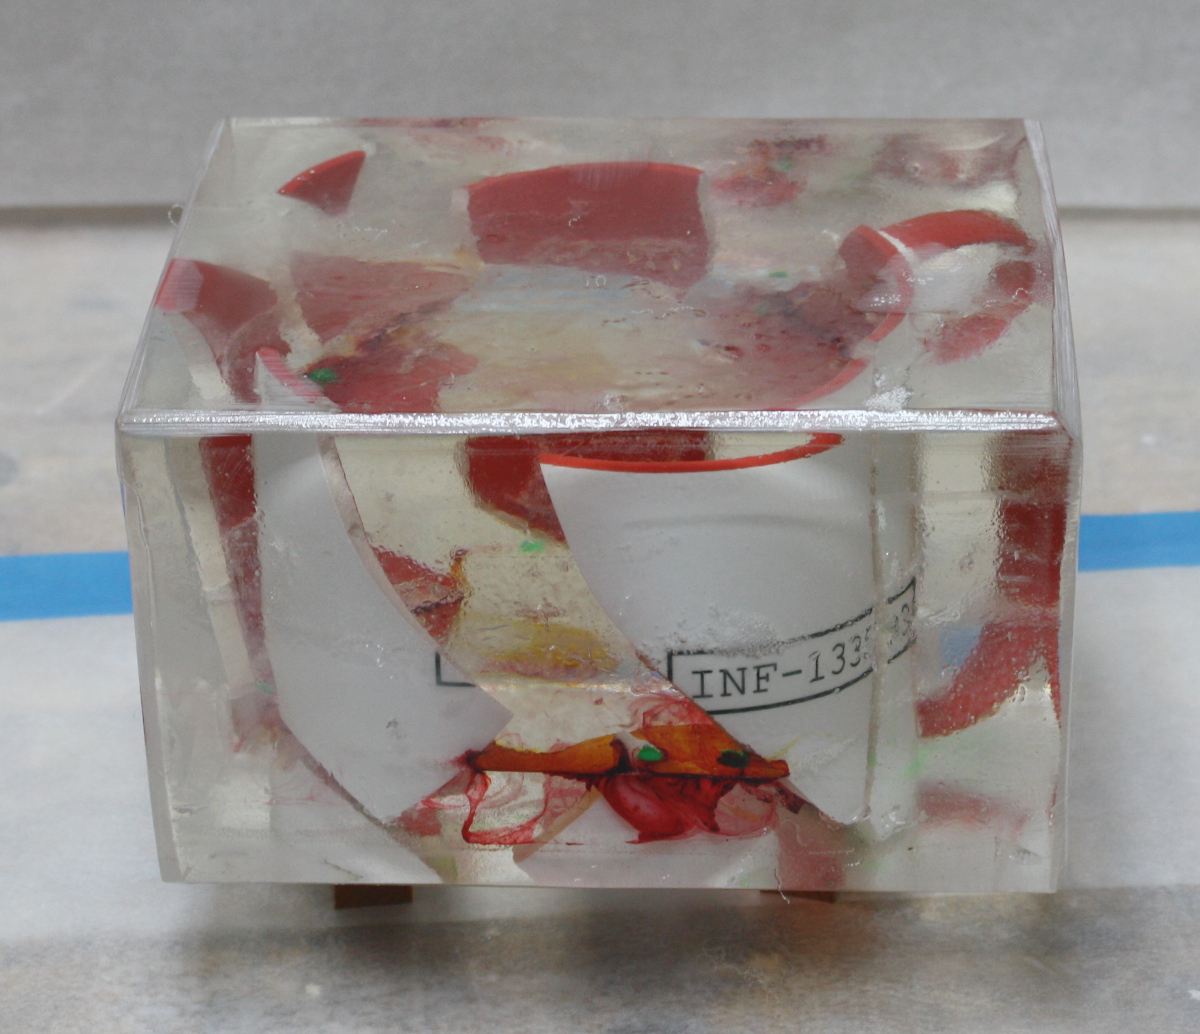
So, one of our team at work went on holiday to Peru and left his mug behind him in Dublin. And was scheduled to return on April 1.

So what happens next is entirely his fault.

(COL-PROD was a work project thing which won’t mean a thing outside of work)

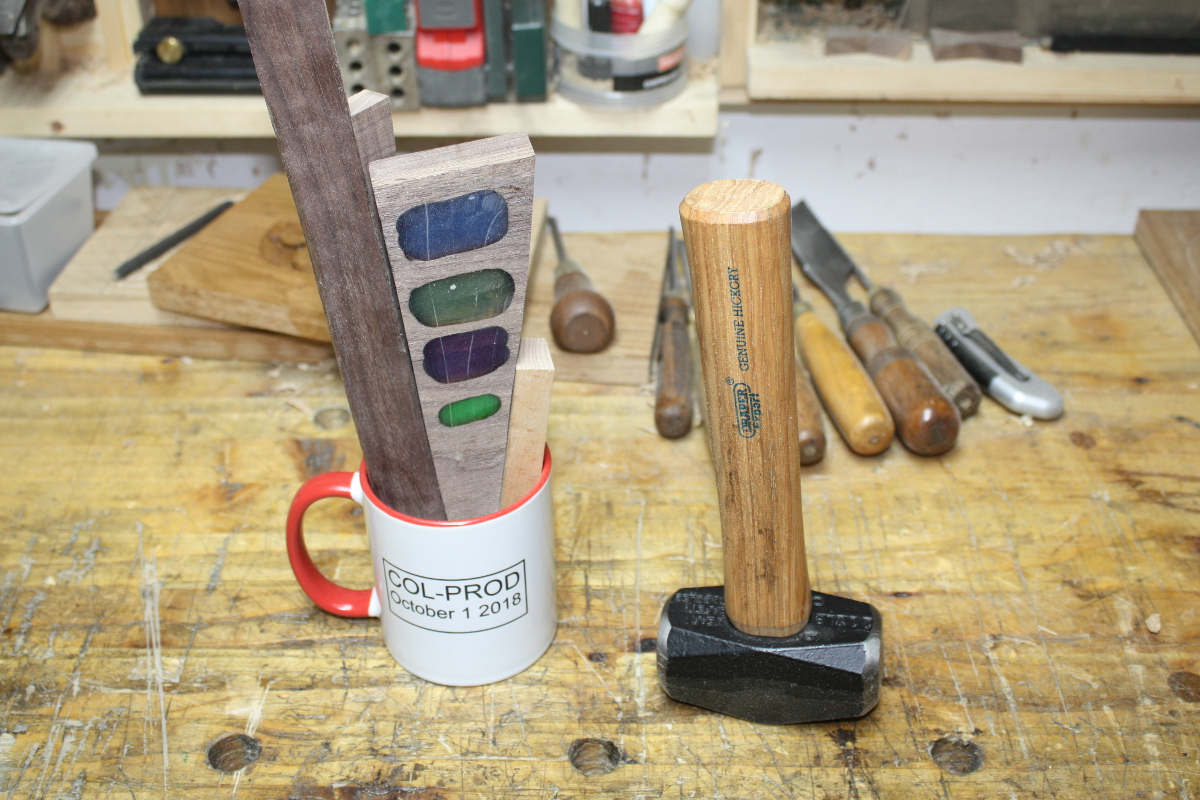
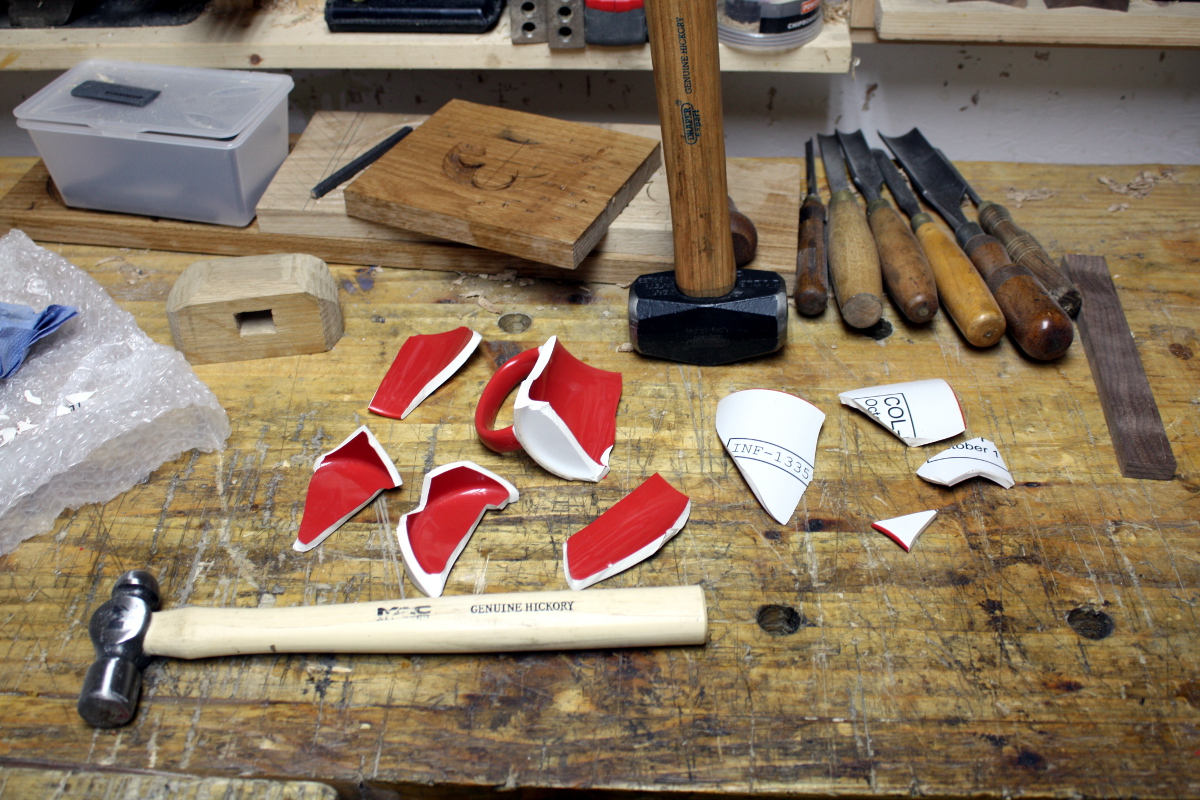
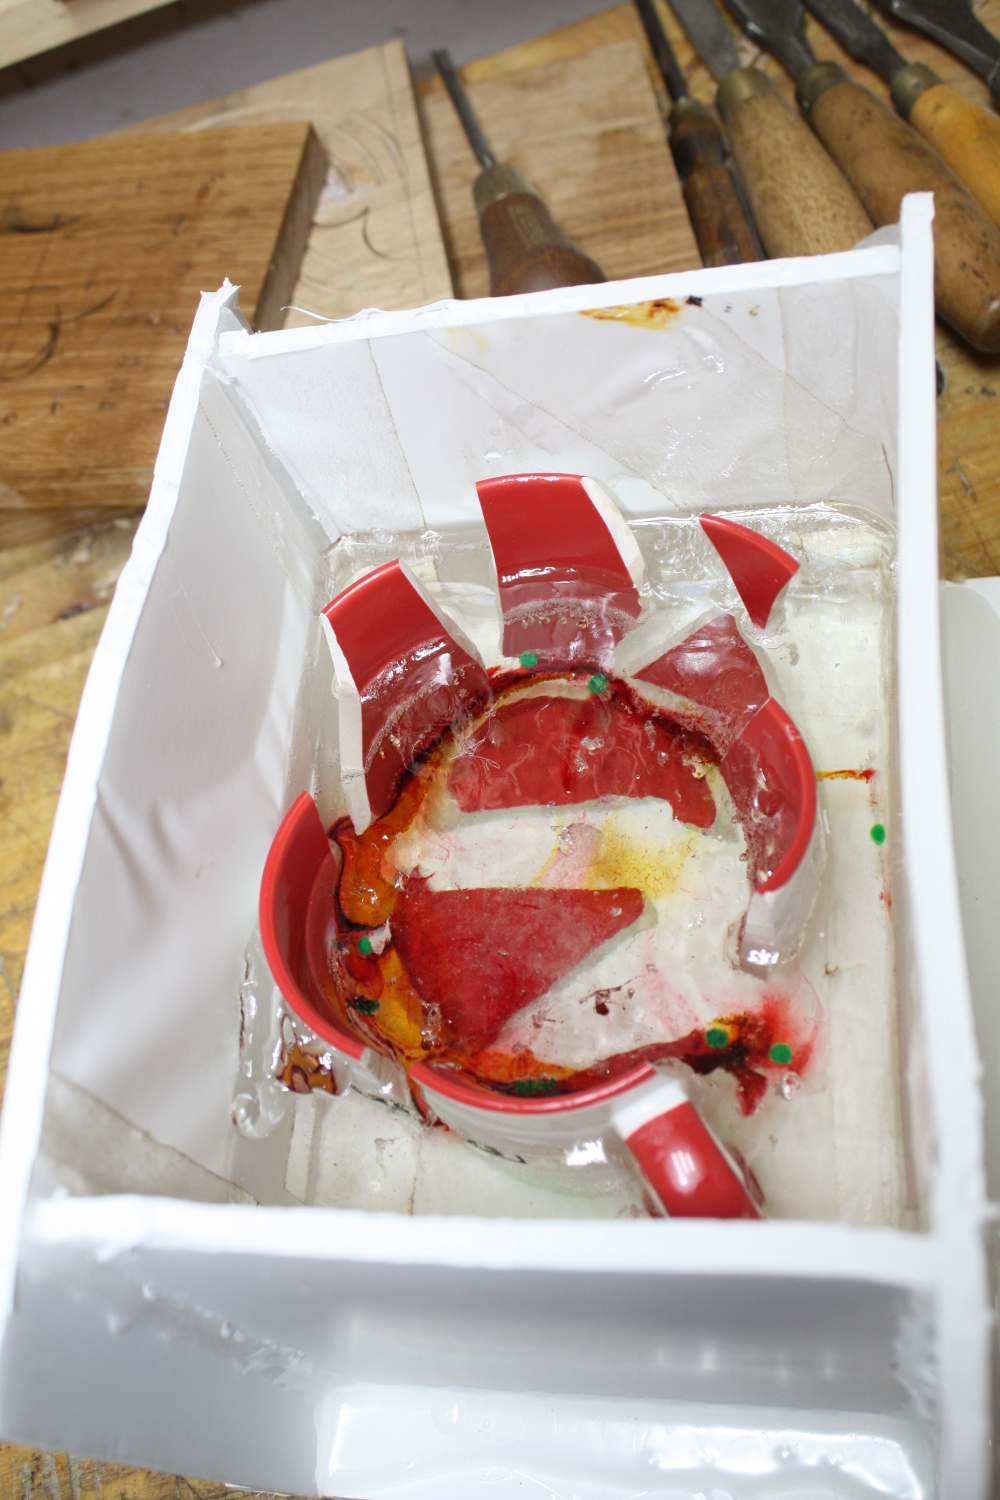
You know, it’s harder than you think to shatter a mug using a wedge from the inside out so it doesn’t look like some heathen just belted it with a hammer…

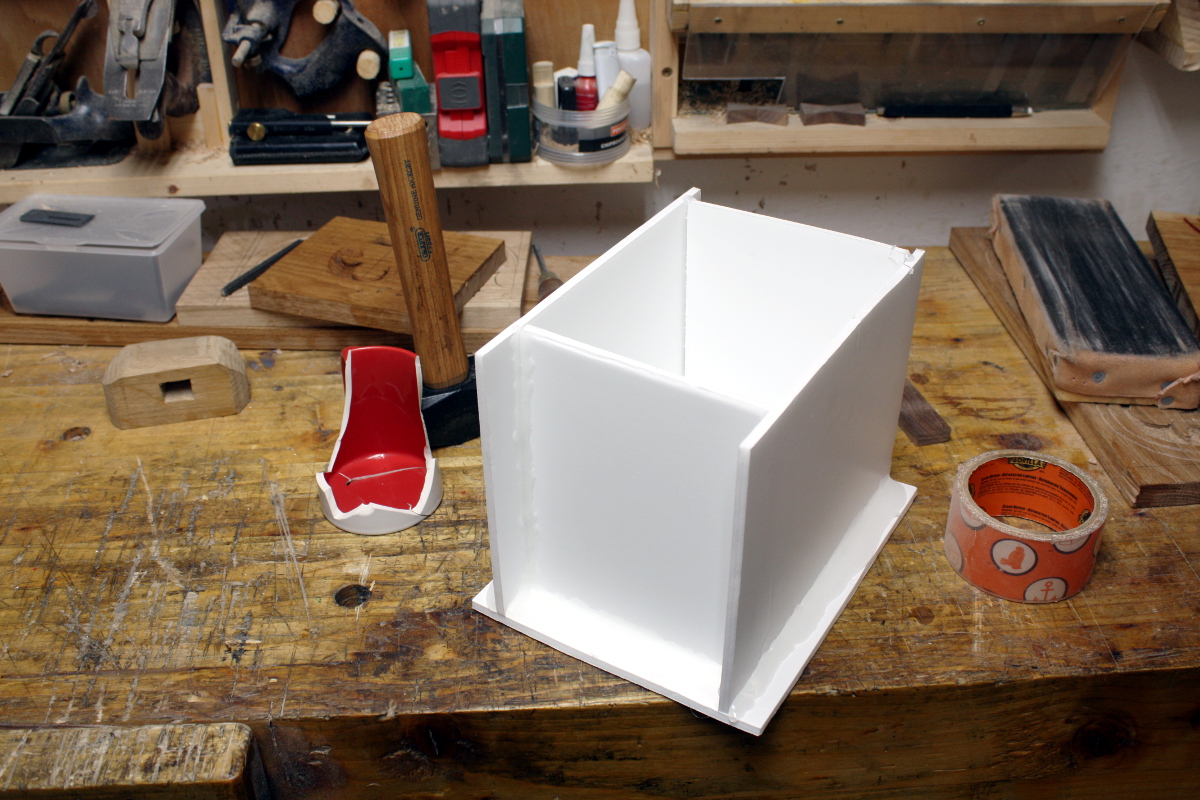
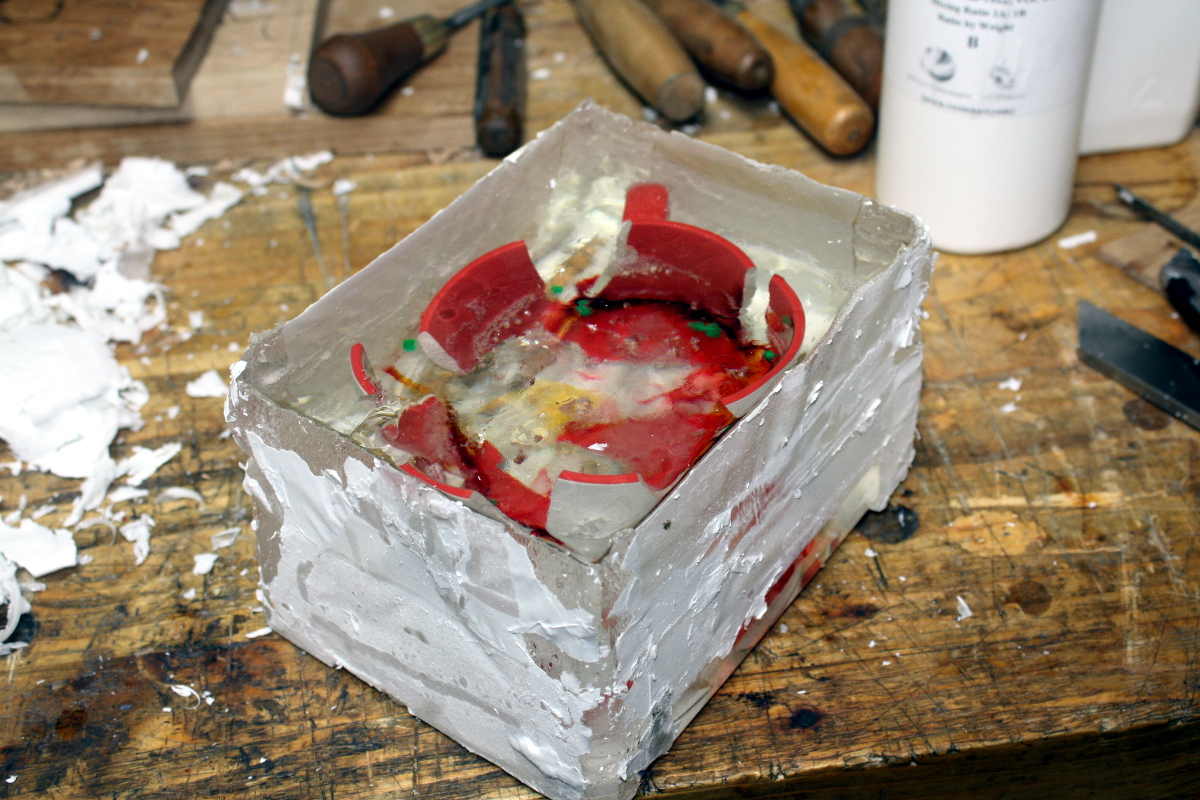
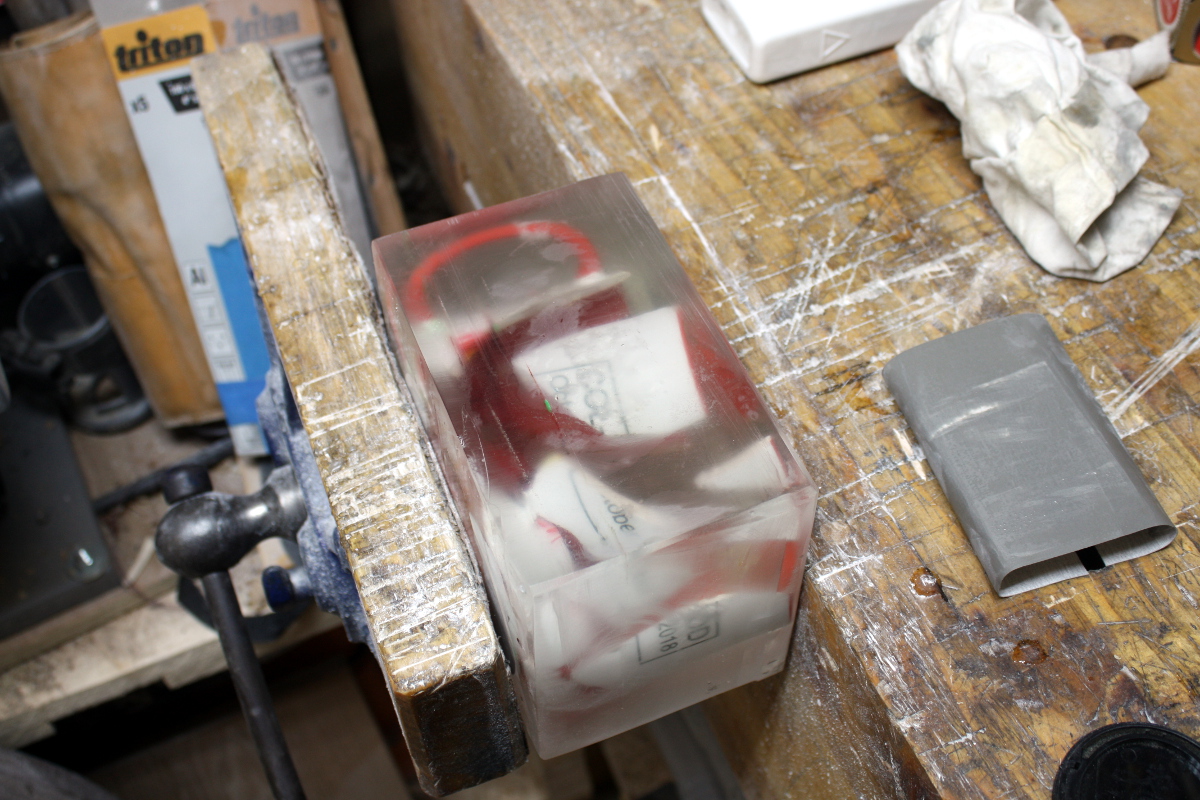
Foamcore mould, held together with packing tape and hotglue.

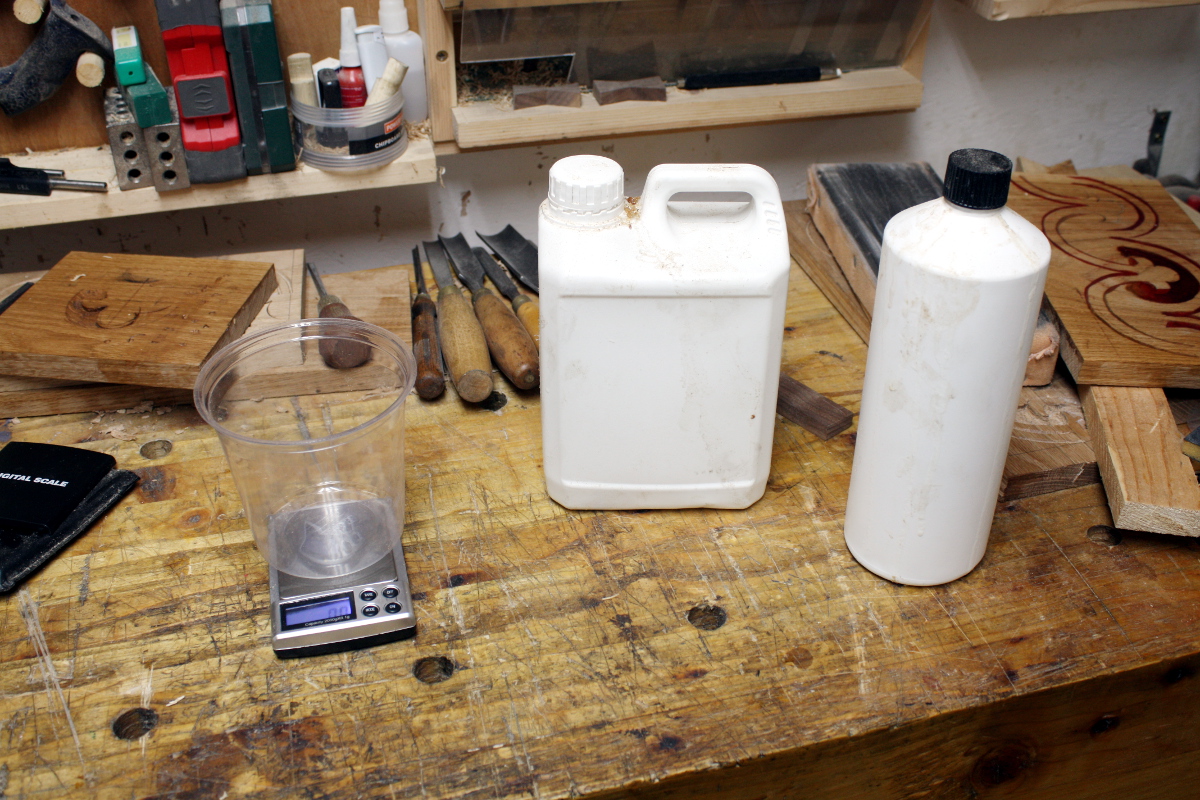
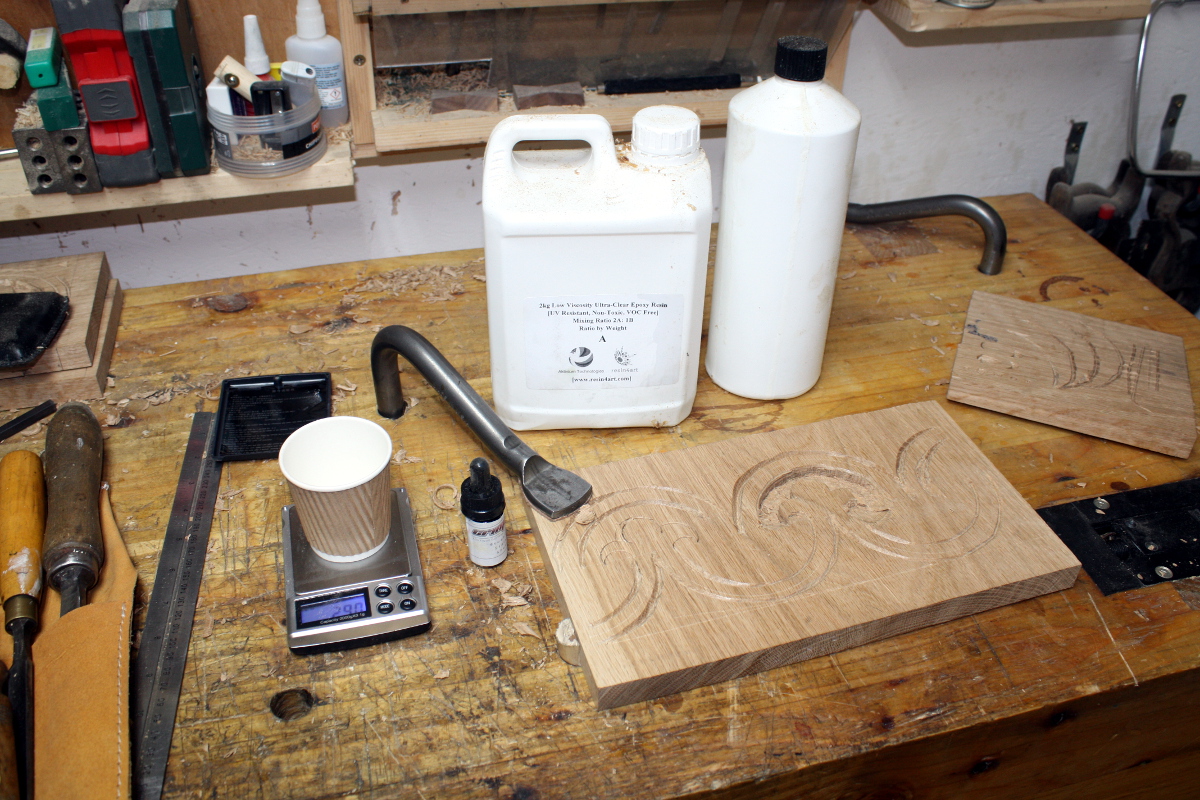
And now we start the first of several batches of resin…

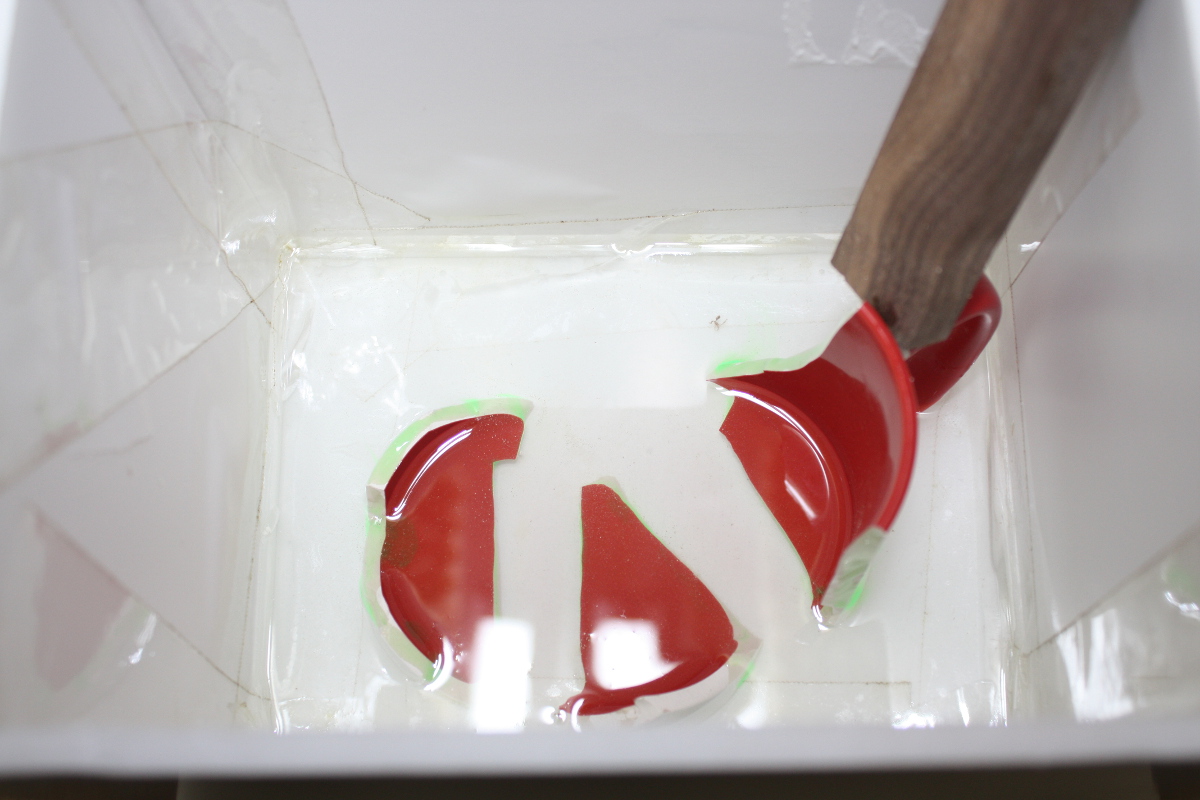
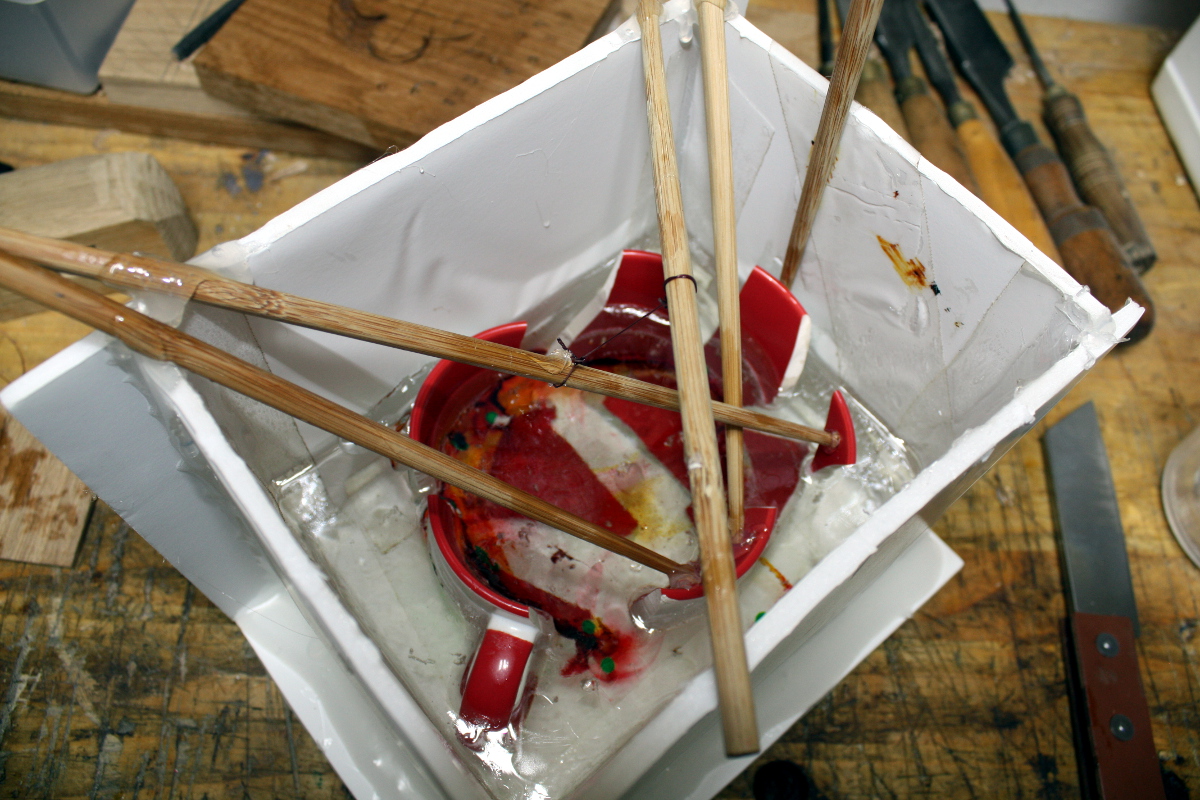
Holding the pieces in mid-air so they’ll be in the right place when you pour the resin around it, and holding it in place while the resin sets, is a fiddly job.

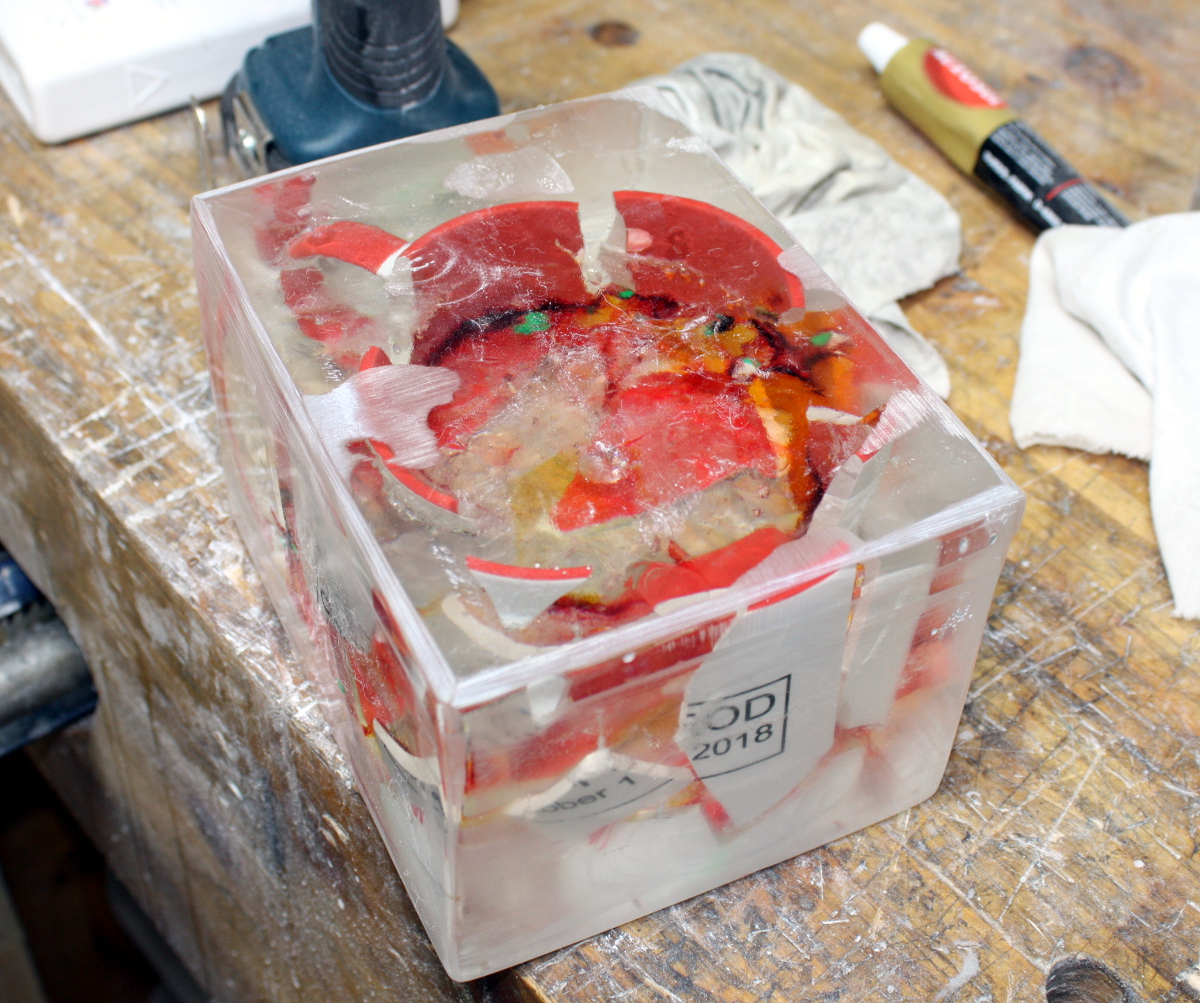
Haven’t poured that much resin before, and the second-to-last layer had something of a thermal runaway and warped the foamcore.

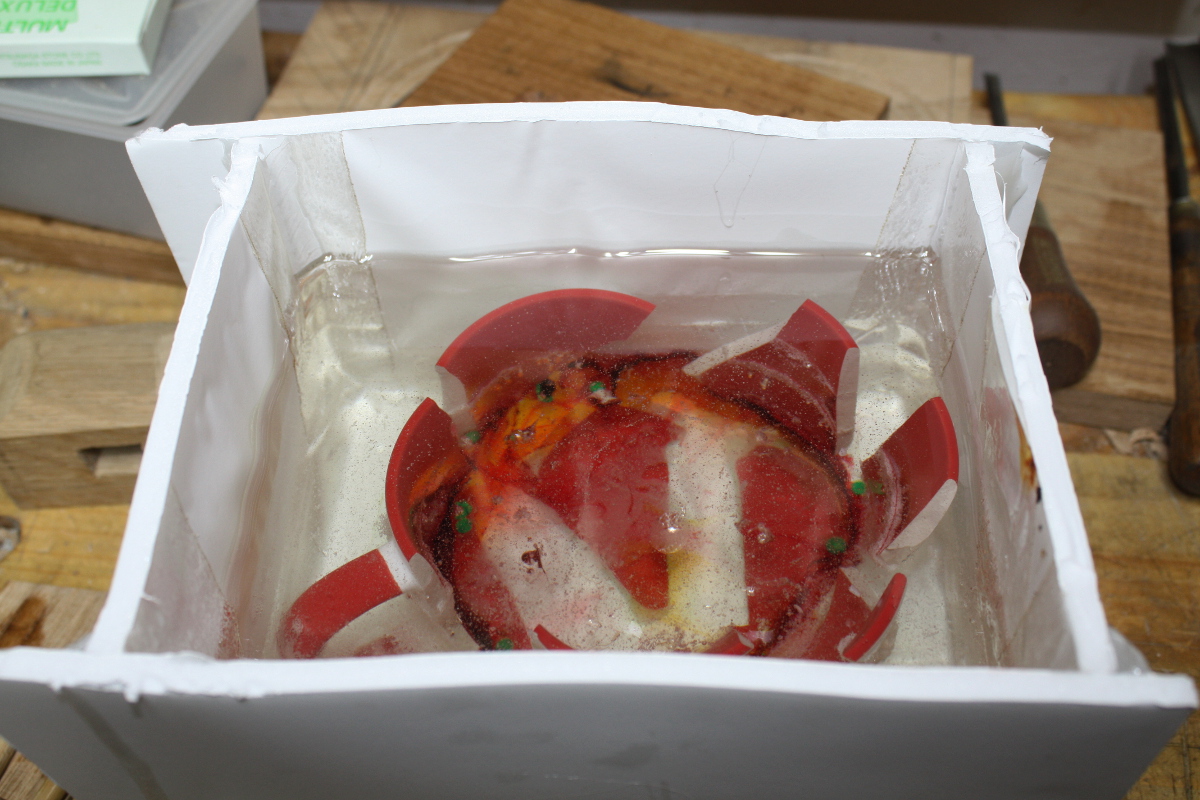
Oh. Right. Foamcore does need mould release before pouring resin. Oh well. That wasn’t irritating and fiddly at all…

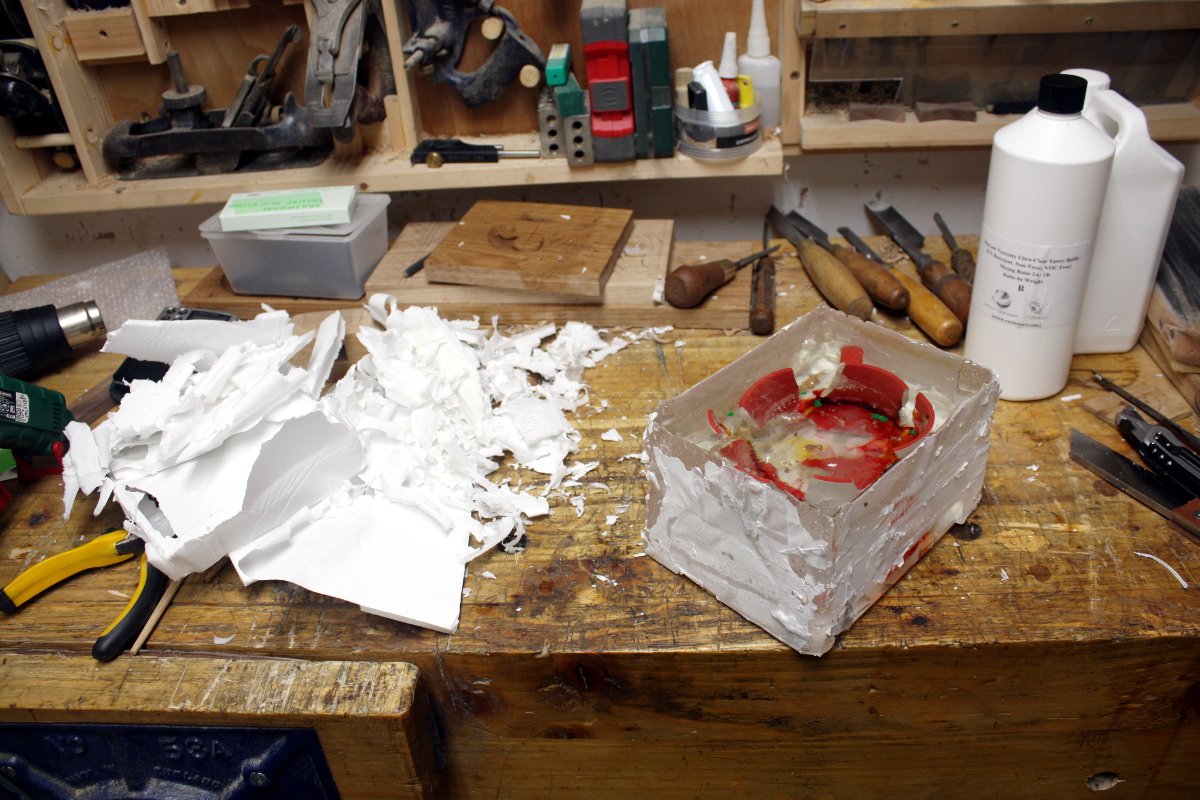
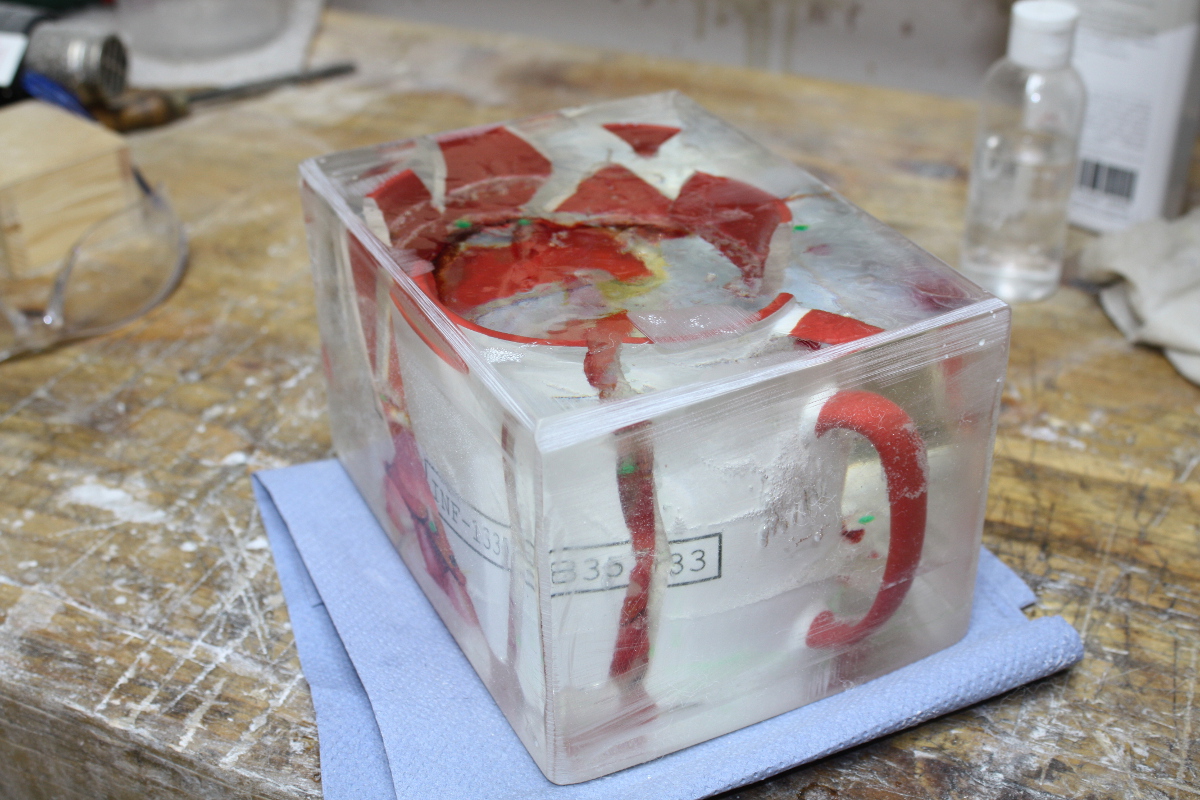
Still though, not horrific. I’ll cut off most of this with a knife and then…

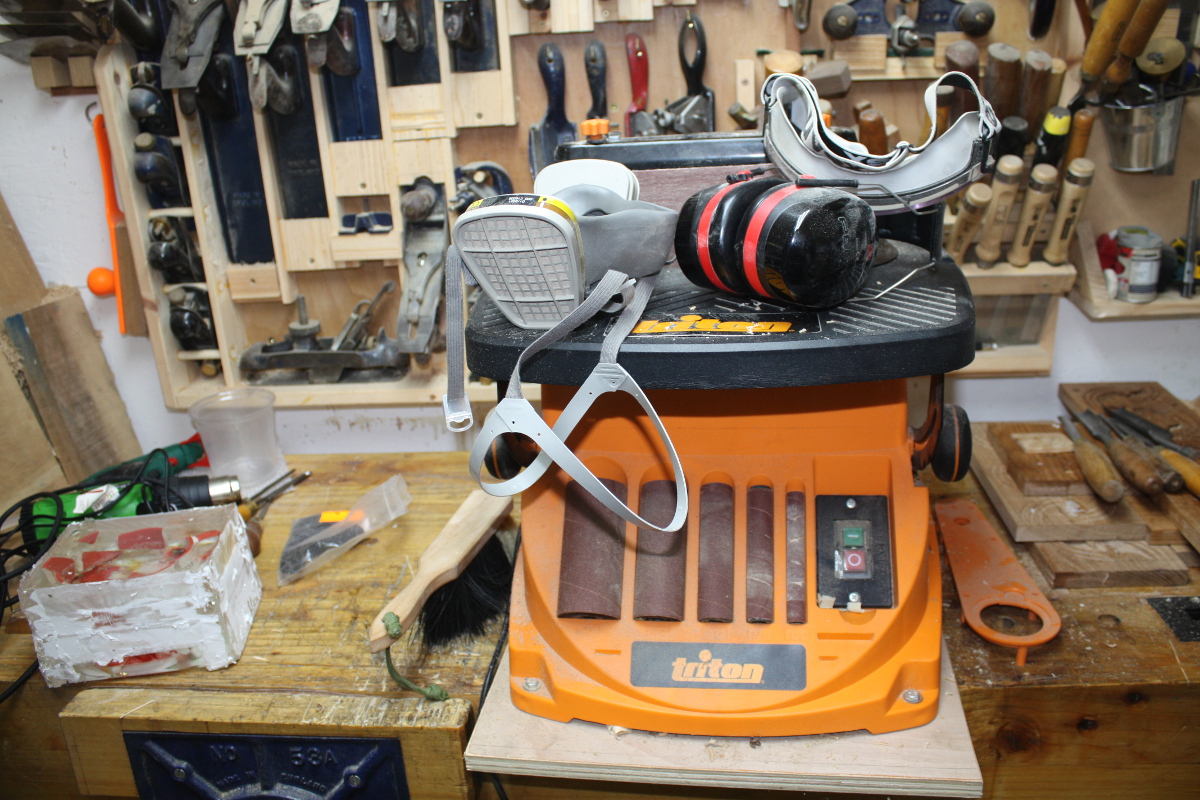
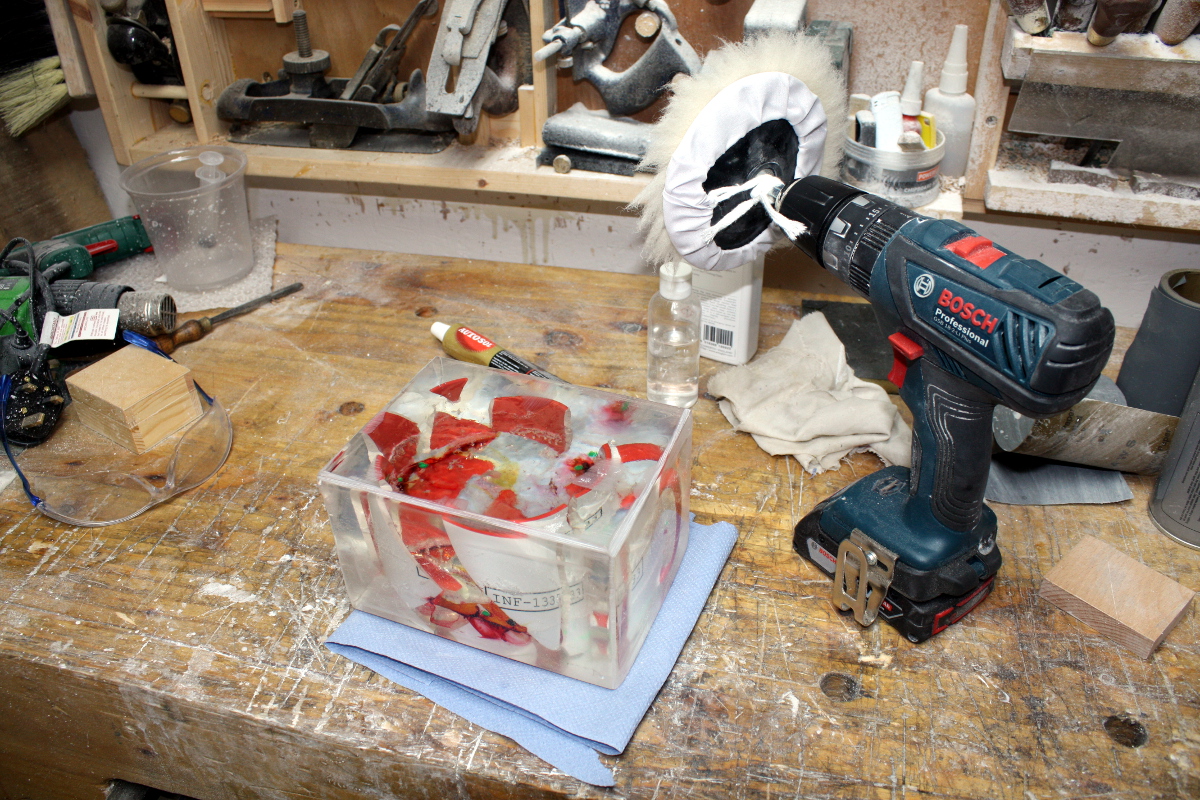
Power tools time. Starting with 50 grit and working up to 150 grit.

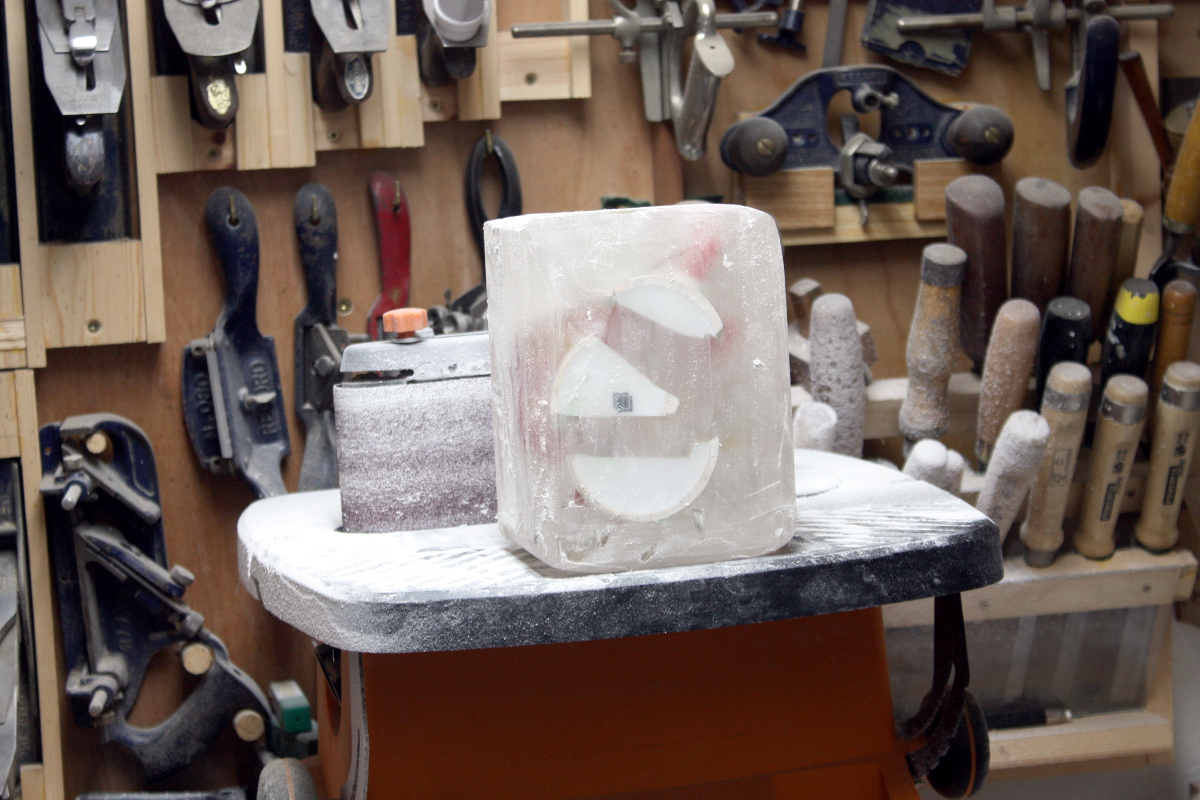
Power sander is done here. And holy carp it was messy. It was like working inside a shook-up snowglobe.

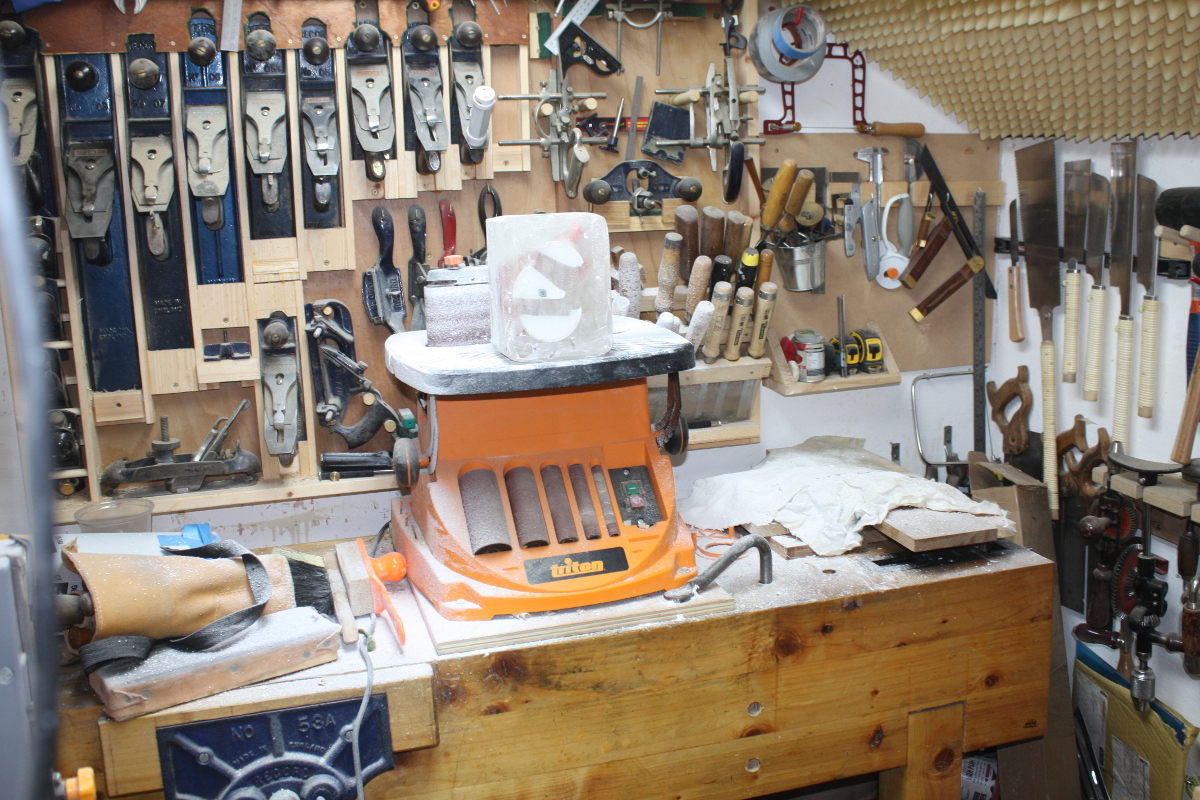
This is going to need some major cleanup later on. But for now, onwards.

Handsanding, wet, with micromesh at 200, 400, 600, 800 and 1000 grit. Then wetsanding with wet/dry paper at 1200, 2000 and 2500 grit. Gotta love Halfords for small amounts of cheap high-grit sandpaper.

Now autosol applied by rag and then buffed with a power drill.

And finally some resin polish, again from Halfords.

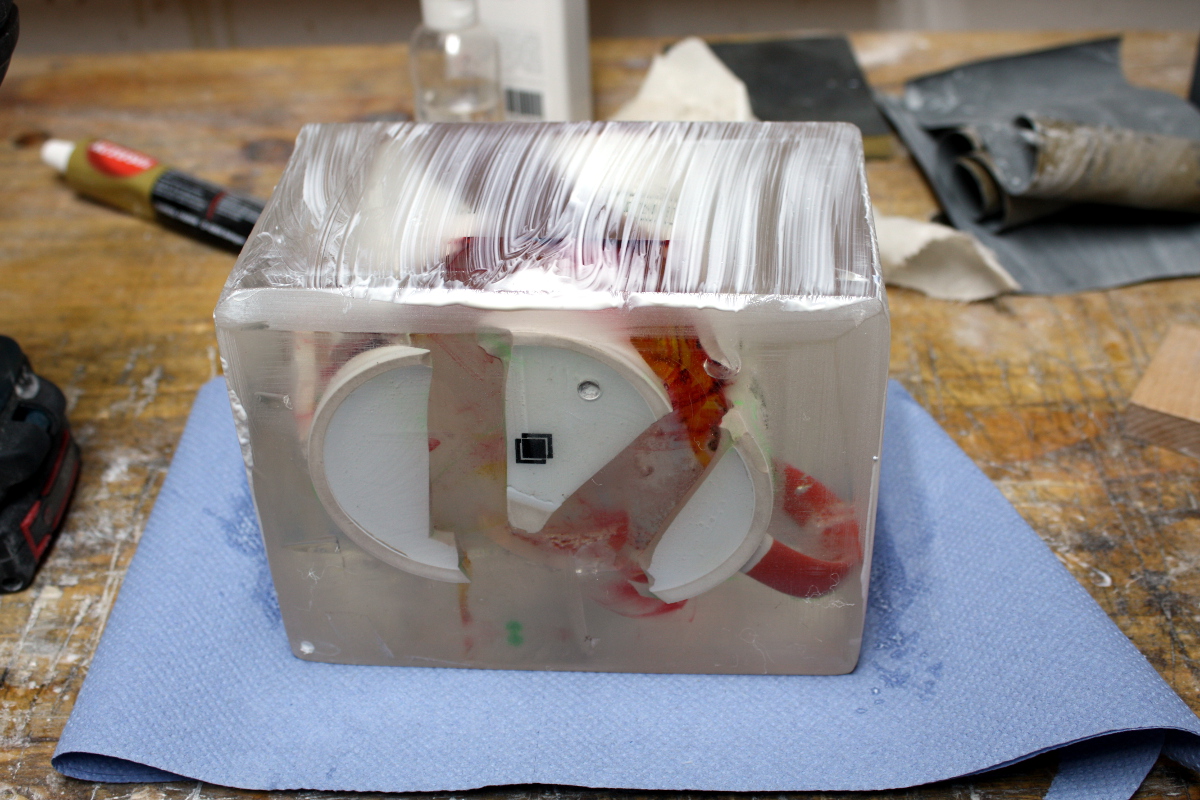
And then I tried spraying with clear lacquer…

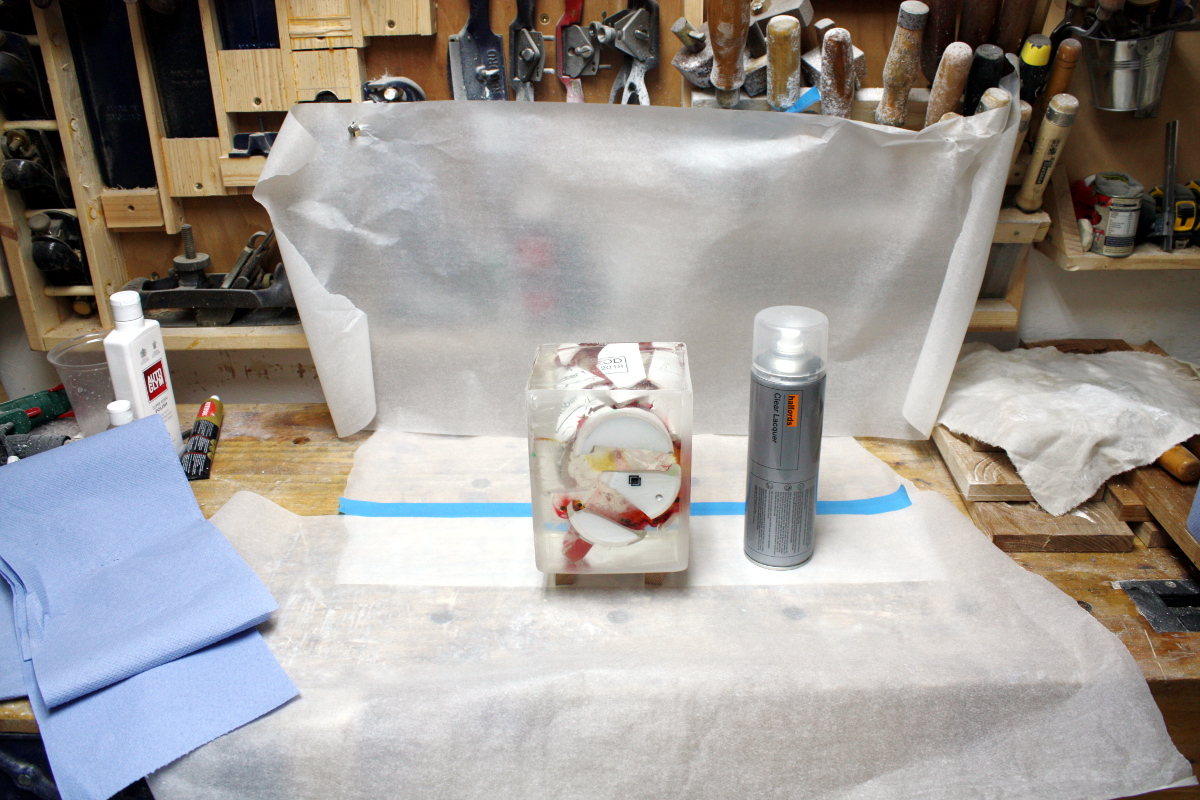
But it didn’t go so well, it left the surface cloudy even after fully drying and buffing. So I went back to the autosol and then the resin polish again and left it at that.

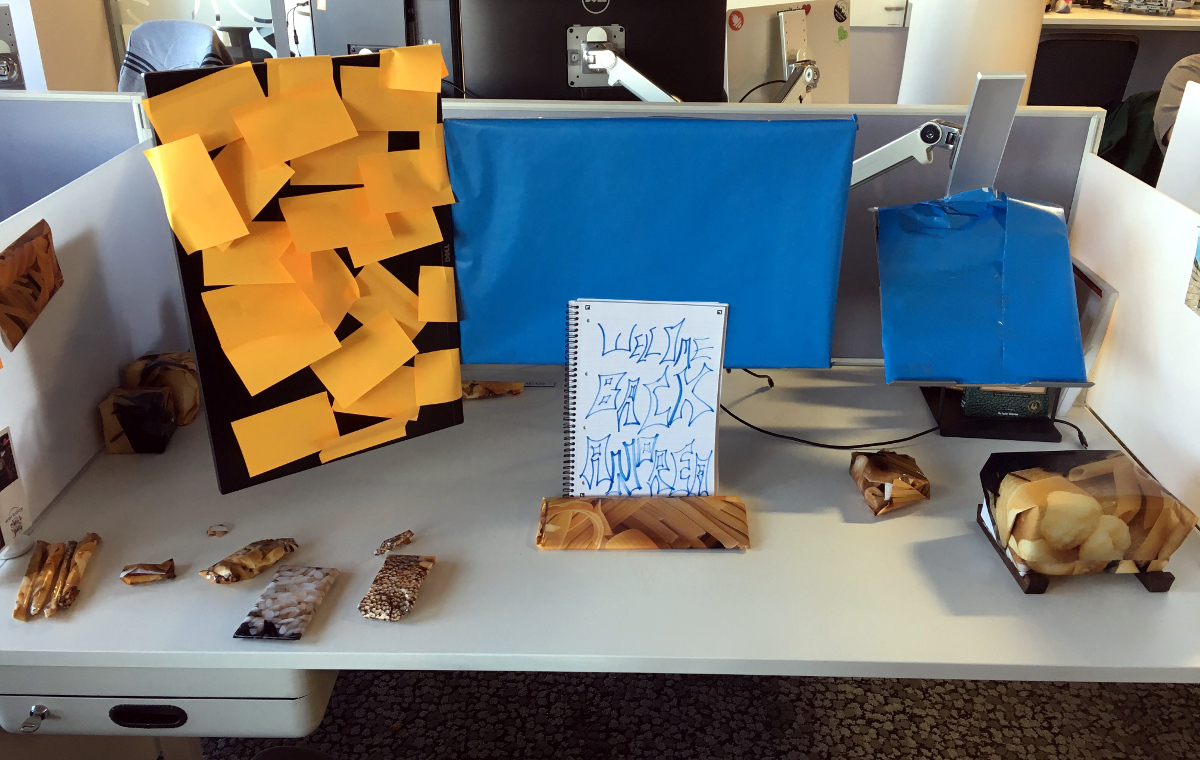
Then I knocked up a very very rough stand out of some walnut and felt and stuck it in my backpack and took it into work…

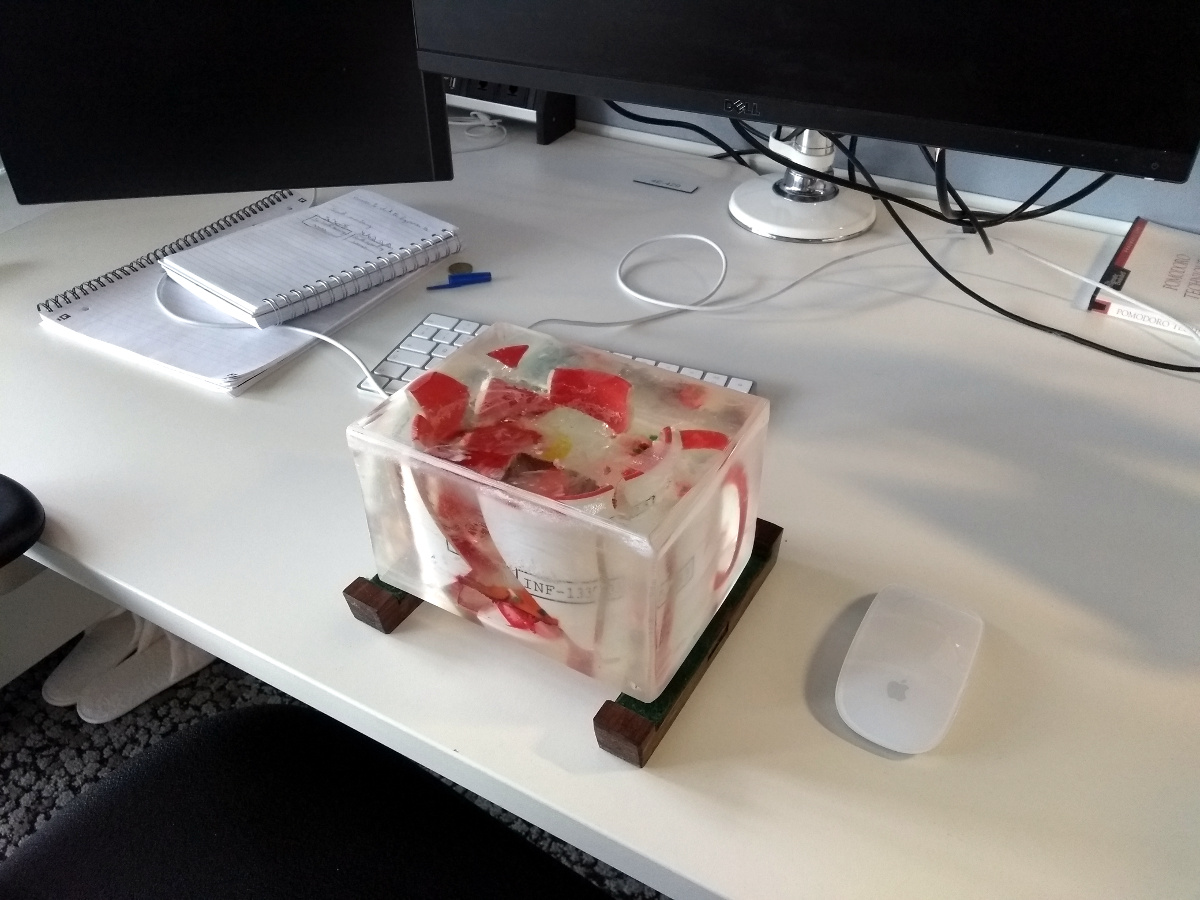
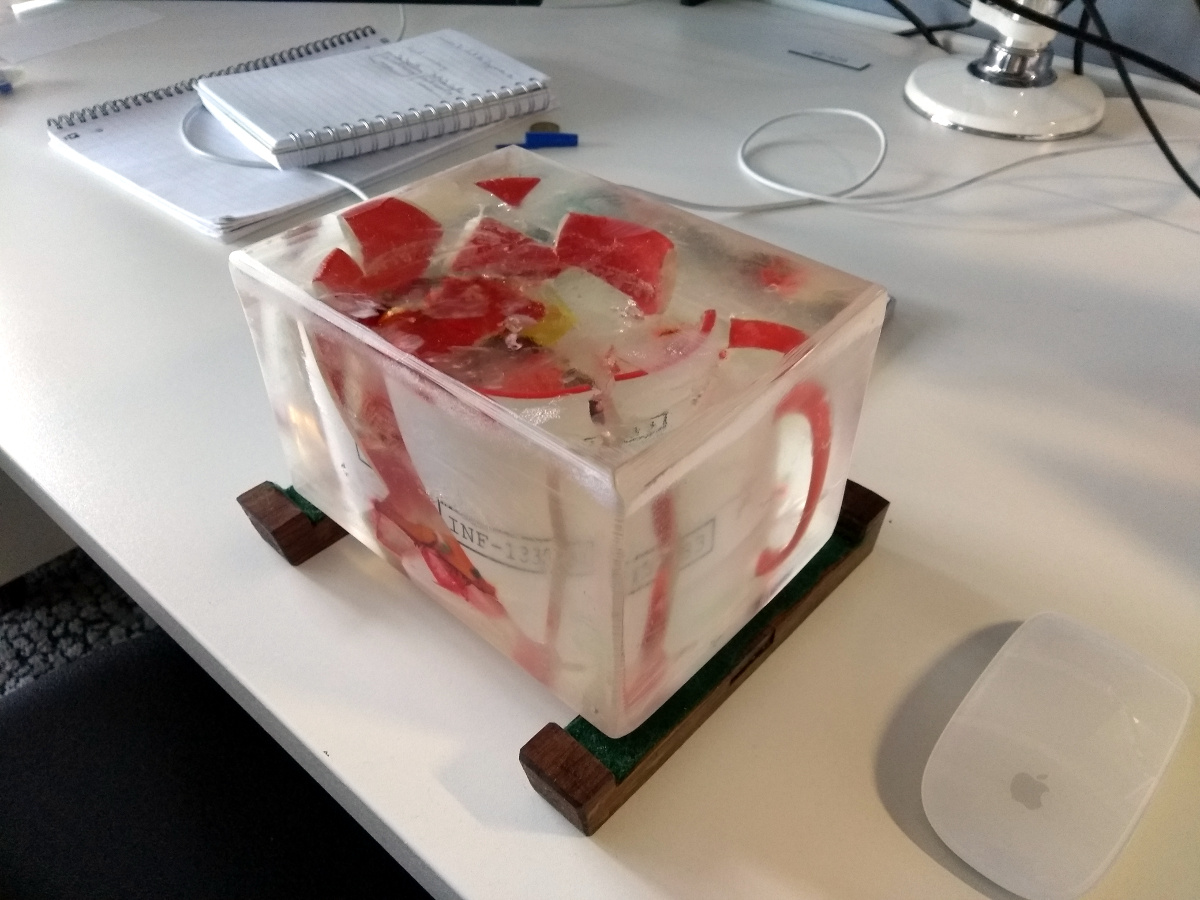
Not bad, but it’s missing something… oh, right, he’s returning on April 1. So…

That seems about right.

We did enter his mug into a Sustainability competition at work on the grounds that it will far outlast a single-use cardboard mug for the coffee machine but for some reason we didn’t win. Harumph.


13
Mar 19

17th Century Resin?

So, y’know when you have an odd idea and you can’t be sure if it’s good or terrible?

The oak carving is going okay. But depressingly regularly, while cutting away the background, a piece of the foreground chips off. Sometimes I can fix it with CA glue, sometimes I can soften out the edges so it looks like it was supposed to be rounded instead of oops-broke-a-bit, but I kept wondering about how well the box would hold up if it’s this chippy, and also while I like the way it looks, well, most of the appeal of this sort of stuff comes from the medullary rays and the lines of the grain you get when you rive oak, and the flatsawn stuff just isn’t as pretty.

And then I wondered, well, what if you carved a Peter Follansbee pattern, but then filled it with Peter Brown resin?

And I couldn’t decide if that was a great idea or a horrific one so I took an offcut, scratched in the pattern and spend a very hurried ten minutes hacking out the basics of the pattern and annoying myself that despite speeding through it, it came out better than some of my more careful attempts.

No, it’s not finished – in particular we’re only down to even close to depth on the right half of the pattern there. But the goal is to just test this idea and see if it’s truly awful. So I stopped here and mixed up some resin with some Crimson Guitars crimson dye (because there is actual historical precedent for this style of thing to be painted, mostly in red and blacks).

I’m fairly sure digital scales in the 0.1g range were not common in 17th century New England, but neither was epoxy resin or a polio vaccine, so, y’know, I can live with it.

Two parts A to one part B by weight plus two drops of crimson stain and mix for a full minute to make up 60g of resin. And then pour.

It looks like a seriously impressive accident just happened.

I know it’s spilled over, that’s deliberate. If I don’t put in enough, the oak being porous soaks up enough resin that it dips below the surface and I’ll have to take it down too far afterwards to get a clean surface again. I’ll let this set then pour more resin over the top to get it all above the datum (and I’ll leave it clear so I can see what a clear resin looks like in some of those v-tool cuts as well; that might also be something to try.

I mean, yes, one’s had more work, but so far this isn’t convincing me it’s a massive improvement, but let’s just see.

So it cures for a few days and then today…

Yikes. Messy. I tried planing down the surface with the #05 but even on a light cut the resin chips and it’s just not viable. So sanding is needed and I only had a half hour so…

Repeat after me, “It’s only a test, it don’t mean a thing”

So that took off the excess and got back to an almost-flat surface (one part of the oak drank a lot more resin than even the second pour made up for). And then more sanding is needed to get an idea of what it could be if I did it right.

Wetsanding with micromesh up to 1200 grit (but not for a huge amount of time, only 30-40 seconds per grit) gives this.

For fits and giggles, add the linseed oil that you’d normally finish oak with:

And the transparent resin is interesting as well – you can see the pattern, but not feel it and the surface is smooth as glass.

The rushed beltsander is not the best tool here. It grinds the resin dust down into the pores of the oak and it’s nearly impossible to fix that. I need to think about that a bit to figure out what to do to prevent it or if it can be prevented at all. Maybe a #04 with a really really fine cut is an answer, I don’t know for sure. Maybe I should finish carving, seal the pores and then pour the resin.

Or, you know, maybe this is an absolutely terrible idea 😀 It certainly isn’t as good as a Follansbee, so maybe that’s why I’ve not seen this done before. Need to think about it a bit more.


24
Feb 19

Resin results and carving again

So the resin tests came out pretty damn good. The idea of putting the reflector under the resin worked quite well, and most of the colours came out well (the crimson guitars stains didn’t really pop but that was more down to the dark background – the way the red especially looked over the reflector suggests it’d be lovely over poplar).

Crimson guitars stains in walnut

Calum picked out a few he liked as well (the ones with crosses beside them in pen). So now I’m just picking out designs to do for the various parts of the desk, shelves and sides. I need to print a few out and find some transfer paper, then some will be done by inlay and some with resin and some with a mix. I also ordered two new inlay handtools for a few curves I can see coming that will have to be done freehand (yeah, you could get router inlay bits but I think we’ve established by now that I don’t like the router very much).

Think I’ll skip banding this time though. For a later project, that one (and I have one in mind).

Meanwhile, I’m blocked for a few days so I made some progress on the oak box. Cutting the component parts was easy enough…

If anything I shouldn’t have cut them so early, but left that till after the carving. And I mucked up shooting the end of one…

And of course the CA glue stuck to the clamp so unclamping chipped the board anyway. Le sigh.

But never mind, on to the fun stuff..

It might be hard to spot there because scratches on oak are, but I’ve marked a centerline and scratched in a series of opposing lunettes (to borrow Peter Follansbee’s term) and next up is cutting them with a V-tool. Well. Actually next up is spending some time with the diamond plates, slipstones and strops sharpening that V-tool and trying to sharpen a second one I had but which actually needs to be reground. Those V-tools are a little small but it’s a small box and the larger V-tool I have is an incanel one which, when used for this, bites in and heads for the far side of the piece. I can’t get it to work for this sort of thing. I’ll keep an eye out on ebay, but for now this V-tool will suffice.

That’s all of them marked out in fact.

You can make out the scratches up close, but they’re still hard to see even standing in the shed. I wonder if Follansbee has it easier seeing these because he uses riven oak instead of this flatsawn stock. He’s said himself this is carvable but not the best.

After a few minutes in fact, I gave up and just ran a pencil line around the scratches. They’re being carved out so it won’t mar the work.

Then I just work my way along, cutting out the same part of the curve on every curve, then moving on to the next until all the lines are cut out. You have to cut in sections so you can brace your V-tool arm and control the cut. I say that like I’m cutting perfectly regular lines, but I have to go over everything once or twice already and it’s still not perfect.

I mean, it’s not terrible, it’s just rough. Still though. Got all the V-tool work done on all the sides.

Next will be cutting the floral decoration. That’s done with a few gouges, so got some out to figure out what fits.

They’re all a bit small though. I suppose “you can never have enough gouges” is a thing as well. Still, bit of experimenting and I found some that’ll work. A few chops with each will act as stop cuts, then some removing of background up to those stop cuts with a shallow gouge, and you get this.

Bit of tidying up, some extra bits and pieces as decoration, and that should be reasonable enough so long as nobody looks at an original Follansbee for comparison…