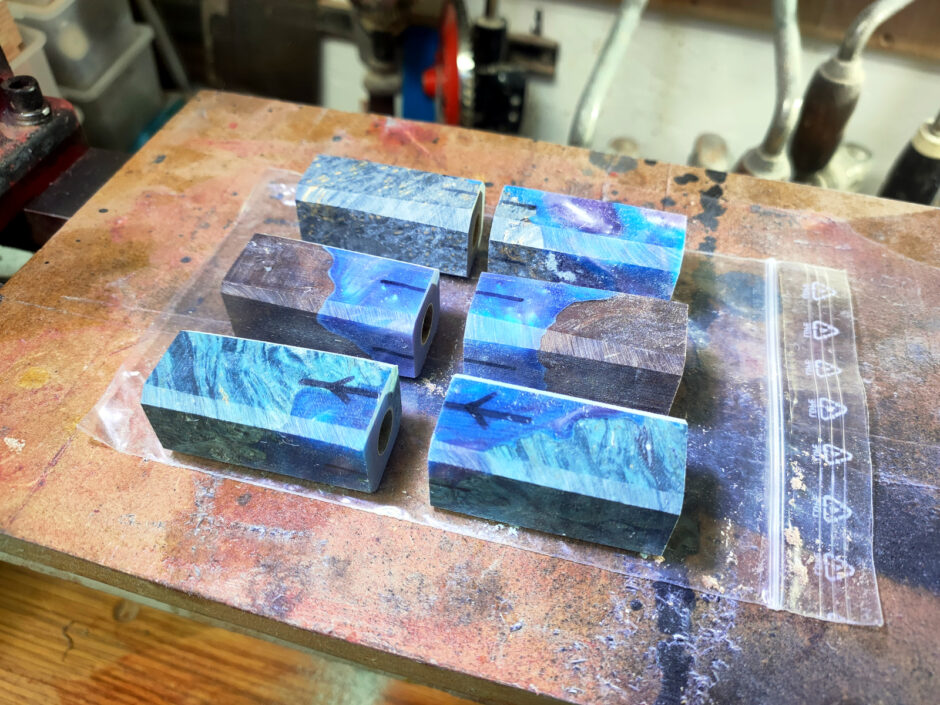
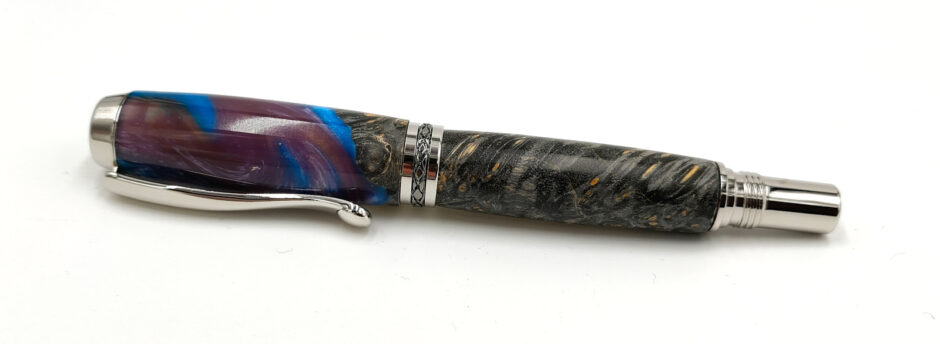
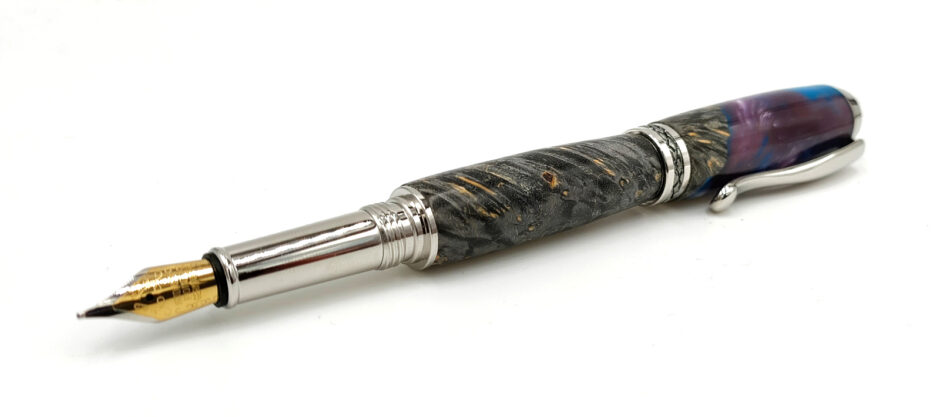
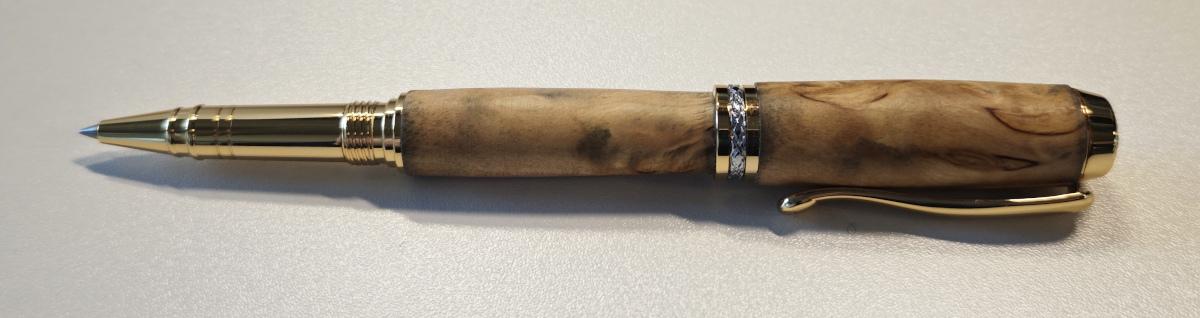
So the first of the fancy pens is done. I actually processed all three of the blanks at once this weekend, but I only got to turn and finish one of them. I also have one remaining blank from Feinesholz to use for something else, but that’ll mean buying a new pen kit to evaluate.
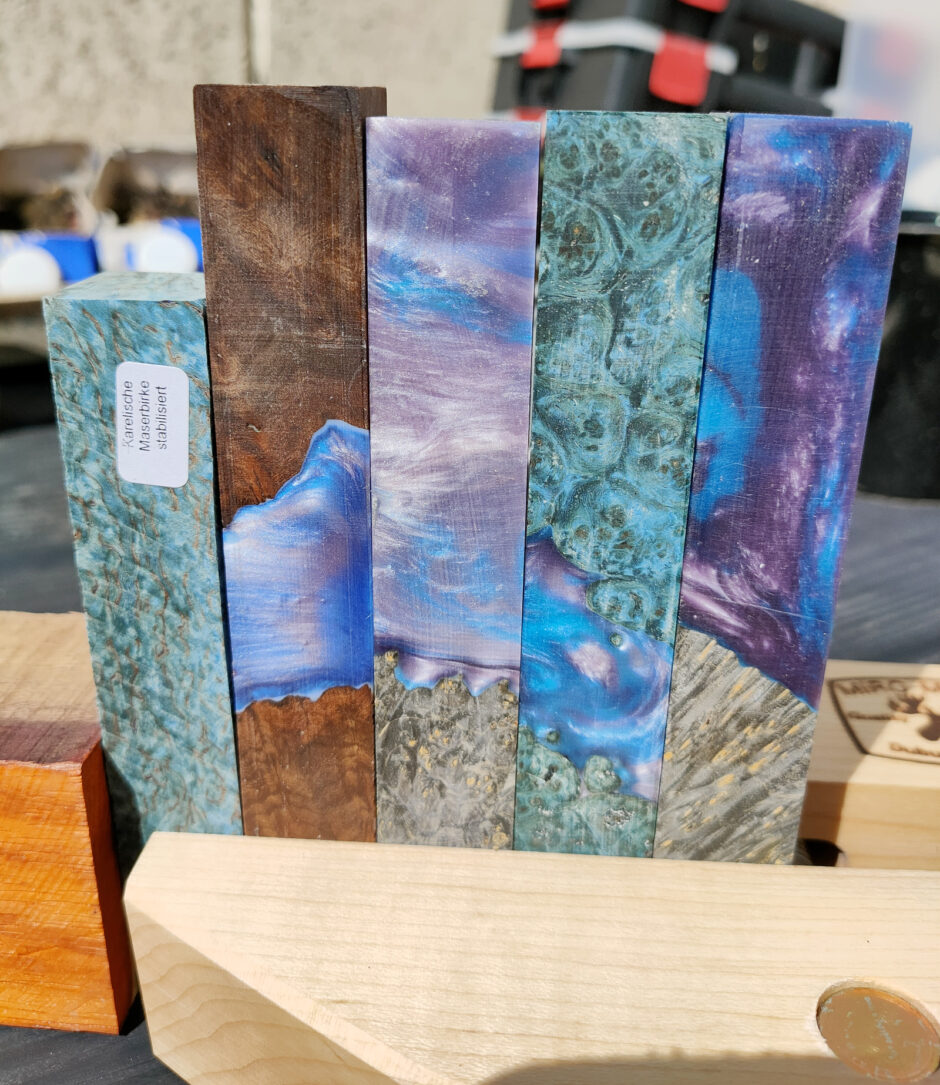
So the rightmost and the middle pen blank there are both hybrid pen blanks with stabilised boxelder maple burl with resin, so I picked one of the two to use, and the other is still waiting. And I also cut down the elm burr (thats second from the left) and the blue stabilised boxelder maple burl blank that’s second from the right.
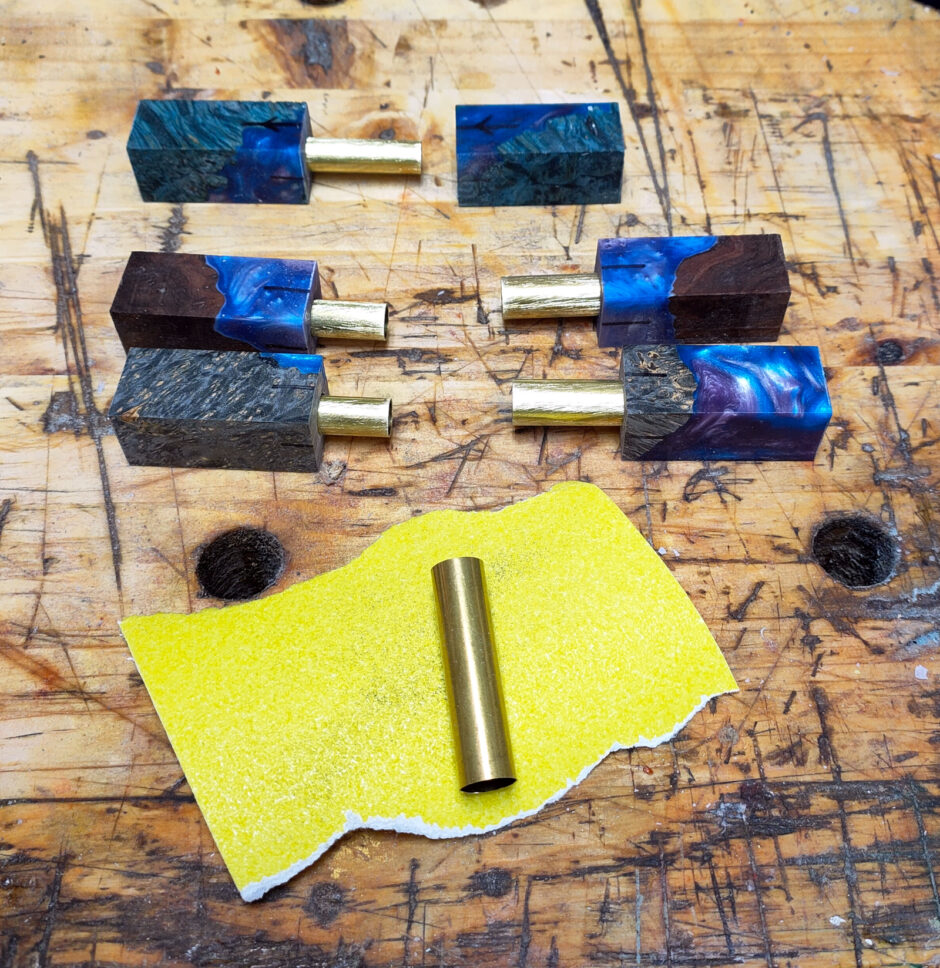
Cut to length, drilled for the brass tubes, scratched up the brass on some sandpaper and epoxied the tubes into the blanks.
And of course, I have a few offcuts. I don’t know if I can actually use these for keyfobs like I hoped, they’re a bit small, but I’ll have a think and see what I can do.
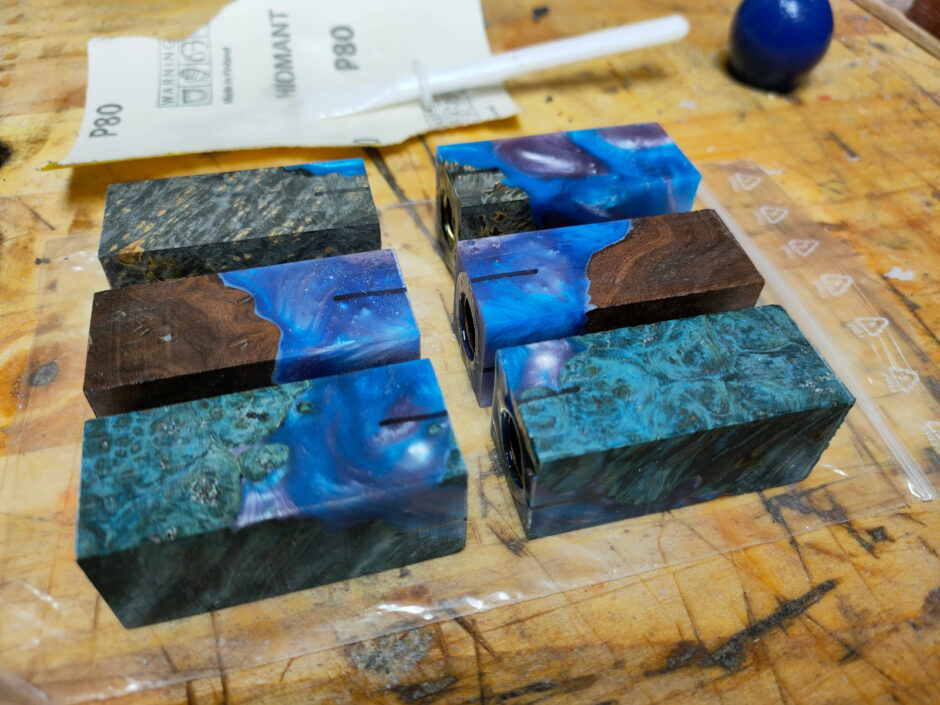
The epoxy went on on Thursday, didn’t get to the shed on Friday, and then on Saturday I dressed the ends and knocked off the edges on the lathe sanding wheel:
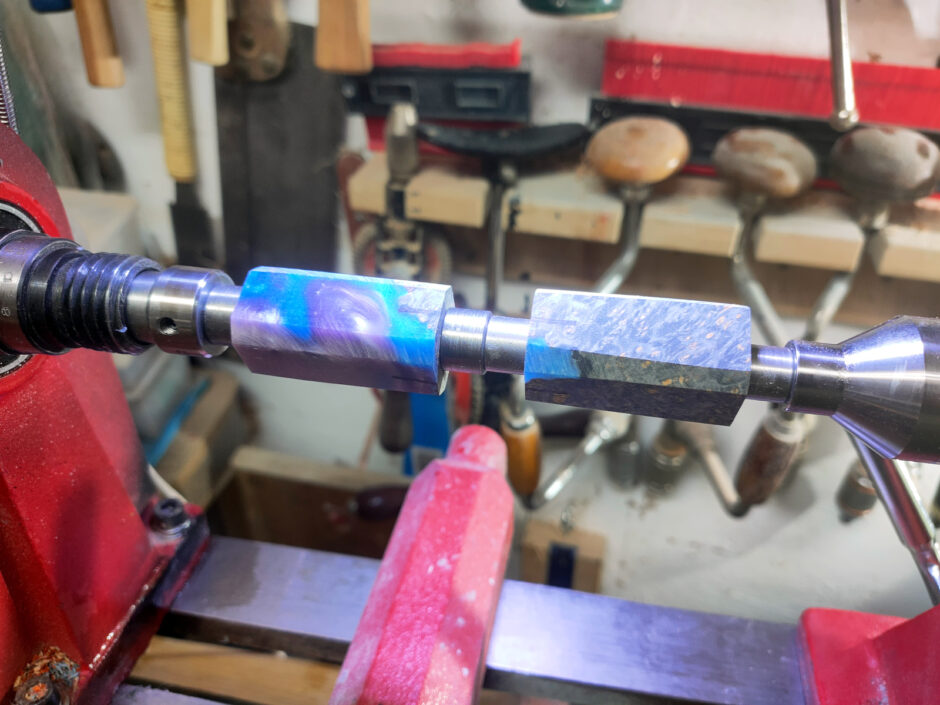
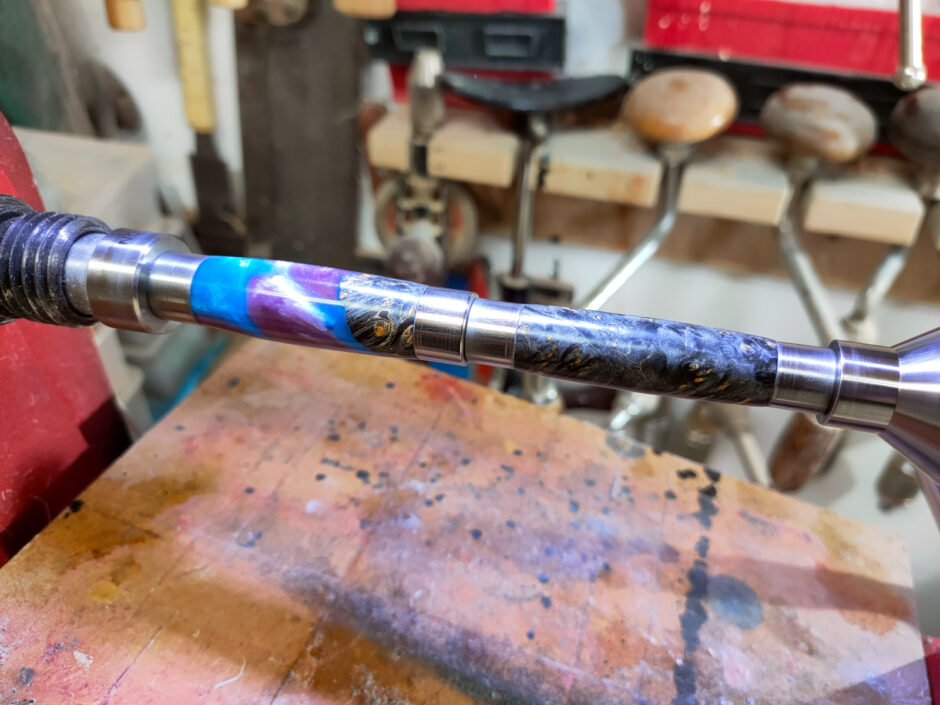
And then it was time to mount the first blank.
Some sheer blind luck there – I had missed the bit in the Taylors Mirfield instructions about how there are two size bushings for the part that becomes the pen body (the finial is slightly smaller than the nib) and it was only luck that I got them the right way round.
On Sunday, sharpened the spindle roughing gouge and the skew and got to work.
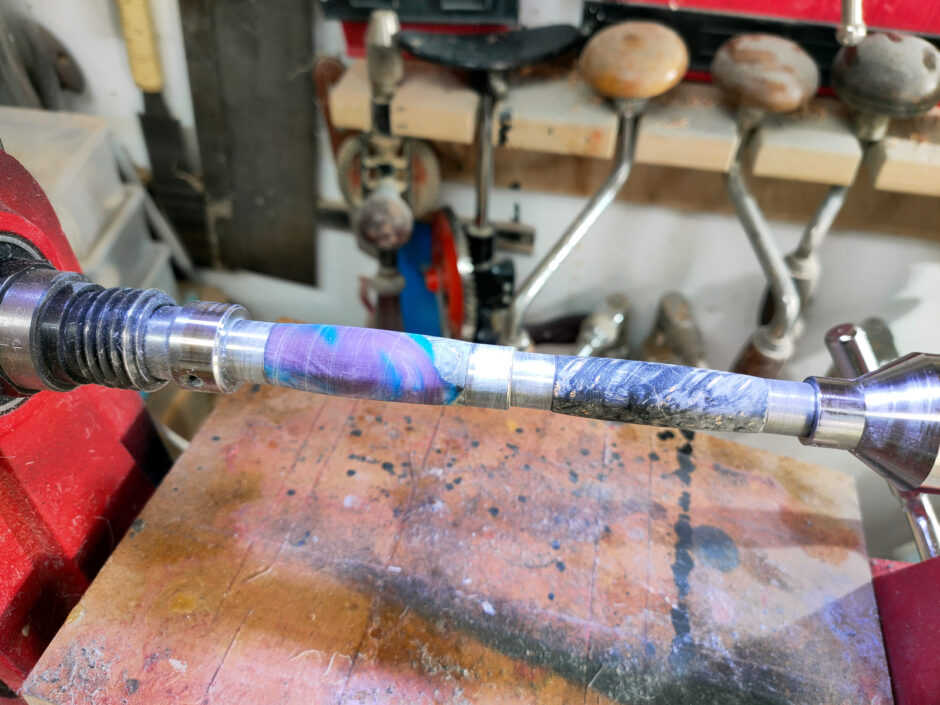
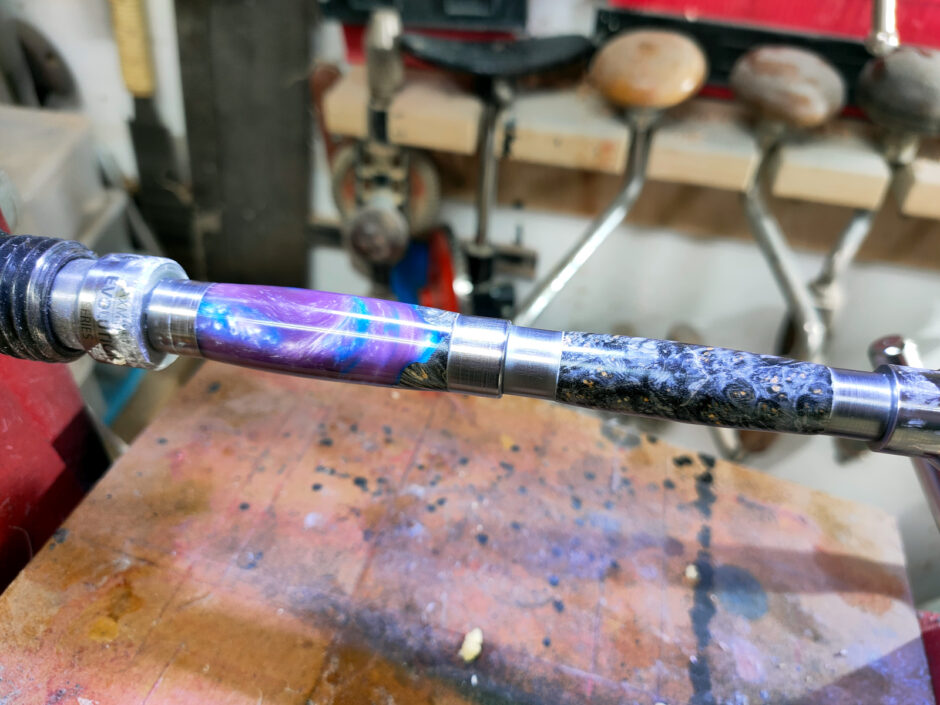
And now it’s sanding time. 600 dry sanding first, then wet-sanding up through the grits with the micromesh (I use water and dish soap for a liquid for the wetsanding). After every grit, stop the lathe, and sand along the axis of the pen, rotating by hand slowly to break up radial sanding lines. For the last two grits, wipe down with isopropanol between each one.
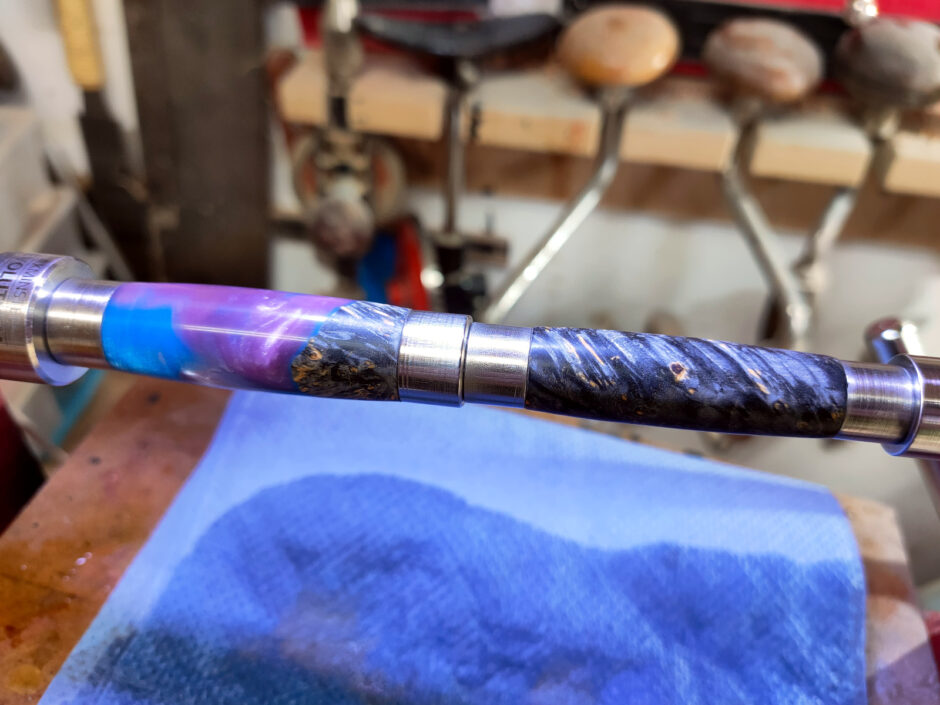
Then Yorkshire Grit, Yorkshire Grit Microfine, and car resin polish.
And one last coat of Hampshire sheed wax.
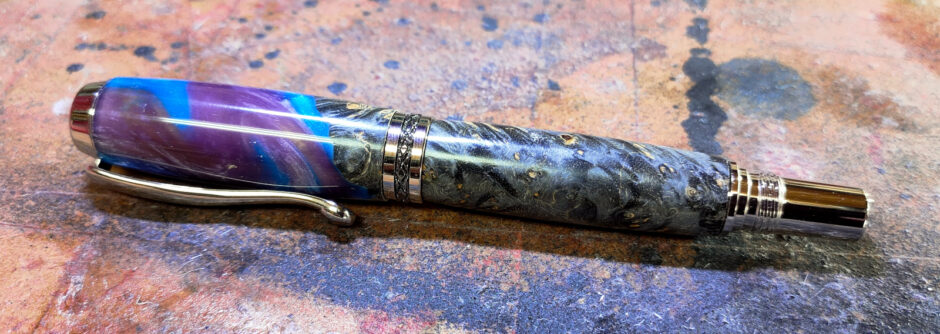
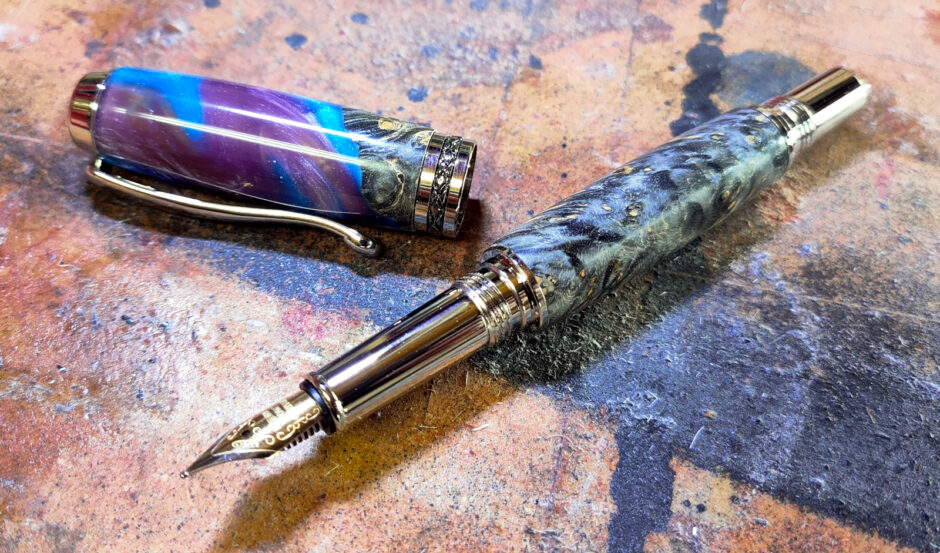
And that’s that. Then it was a matter of assembly and the Taylors Mirfield kit came partly assembled for the centerband and finial, which made life a bit easier.
That came out really nice. And two more to go this week, and I must buy a few more pen kits I think.
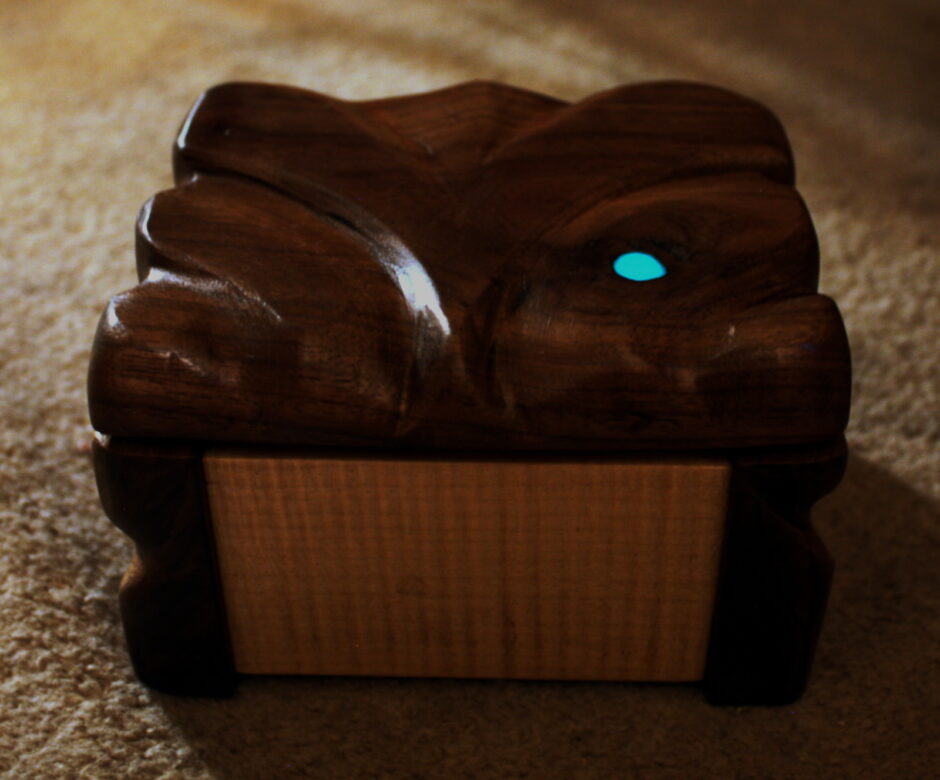
The traditional gift guide says ten years is… tin. Hm. Really? Was tin some seriously sought-after material at some point in the last few centuries? Weird. But okay, tradition is tradition…
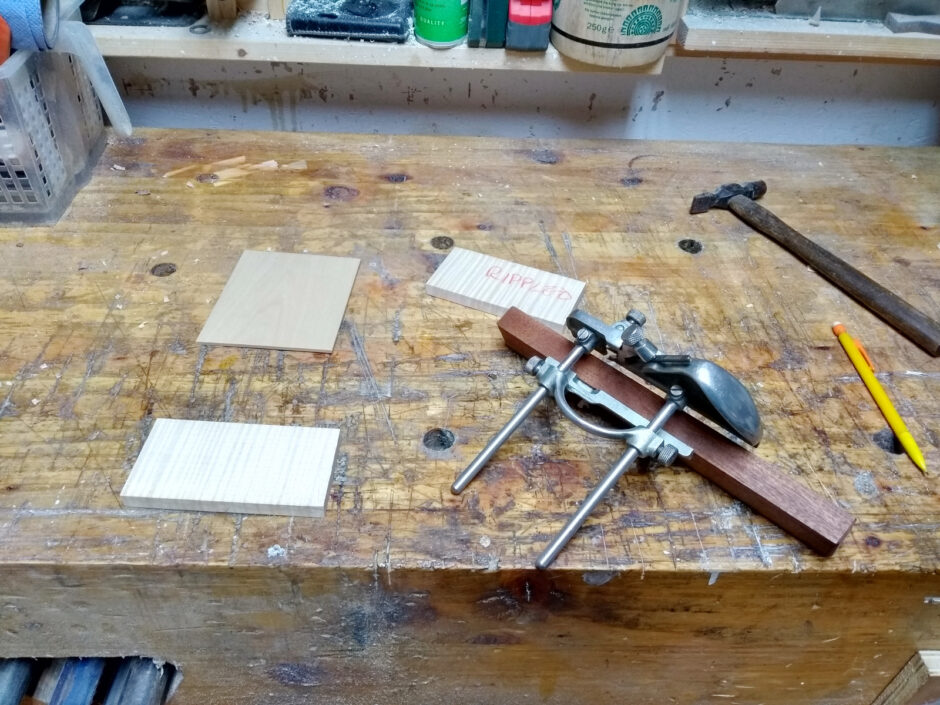
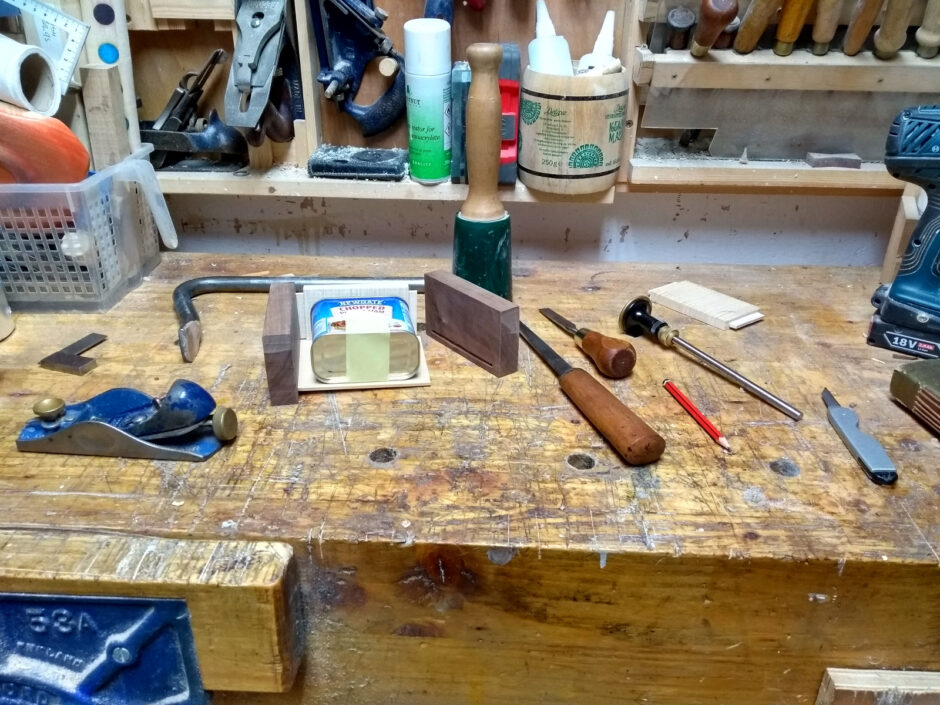
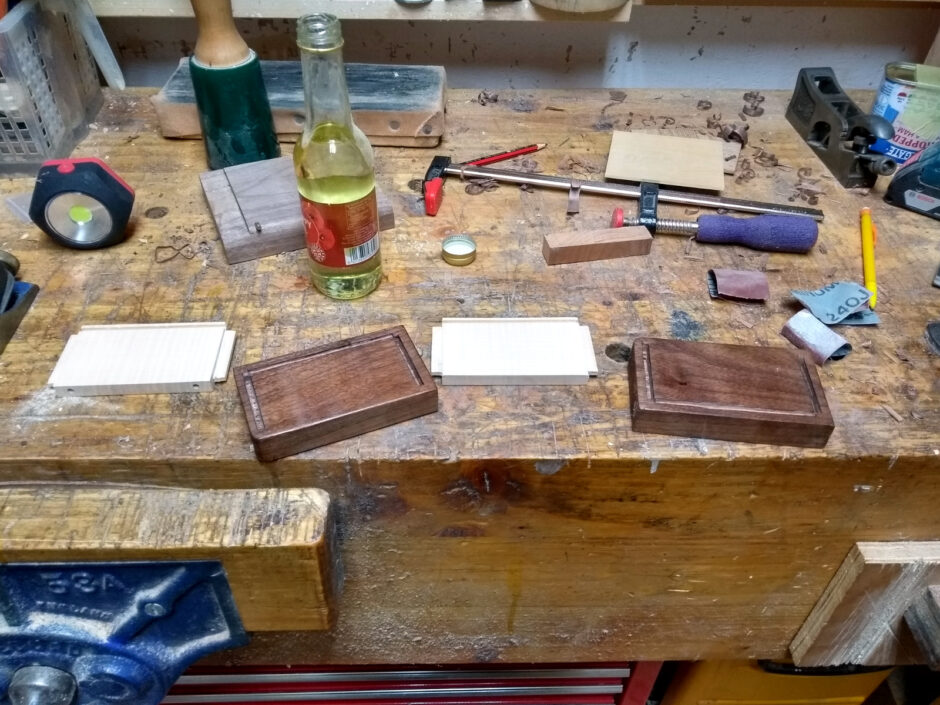
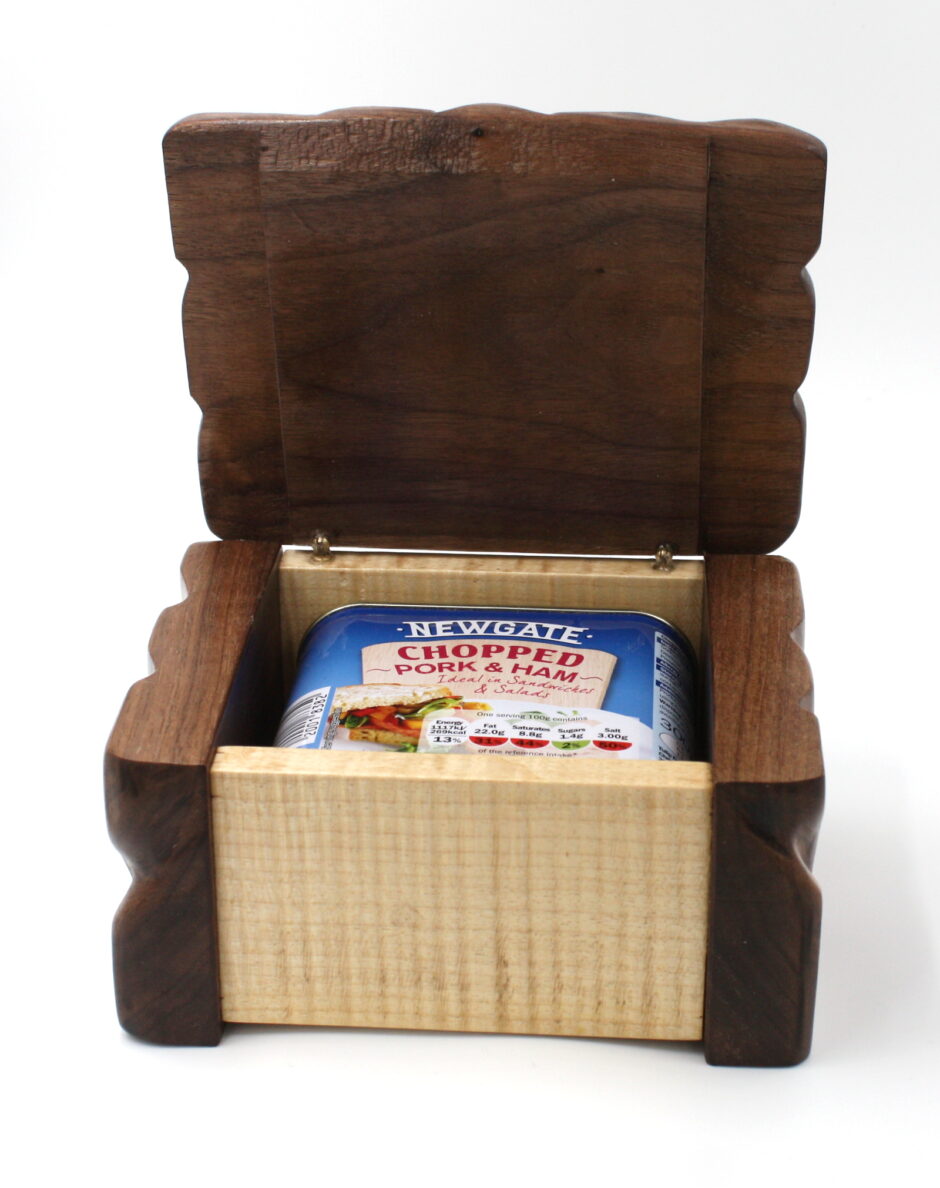
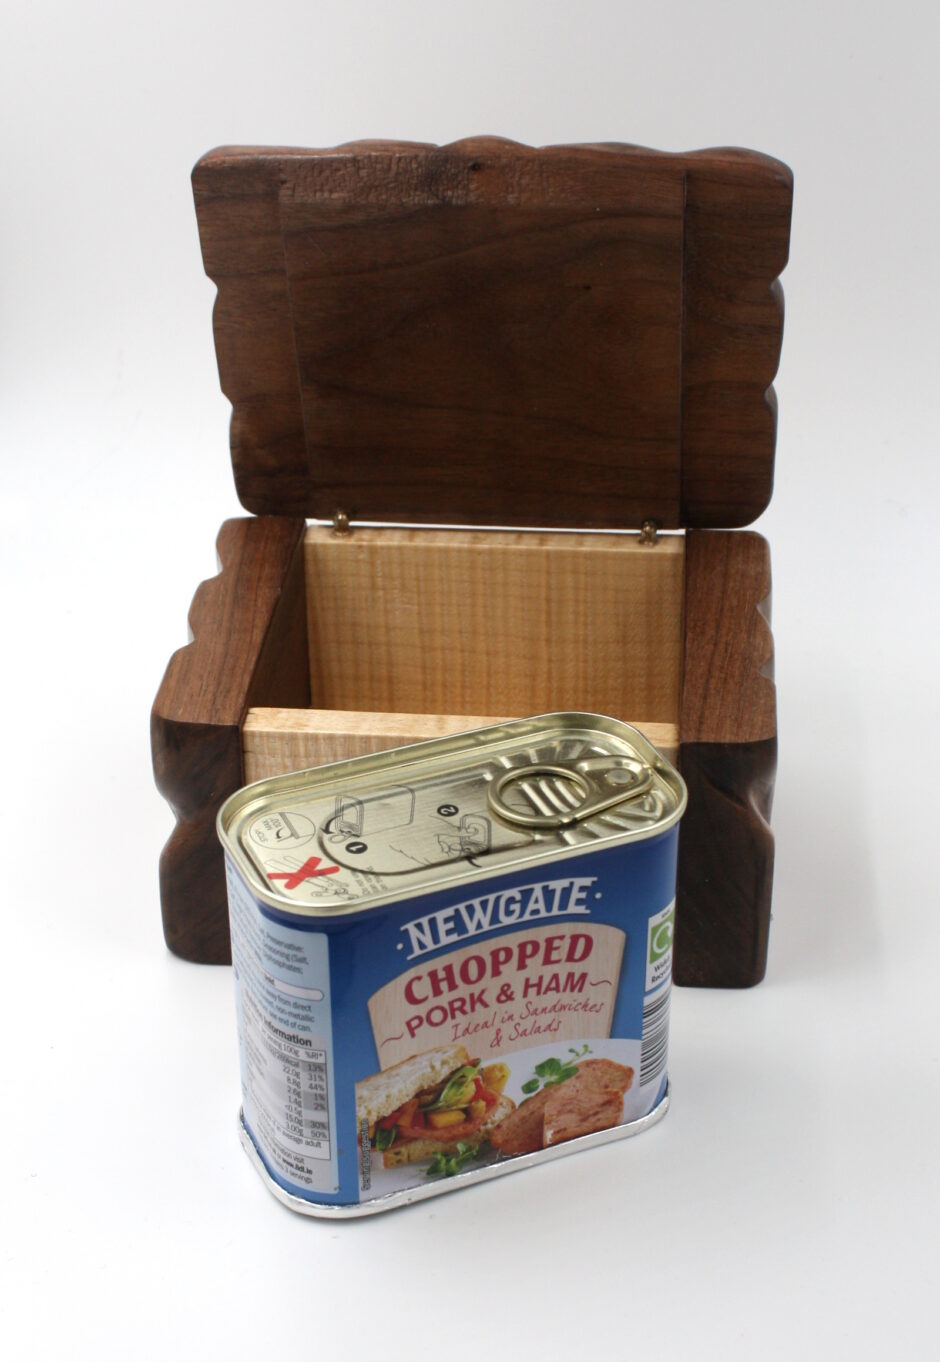
We can at least make a nice box though. I have some walnut and I still have some of that lovely rippled sycamore Custard gave me when I was searching for thick veneers…
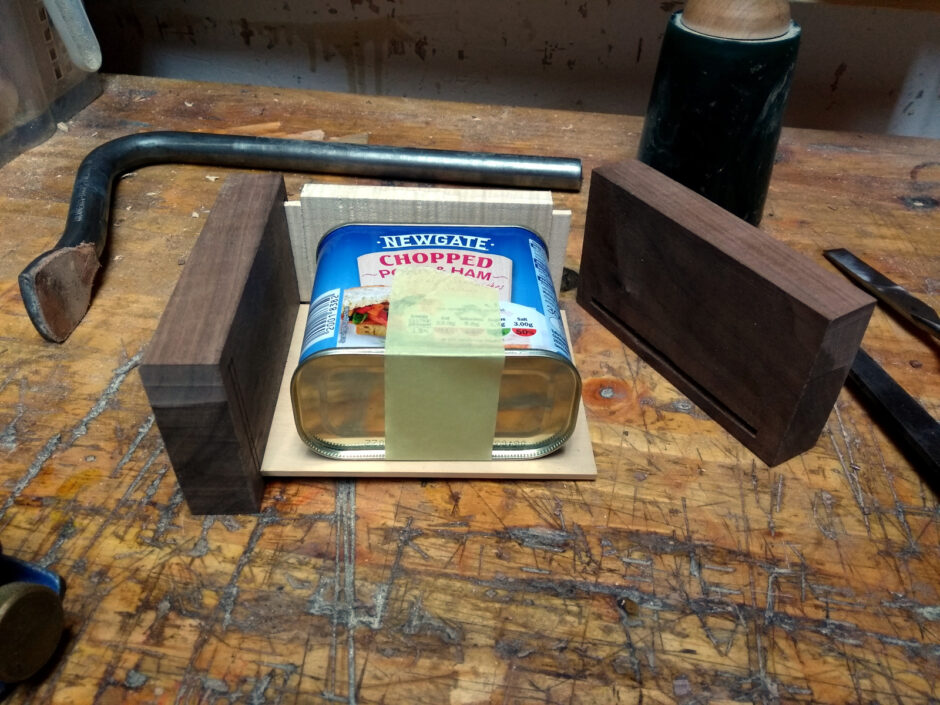
Simple design from a joinery point of view, so just mill the components and cut to size to match the tin…
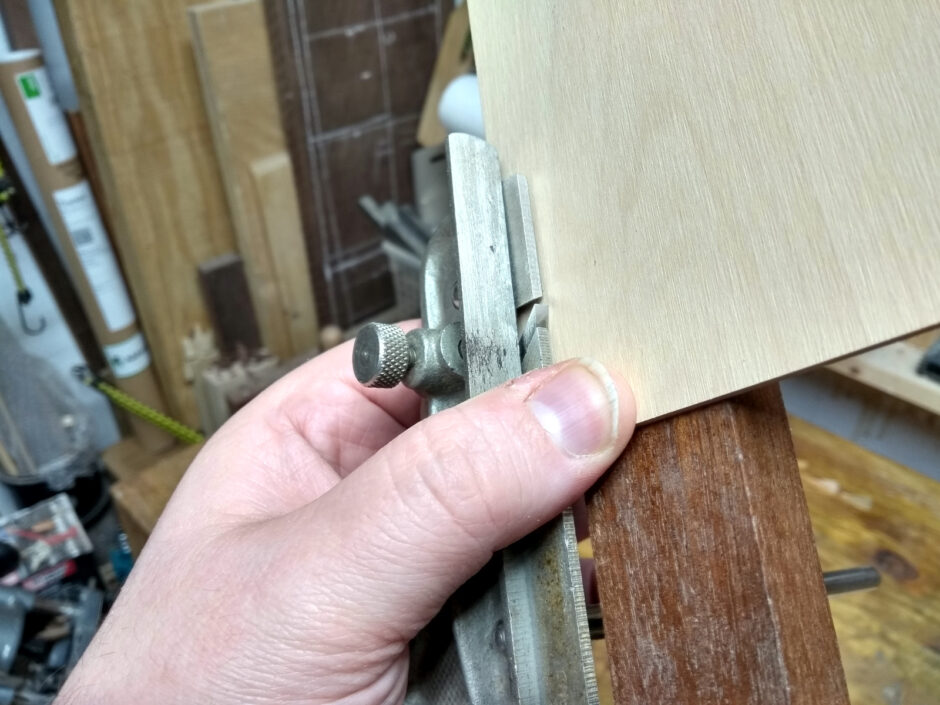
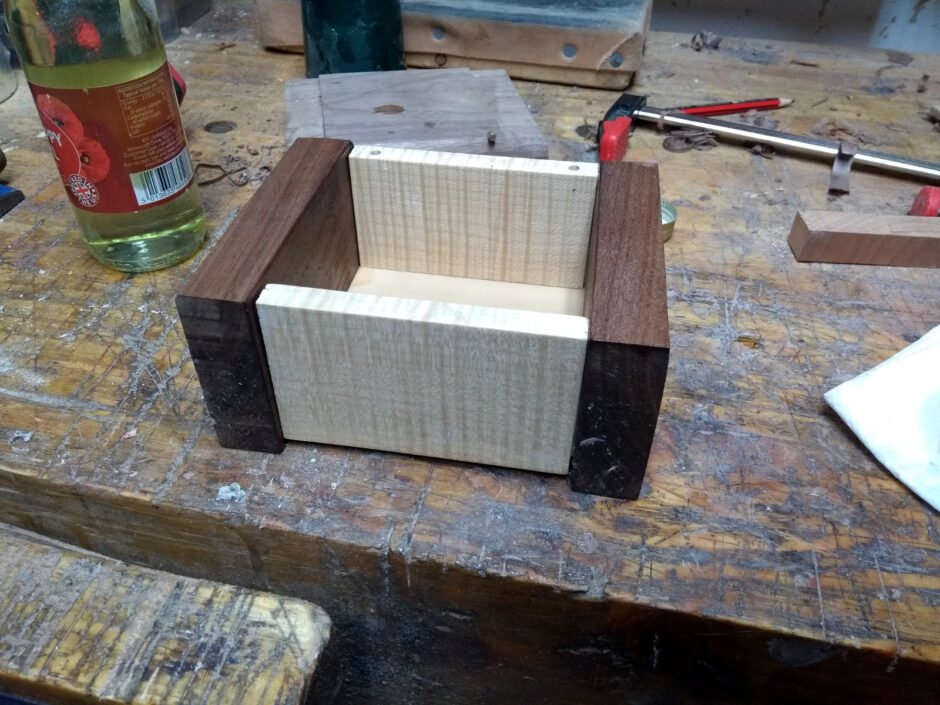
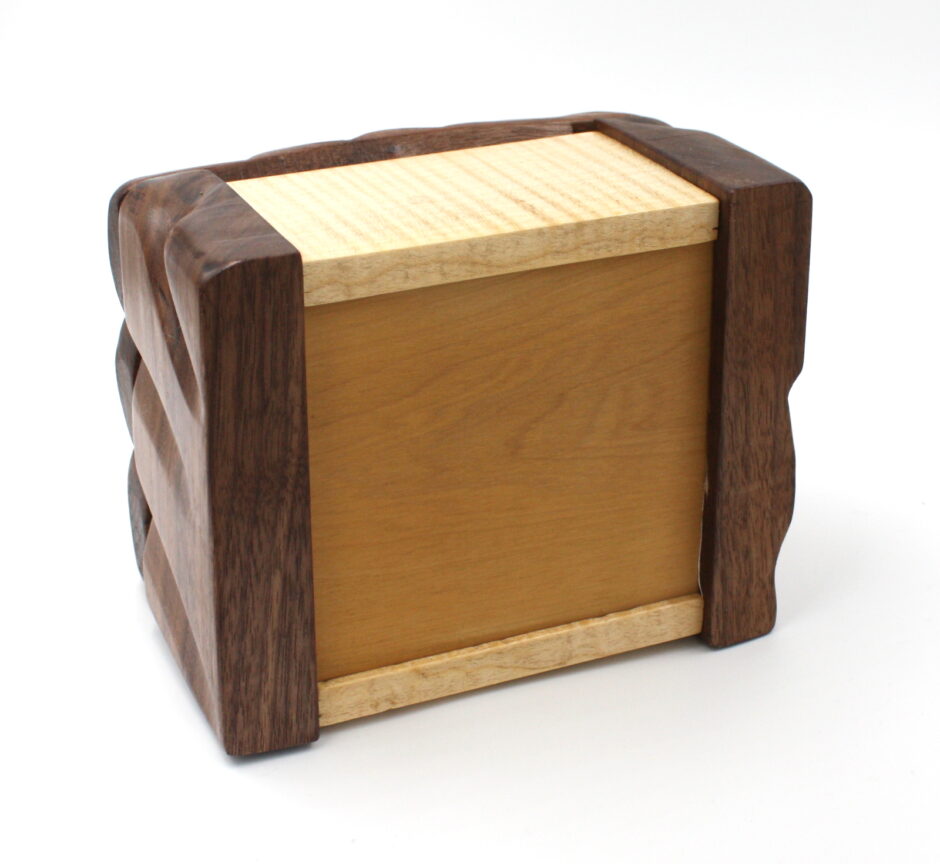
Grooves in the base of the front and back panels and in the sides will hold the base, which is 3mm boxwood (lovely material, it’s a shame it’s so hard to find).
It’s almost a single-use plane but it’s the best tool for this task really. The depth of the groove and the distance from the bottom of the panels is set using the boxwood base directly.
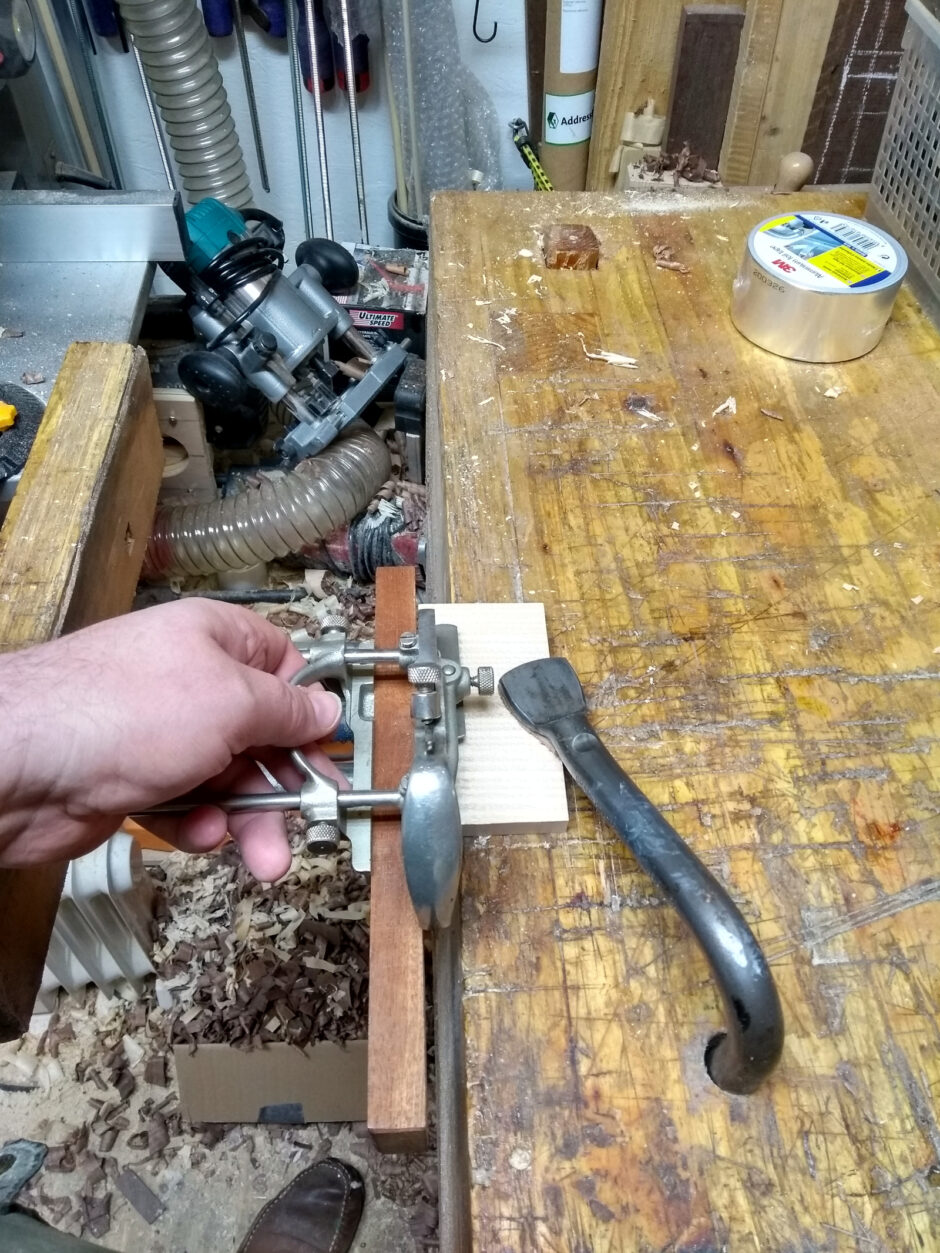
Then just groove away.
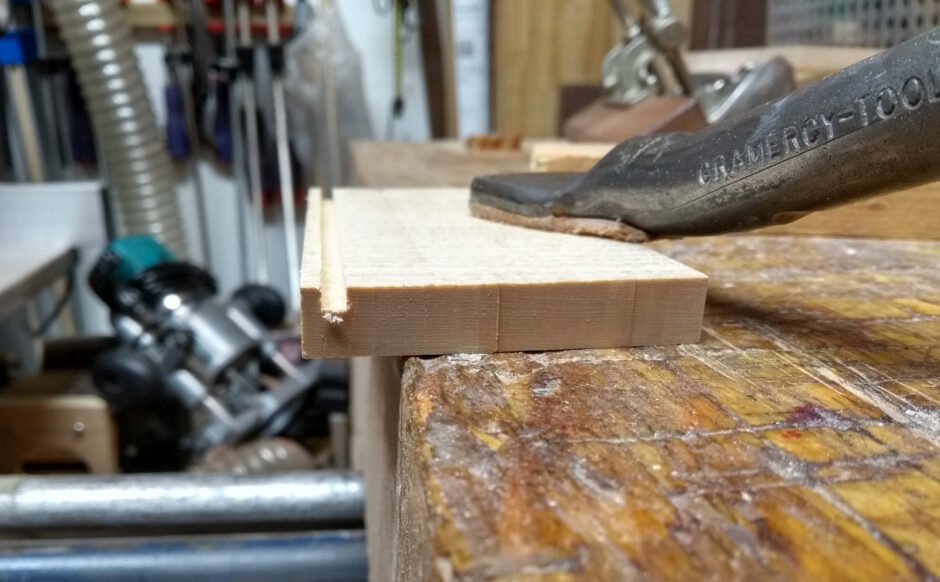
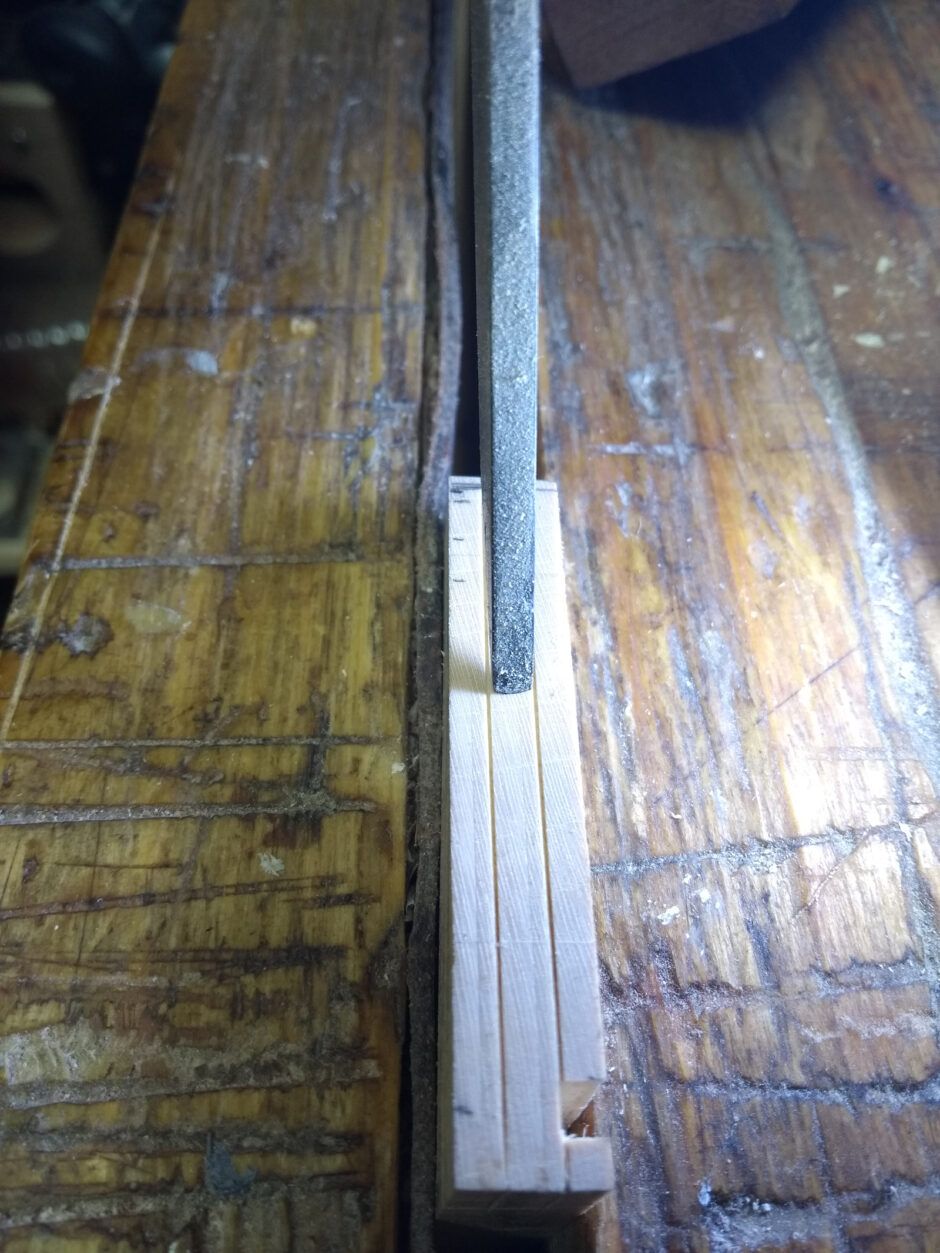
For the sides, because you don’t want to run off the ends with the groove, a different approach is needed; and at this point I discovered the narrowest of my usual chisels was 5mm wide and the groove is 3mm. A 1mm gap on either side would be a bit unsightly, so I was about to get out the grinder wheel and convert one of the older chisels to life as a narrower chisel when I checked the less-used ones and bingo…
3mm almost on the nose (actually a tad under). Hilariously, this wasn’t some engraving tool or fine work chisel, this is a morticing pigsticker designed to go through several inches of oak…
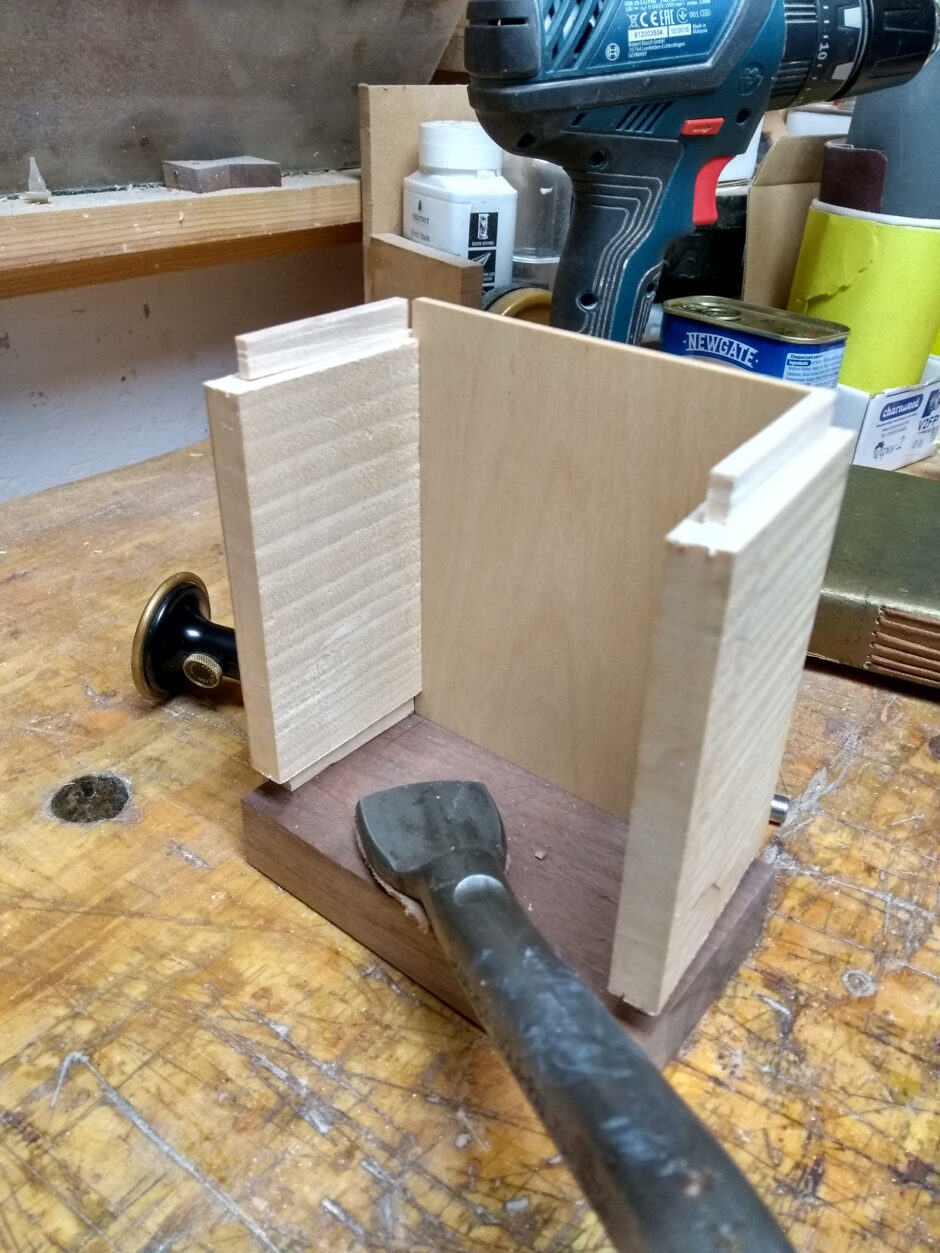
This gave me a giggle or two, but then on with chopping out the mortices for the base in the sides.
Tappy-tap-tap, as they say. Very shallow mortice, only one pass with light taps required, then a bit of scraping with the tip of the chisel to clean up and then check for fit.
The cross-grain mortices are less straightforward because they’re cross-grain and very narrow. You can’t really chop along the mortice for these. I tried cutting them like a housing dado but that wasn’t really getting it done, so I resorted in the end to knifing in the edges of the mortice rather deeply, chopping a little with the morticing chisel to a mm or so down to define the mortice, then drilling out the rest and cleaning up with the bevel-edged chisel.
Worked pretty well.
Then just repeat on the other side.
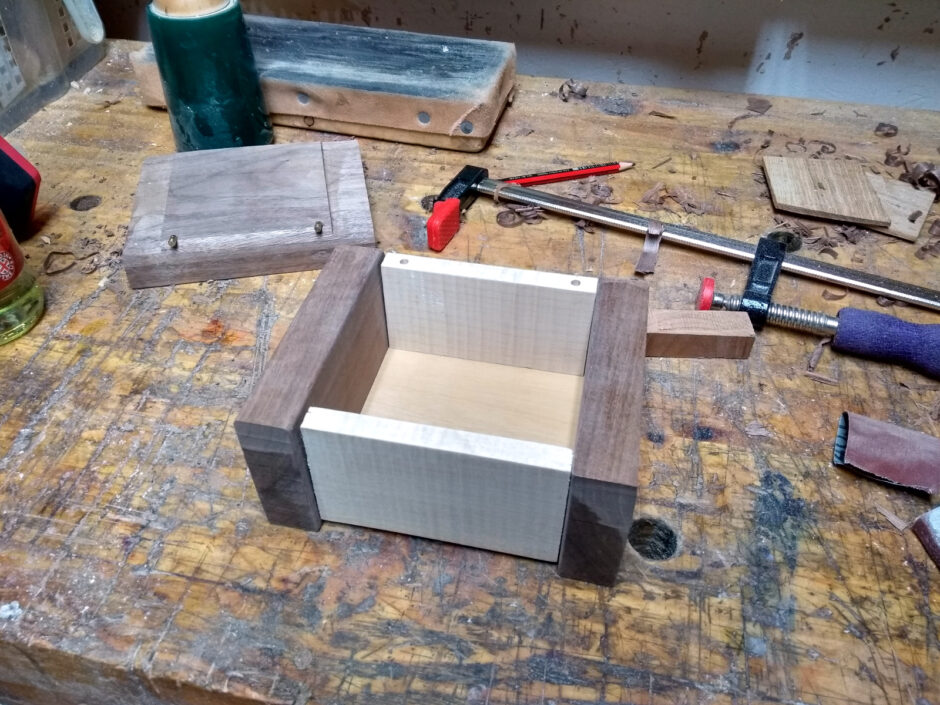
There’s a fair bit of fettling with all this as well but it got there in the end. I also drilled holes in the back panel and lid for the barrel hinges (butt hinges on this scale are something I still can’t get right). Then it’s time to knock it all back apart and sand the panels and the inside of the sides and the base and prefinish the insides because it’d be much harder later on, and then I gave everything a coat or two of poppyseed oil (it’s very light so it doesn’t darken the sycamore much).
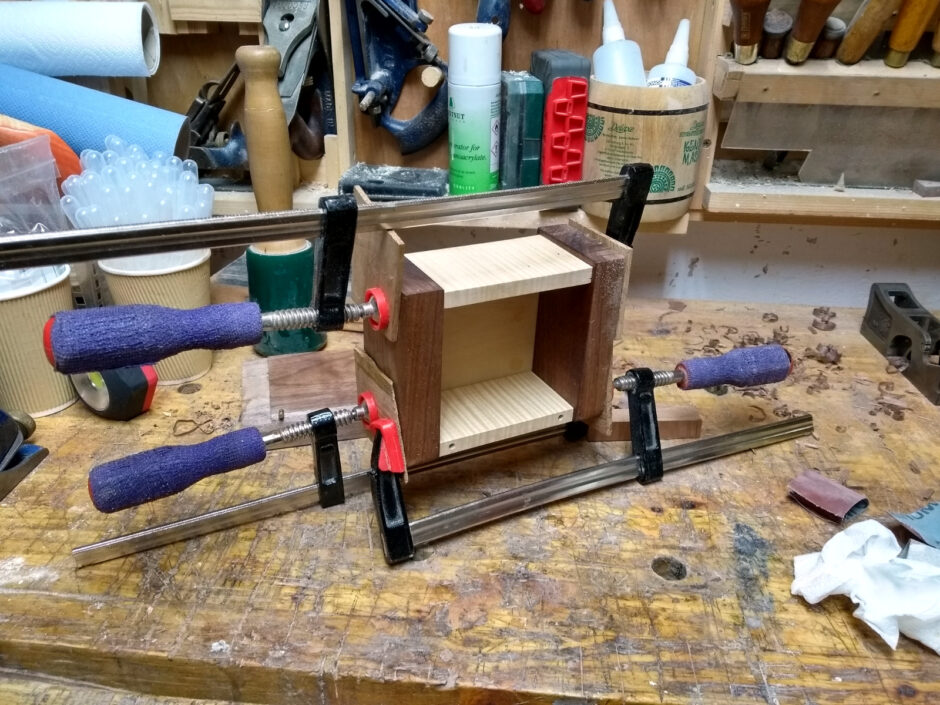
And then glue-up. Just titebond here, no need for the hide glue and it was cold so it wouldn’t flow well without faffing about with hot water.
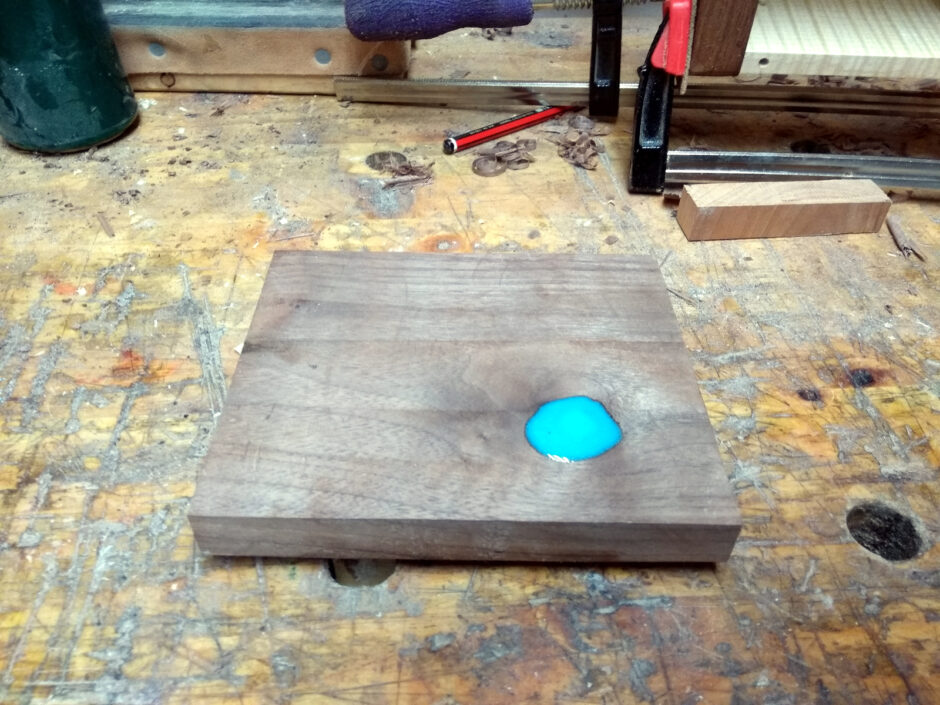
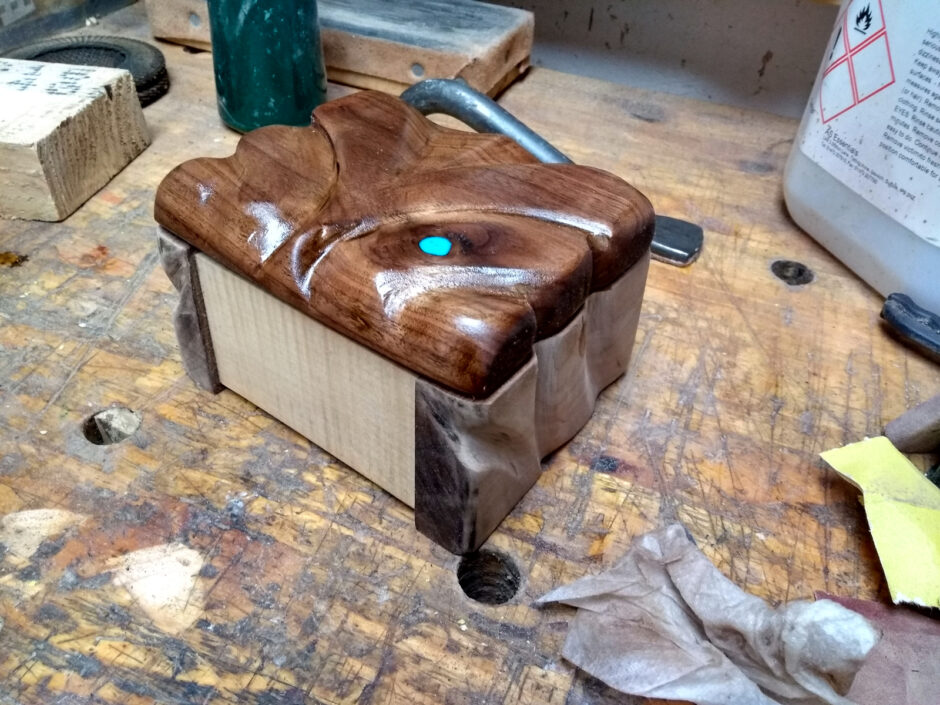
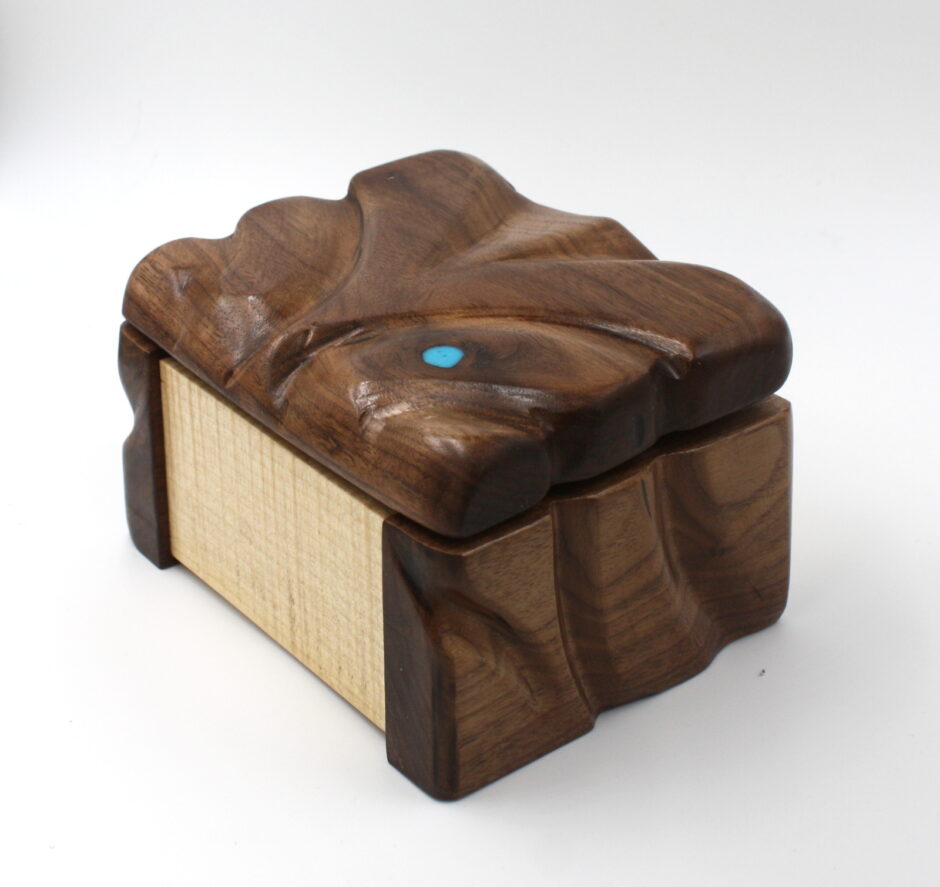
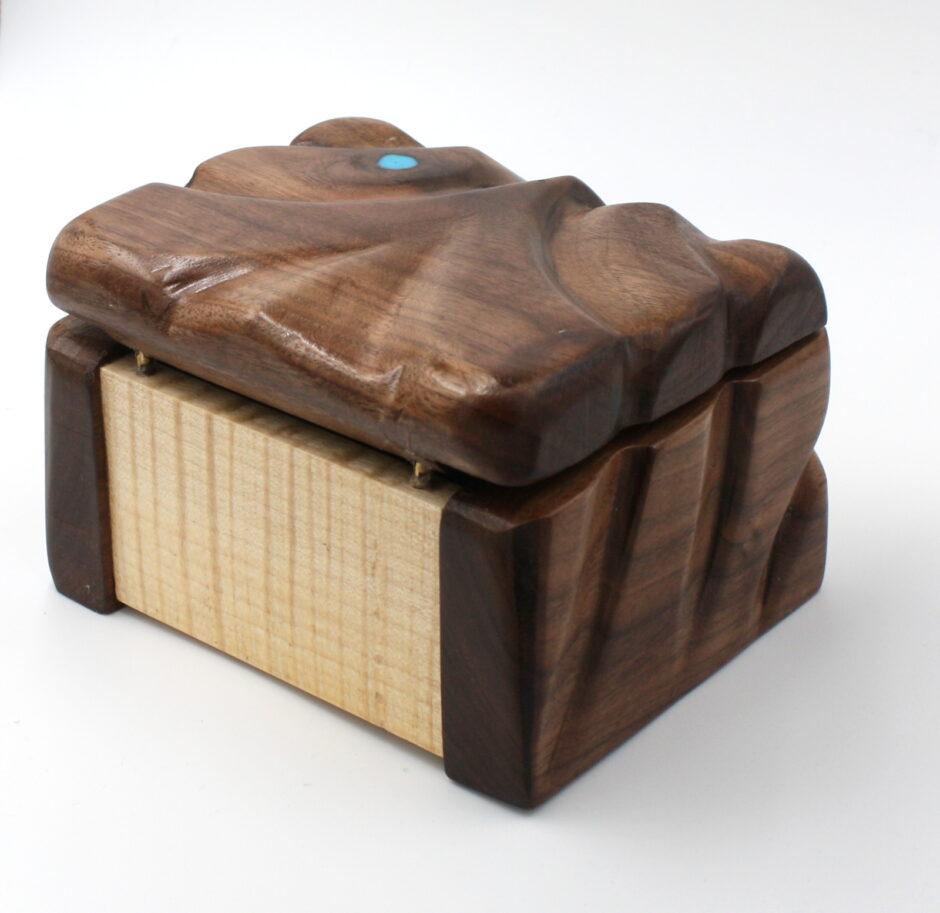
Along the way to here, the lid changed from rippled sycamore to more walnut because of a realisation about the size of the box and the lid (ie. that the lid was too narrow to cover from front to back unless it was sitting inside the box and I didn’t have the hinges for that). But the walnut had a knot so it was resin time again (I mean, it’s me, of course it’s resin time).
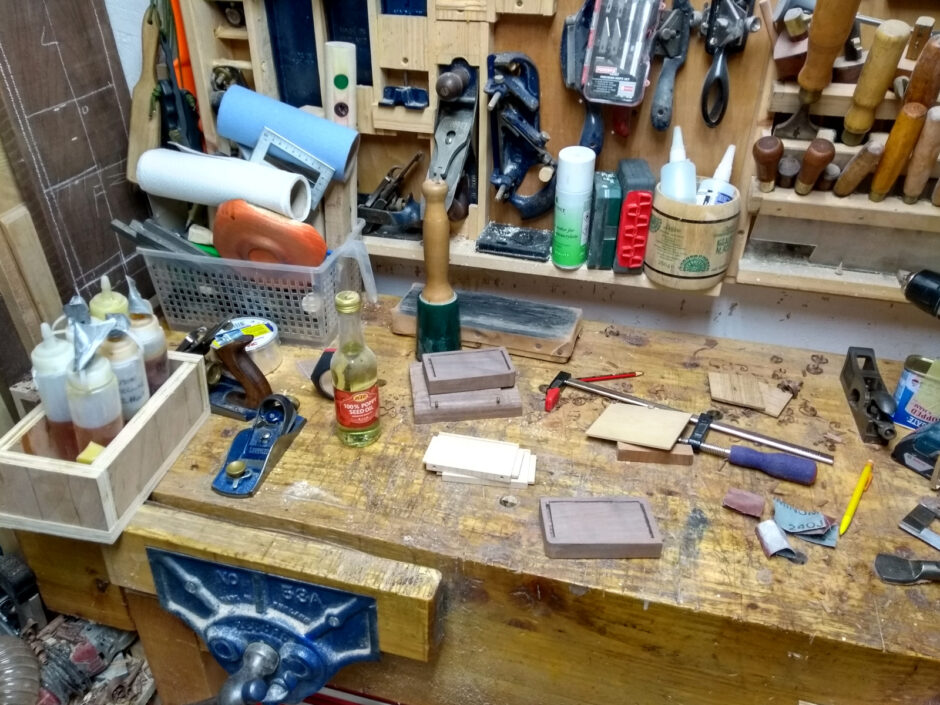
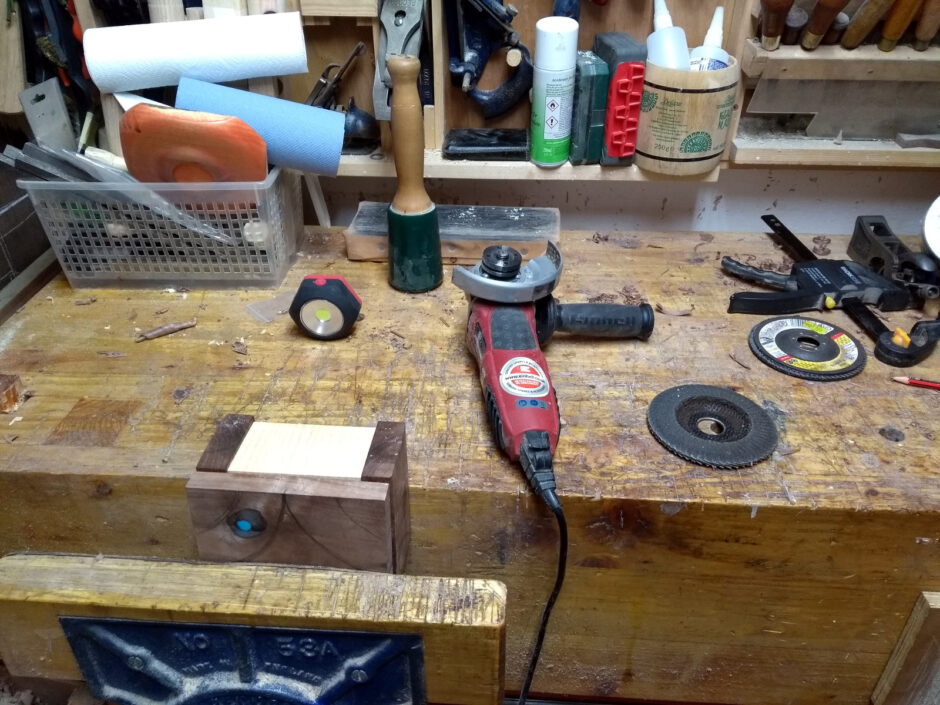
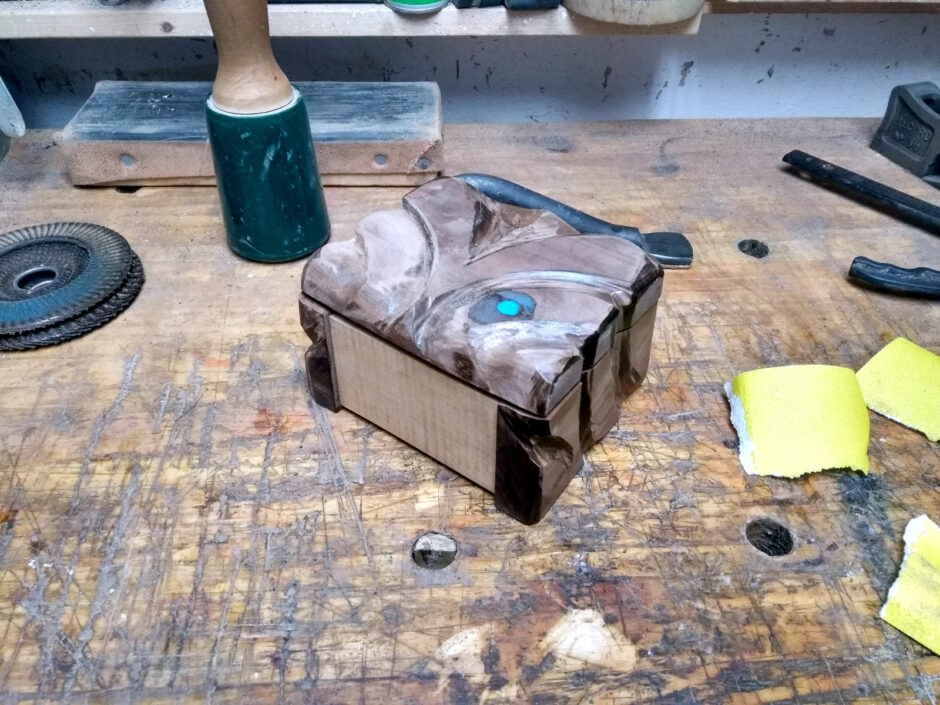
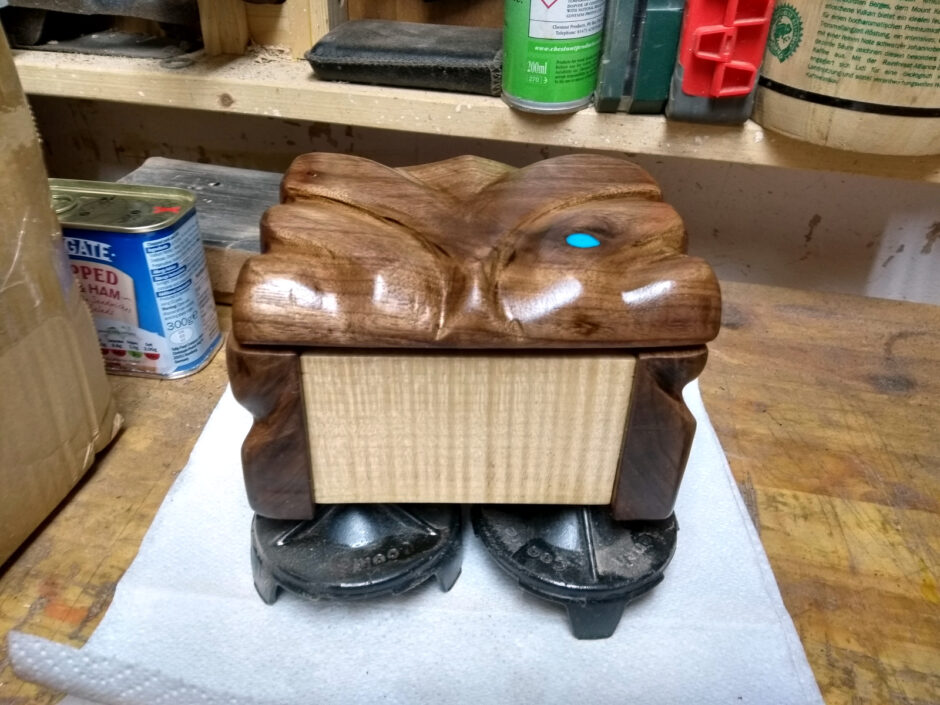
And that came out nicely after scraping and sanding down the lid. It’s a little beauty spot. But the box is a bit… chunky at this point. Not to worry, that’s part of the plan. And now I get to try to be delicate with industrial tools…
Angle grinder and a flap disk in 40 grit and one in 120 grit. It’s like using a power router only without the convenient handholds or the reference surfaces or the safety features. Exciting times…
Worked though. And now a lot of handsanding with every grit from 80 to 240. The cloth-backed sandpaper from the lathe was very useful here especially with the parts in the carved grooves.
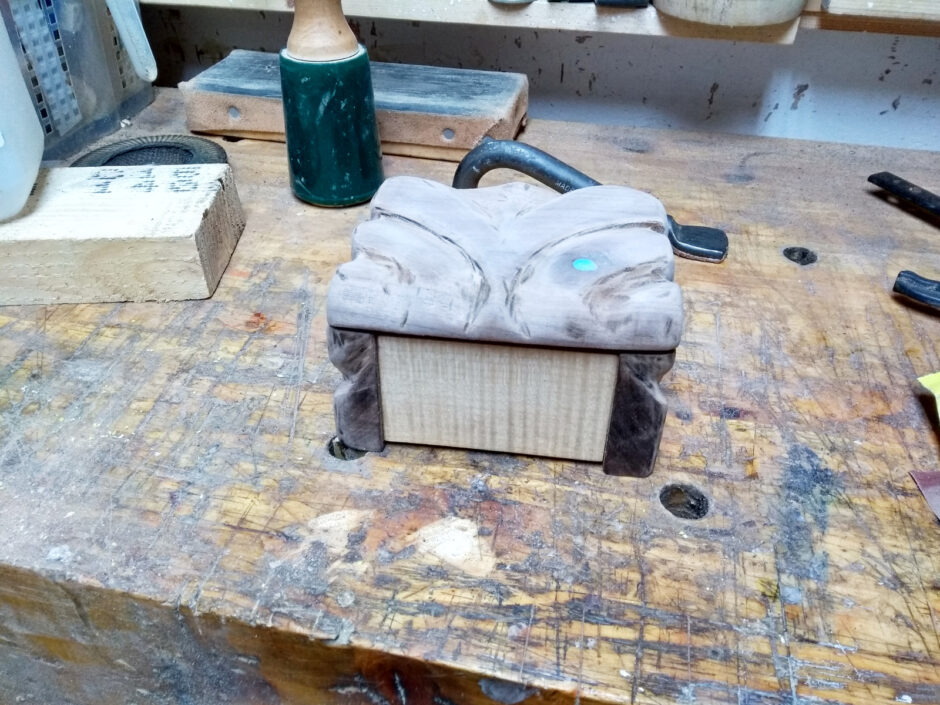
Okay, now for finishing. First off, wipe off all the sanding dust with a dry rag, then with kitchen paper soaked in isopropanol. Then two coats of poppy seed oil.
Makes a difference!
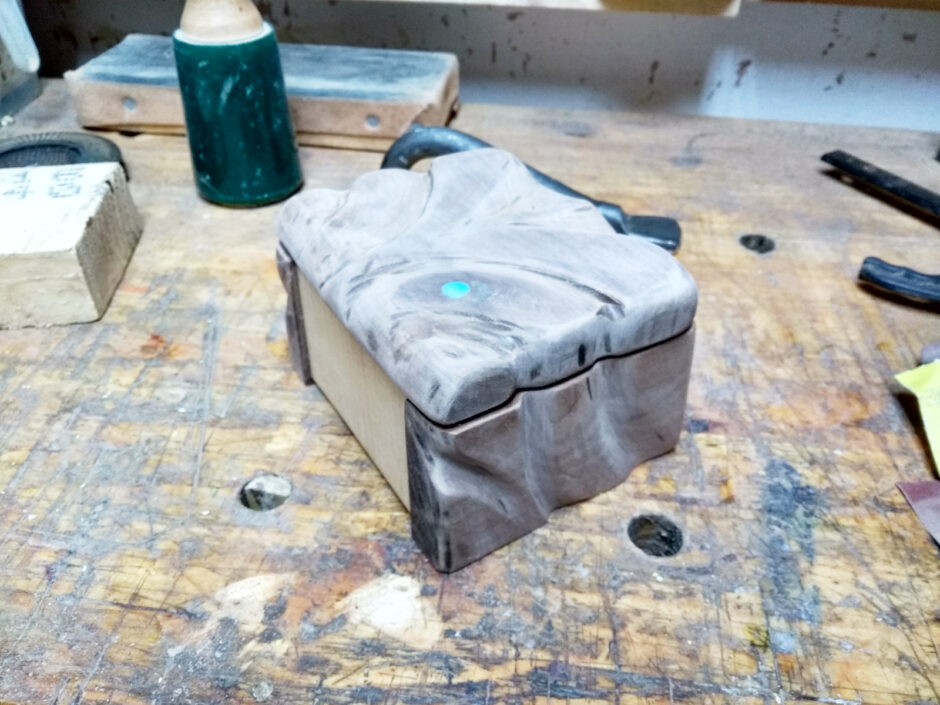
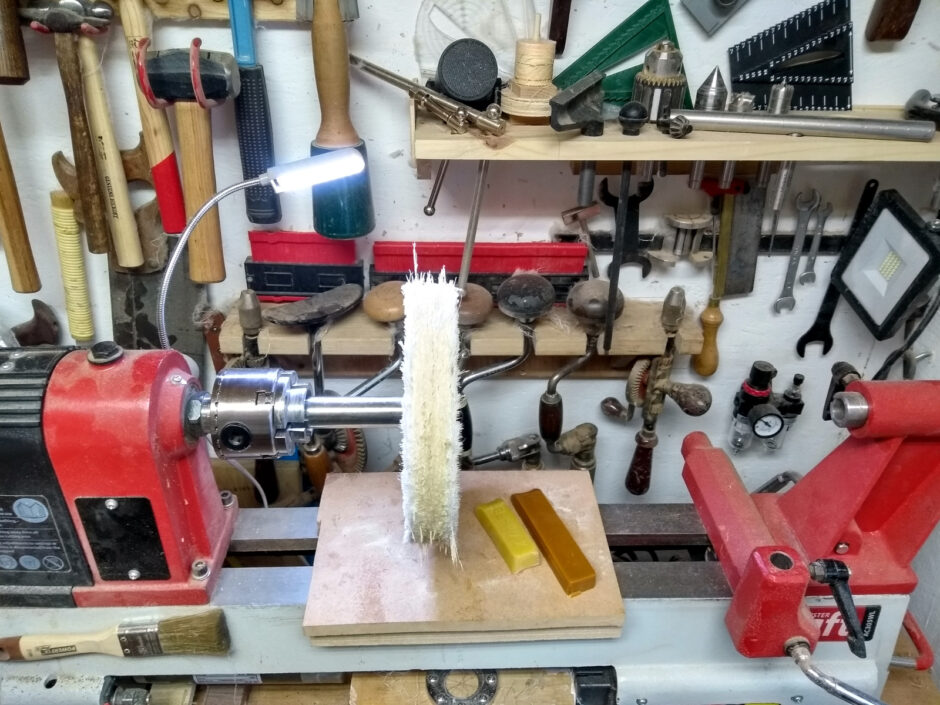
Next up, a new lathe toy, the burnishing wheel. It’s not a fancy one, it’s just the chestnut products basic one. Works well. I will say that I didn’t expect it to be quite so grabby though, and it did bounce my hand off the chuck which wasn’t fun. Be careful out there folks…
And yes, I mixed carnuba and beeswax at the final stage. Also, I was unprepared for the sheer amount of cotton fibres this thing throws everywhere. It looks like the spiders were working overtime in the shed.
Worth it though.
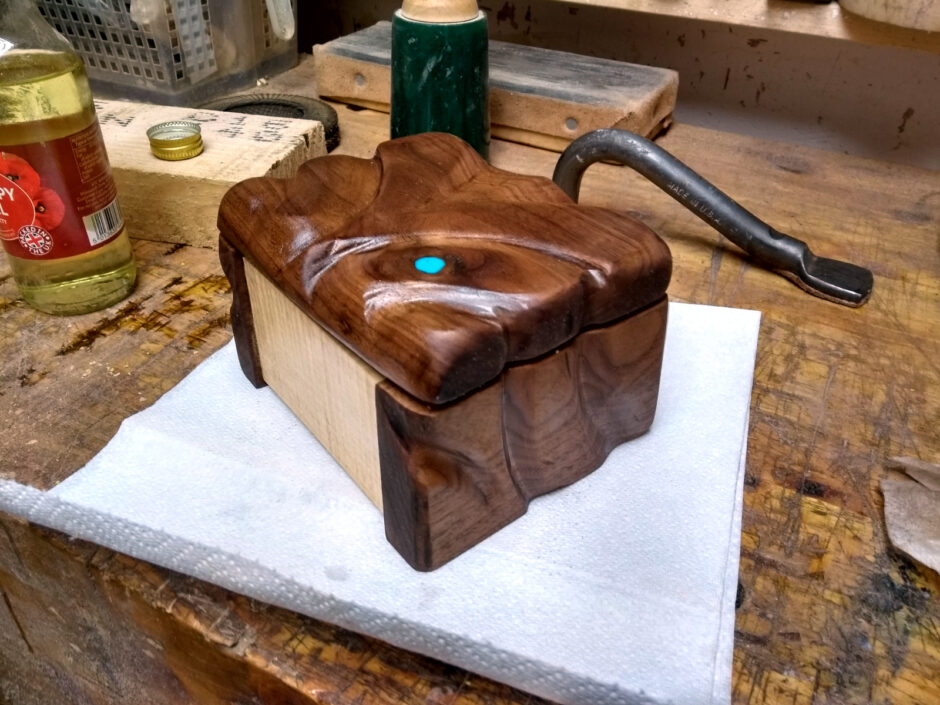
And after that, two coats of blonde shellac with another buff on the final wheel after each coat, and finishing was done. Final job was to epoxy in the barrel hinges (finishing was easier with the lid separate) which was a tad fiddly because of course it was, hinges are my nemesis. But it worked…
The resin dot glows in the dark!
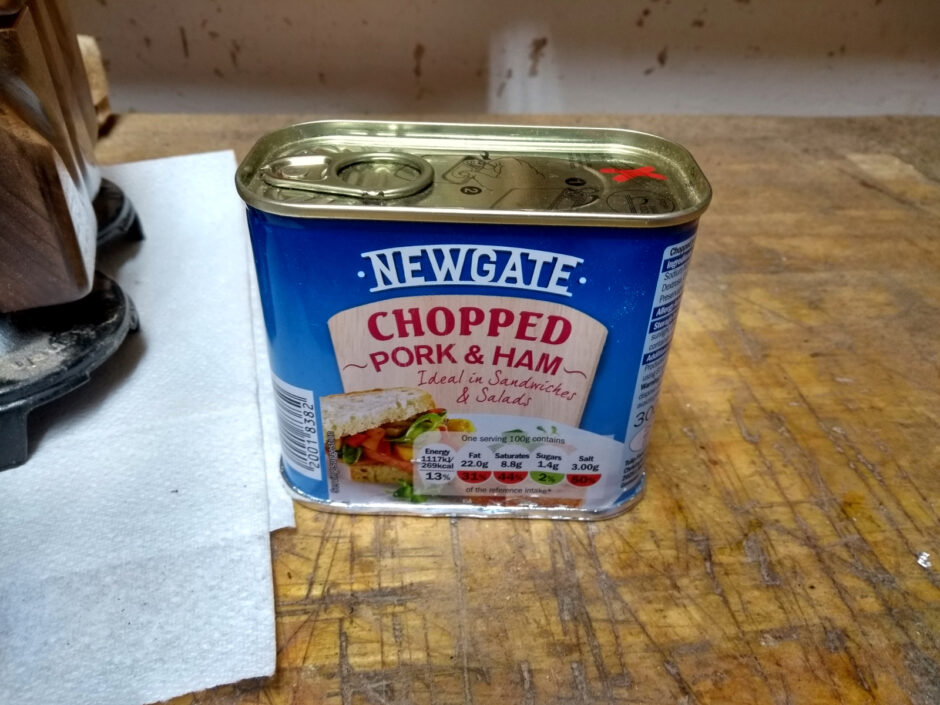
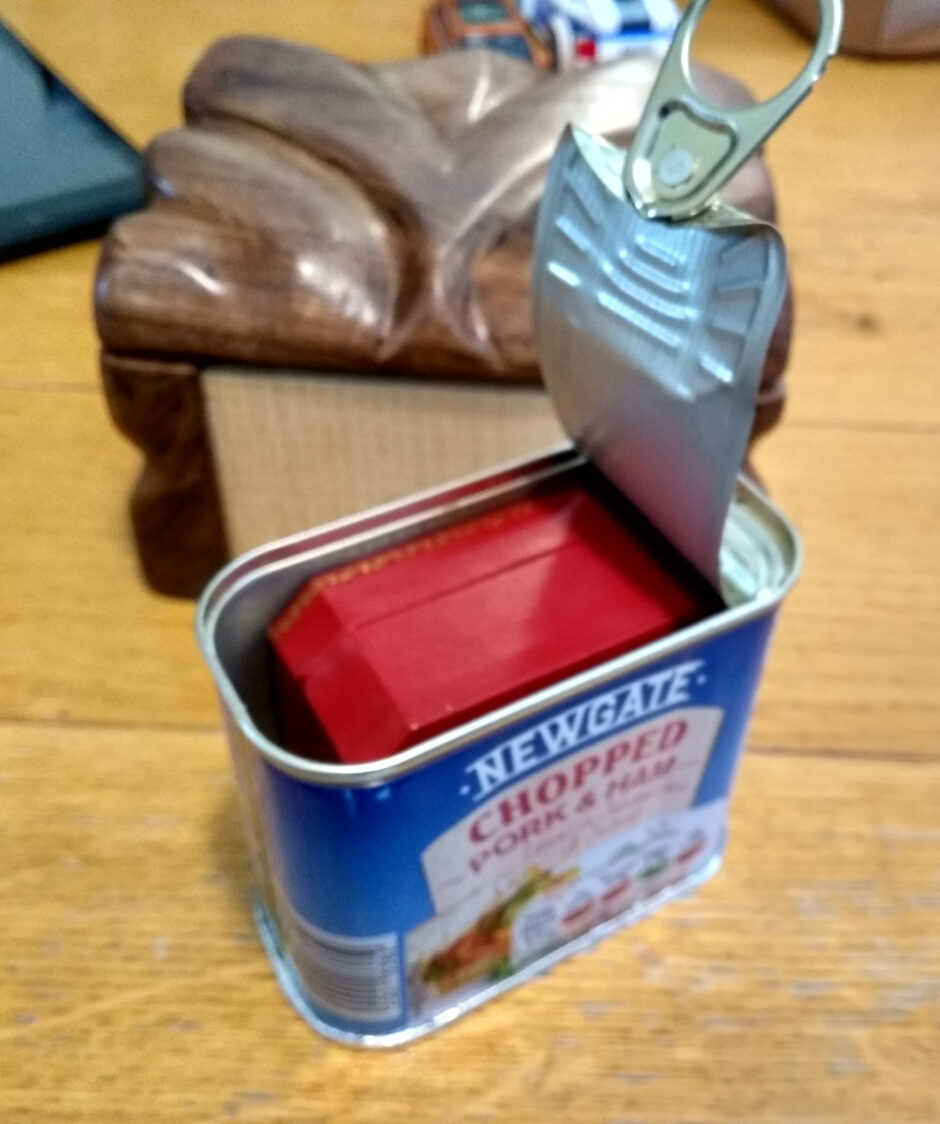
Also, yes, that’s a tin of spam.
And also, no, I’m not that bad.
Tin is the traditional gift, but tradition can go jump in a lake.
So a few years ago, some woodworkers on a podcast made an April Fool’s joke about how they always picked the same species of xmas tree so that they could mill it up for lumber after the holidays and make a chest of drawers out of them. Which was funny, until another woodworker went and actually did it (with small boxes not a chest of drawers, because there’s a lot of timber in a chest of drawers):
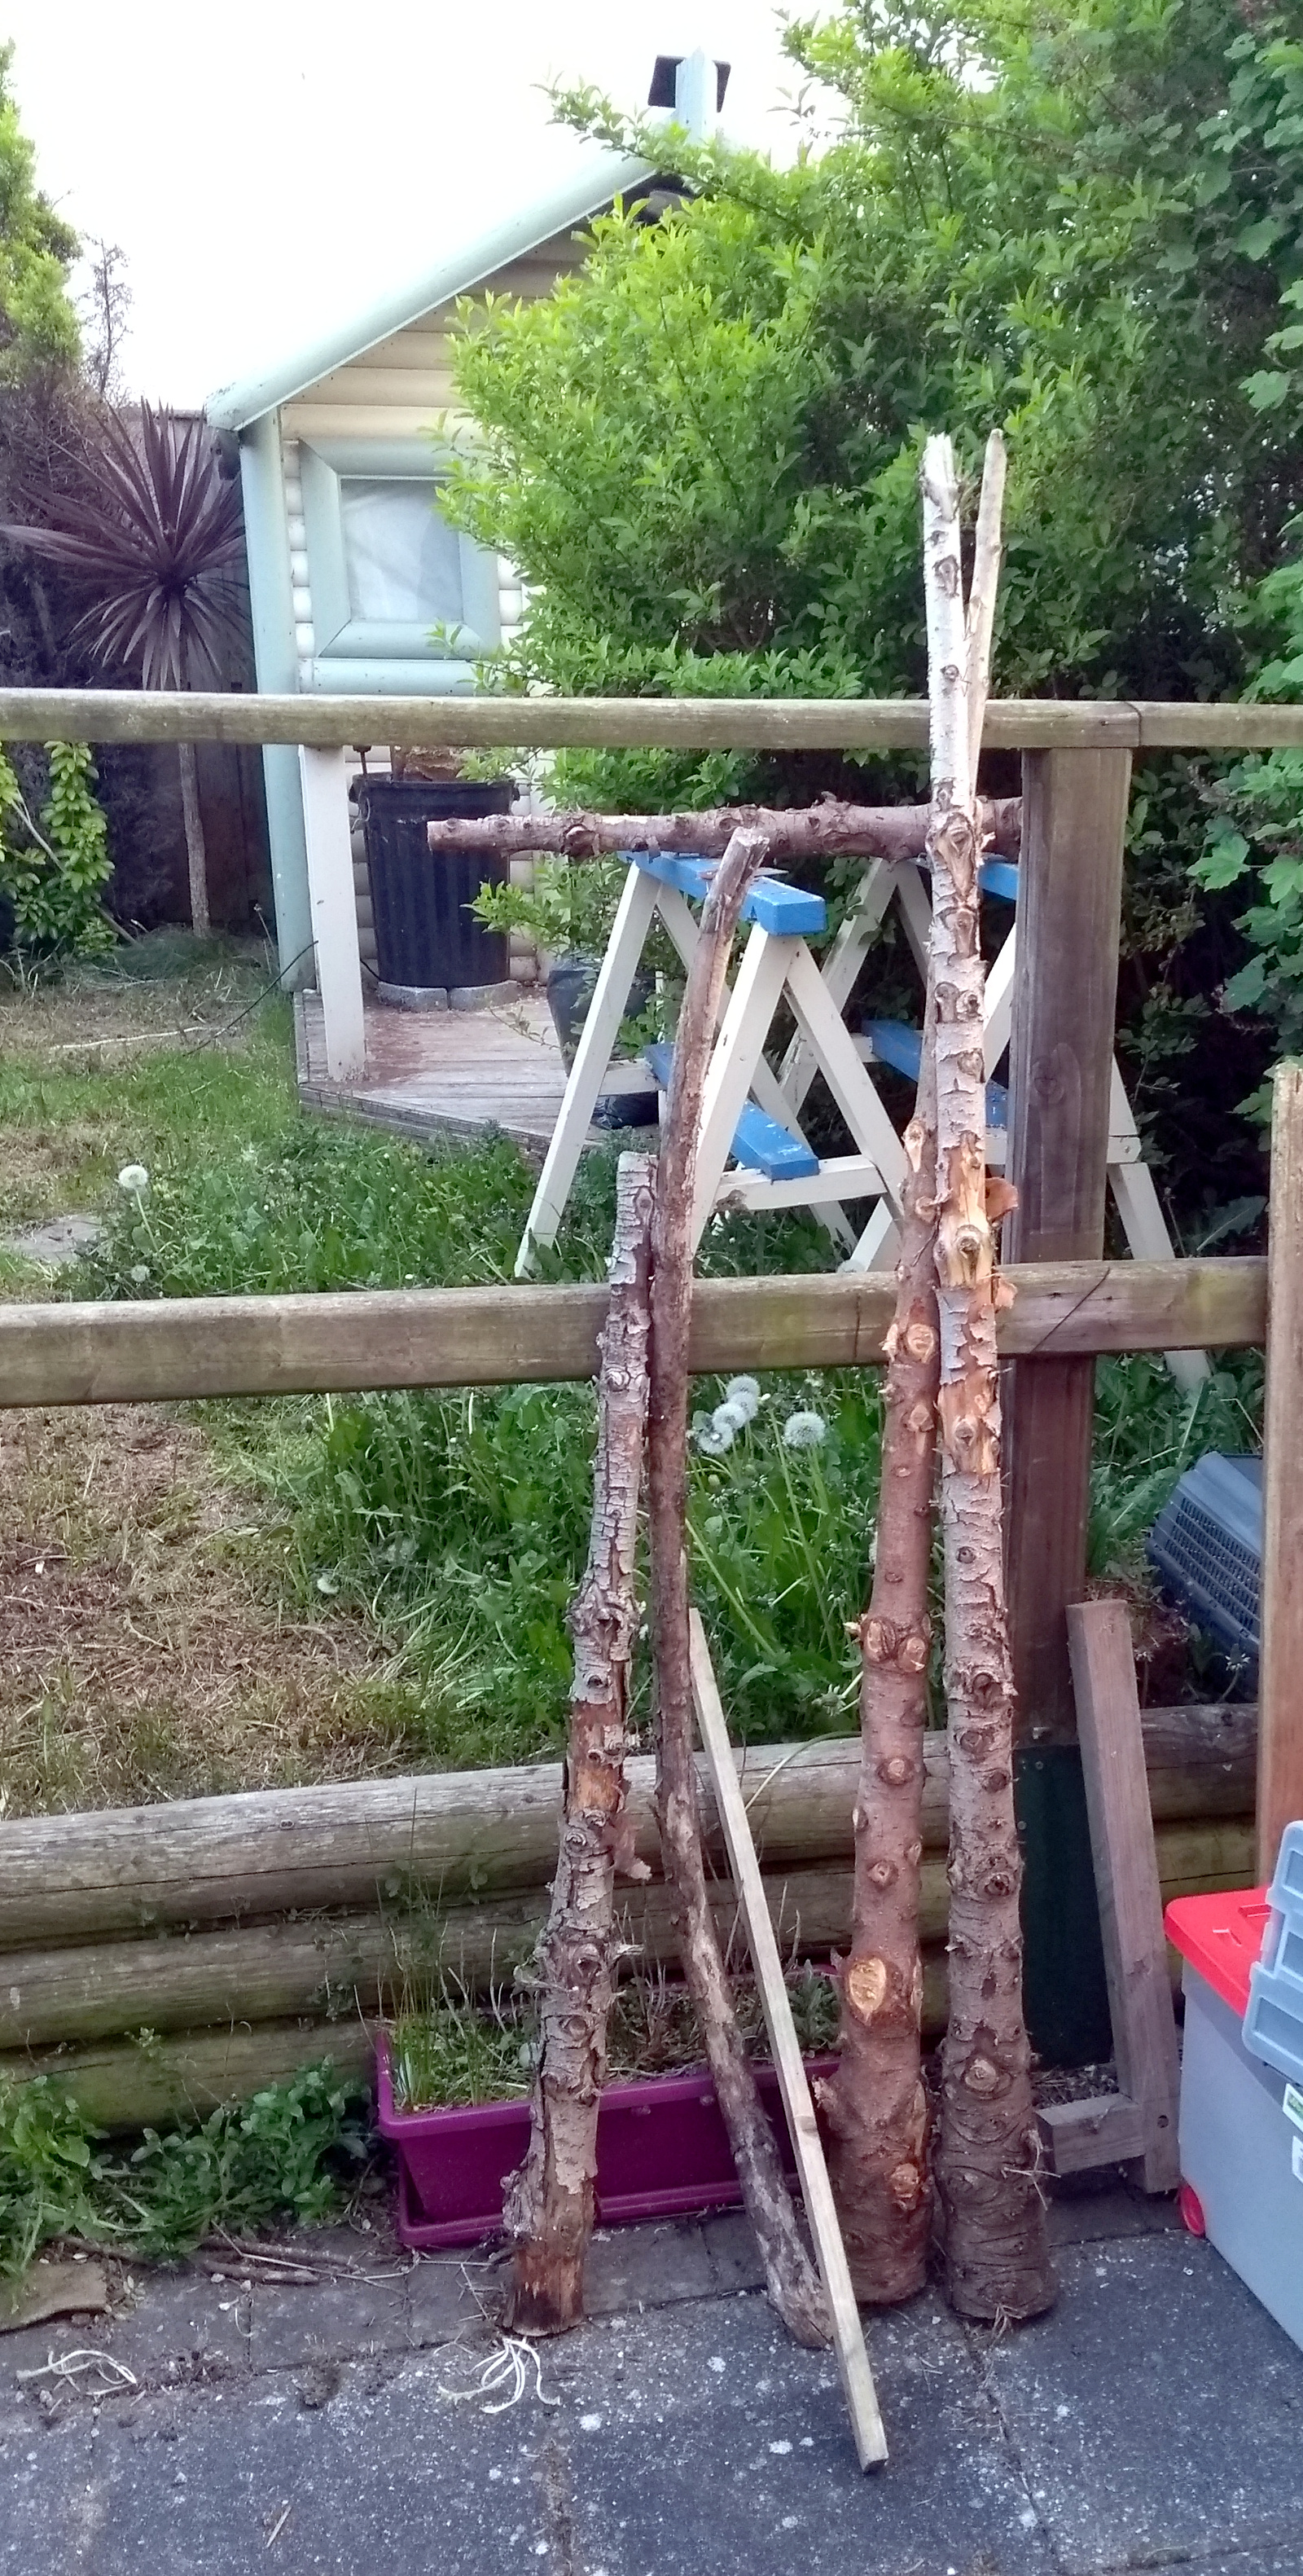
And this was important because until this point, the several xmas tree trunks in the back yard were just there because I had been too lazy to make a second trip to the recycling yard with them. See, after the holidays I take our now-long-dead-and-drying tree into the back garden and hack off all the branches with a hatchet and bag up the branches and the two kilograms of needles that have fallen off them on the ten-yard trip from living room to back garden. Those bags go to the recycling center because if you tried to just shove the tree into the car to bring the whole thing there, you’d be cleaning pine needles out of the car ten years later.
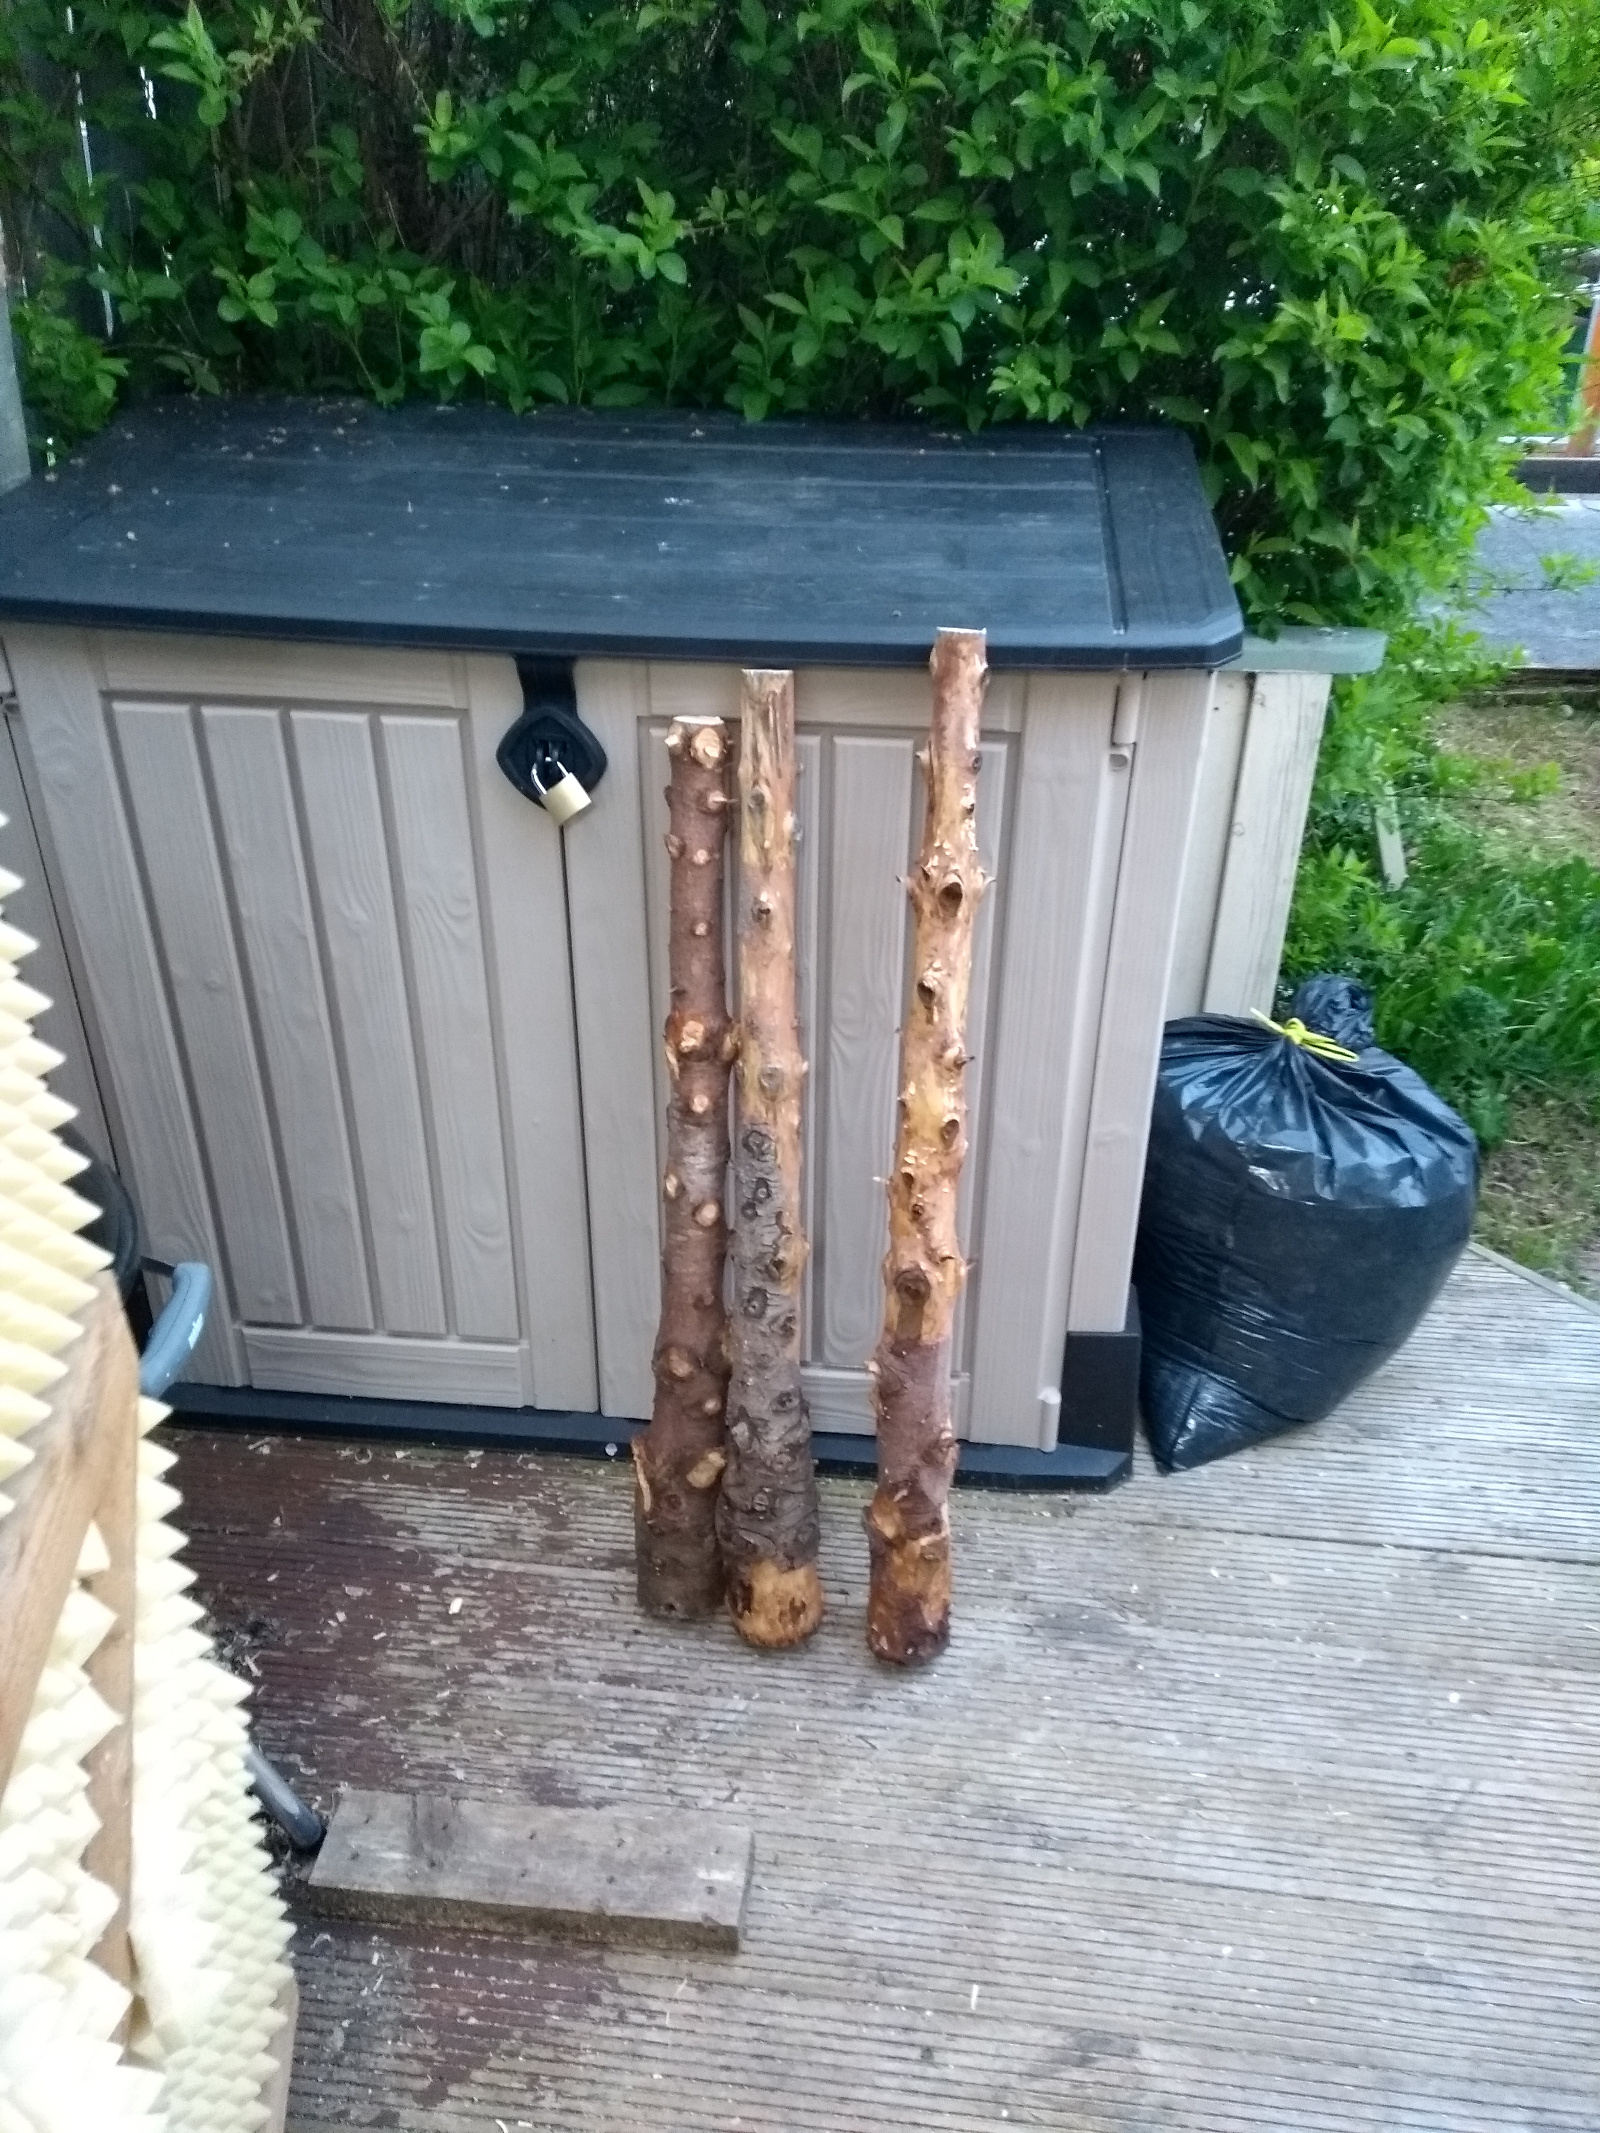
But now, there was a reason I was keeping those trunks 😀
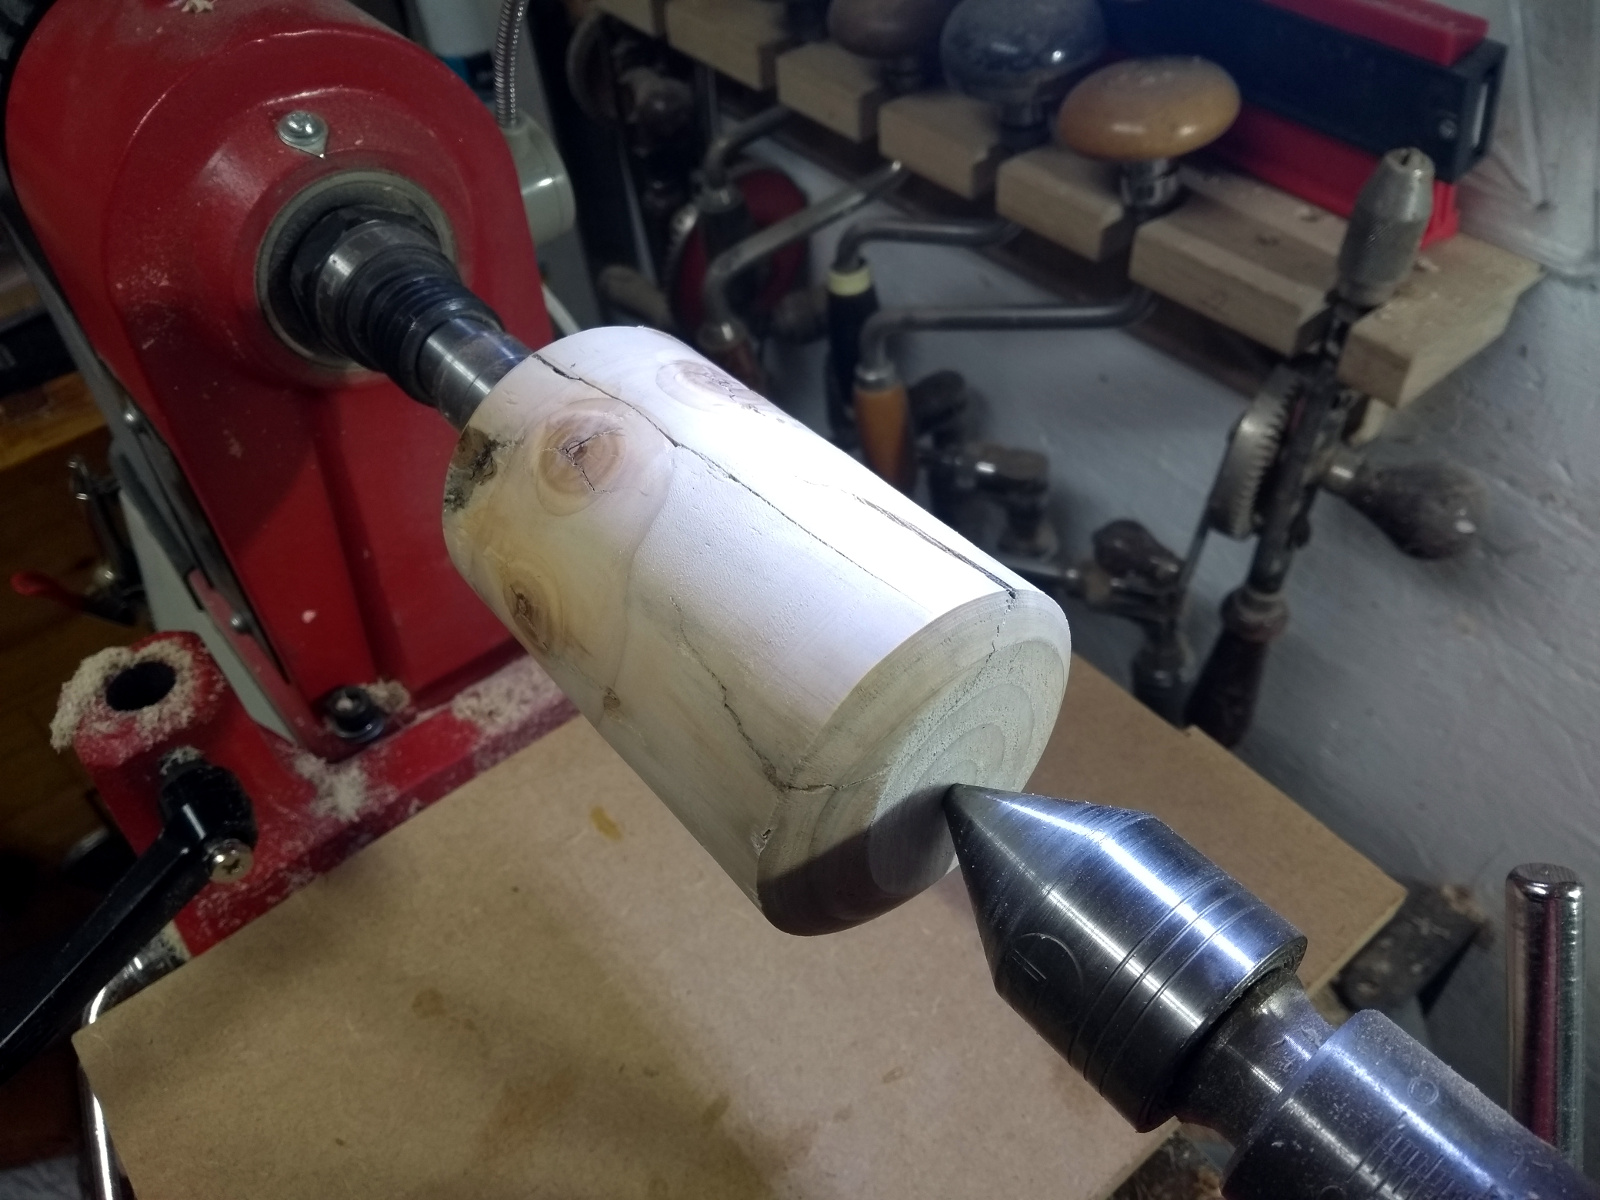
And what better time than during a pandemic lockdown to do something with them? So, first up, take a glazier’s hacking knife and debark them and lop off the top foot or three until we get past the really bad shakes and checks on the surface (these things have just been drying outdoors untended for up to five years now).
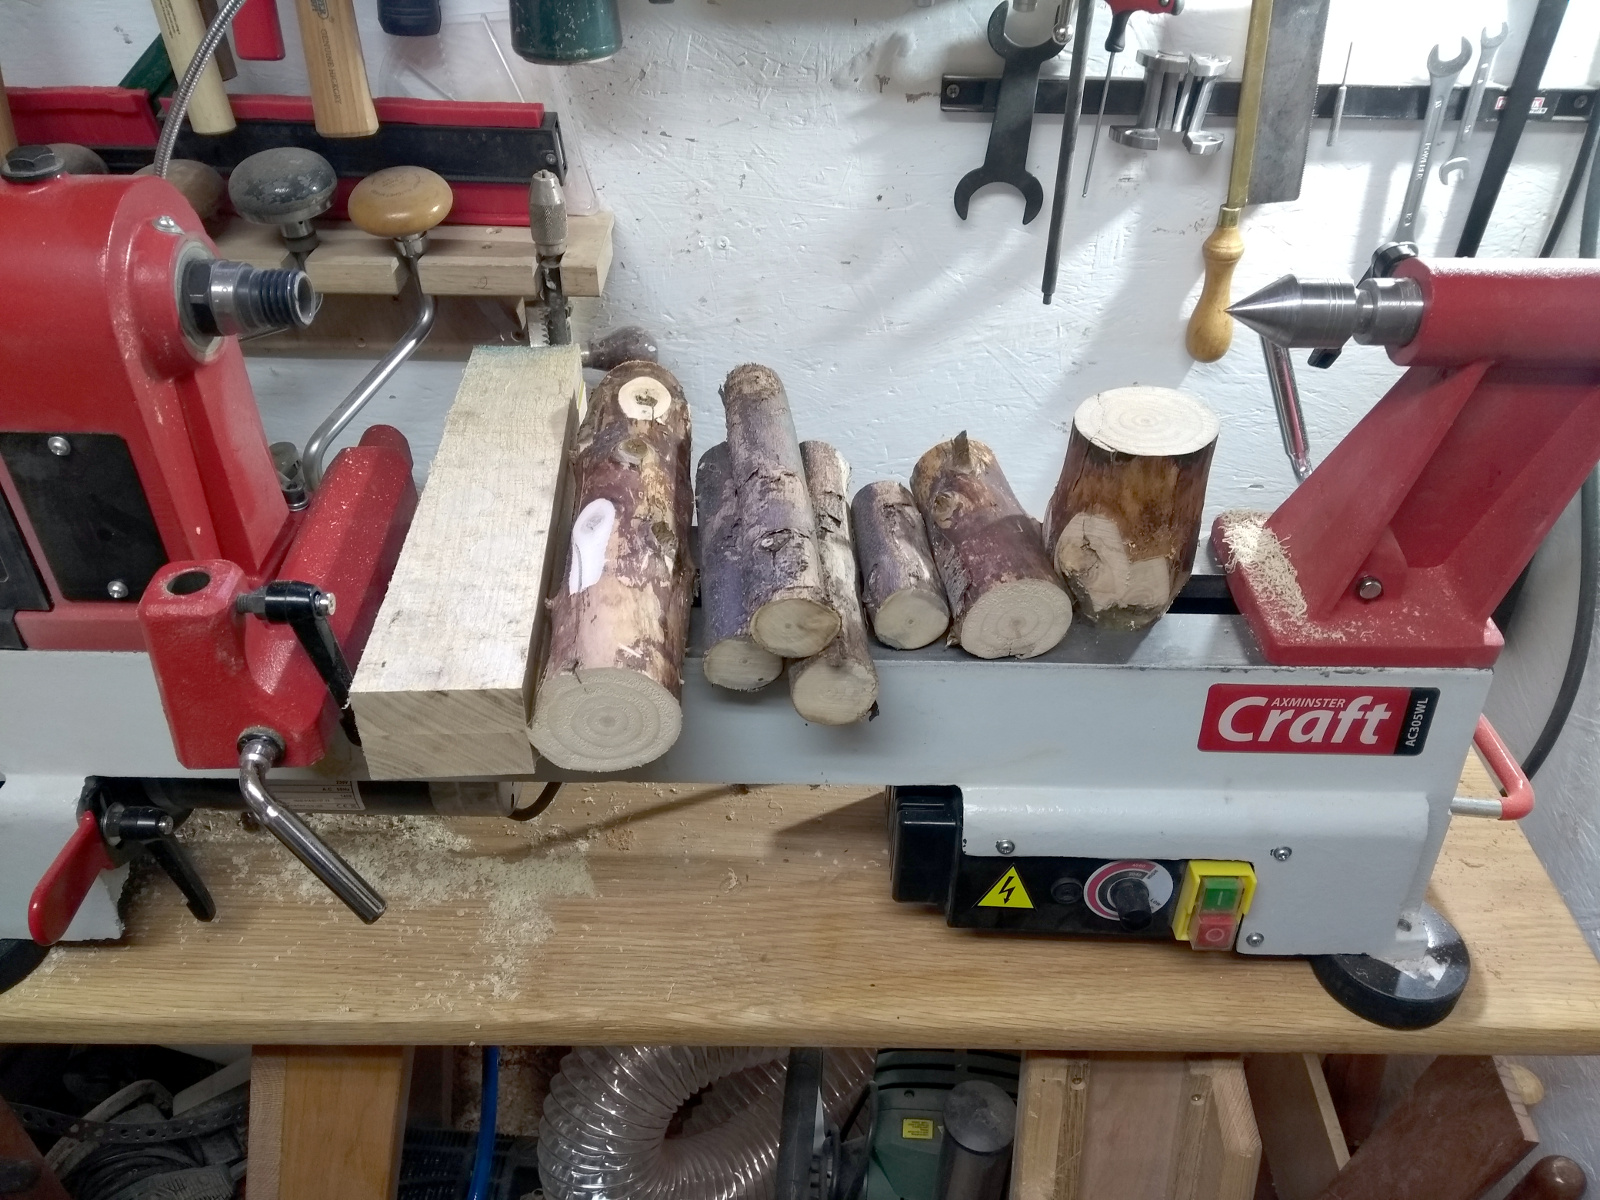
Then I took the more manageable-in-my-shed lengths into the shed and cut out all the pieces that looked salvagable, trying to get at least one chunk from every trunk so we’d have every year represented. The bandsaw rendered the rest into firewood.
The oldest two trees just resulted in a handful of chunks but the most recent trees yielded a lot more material (that binbag is shavings btw, I had to empty the extractor that day)
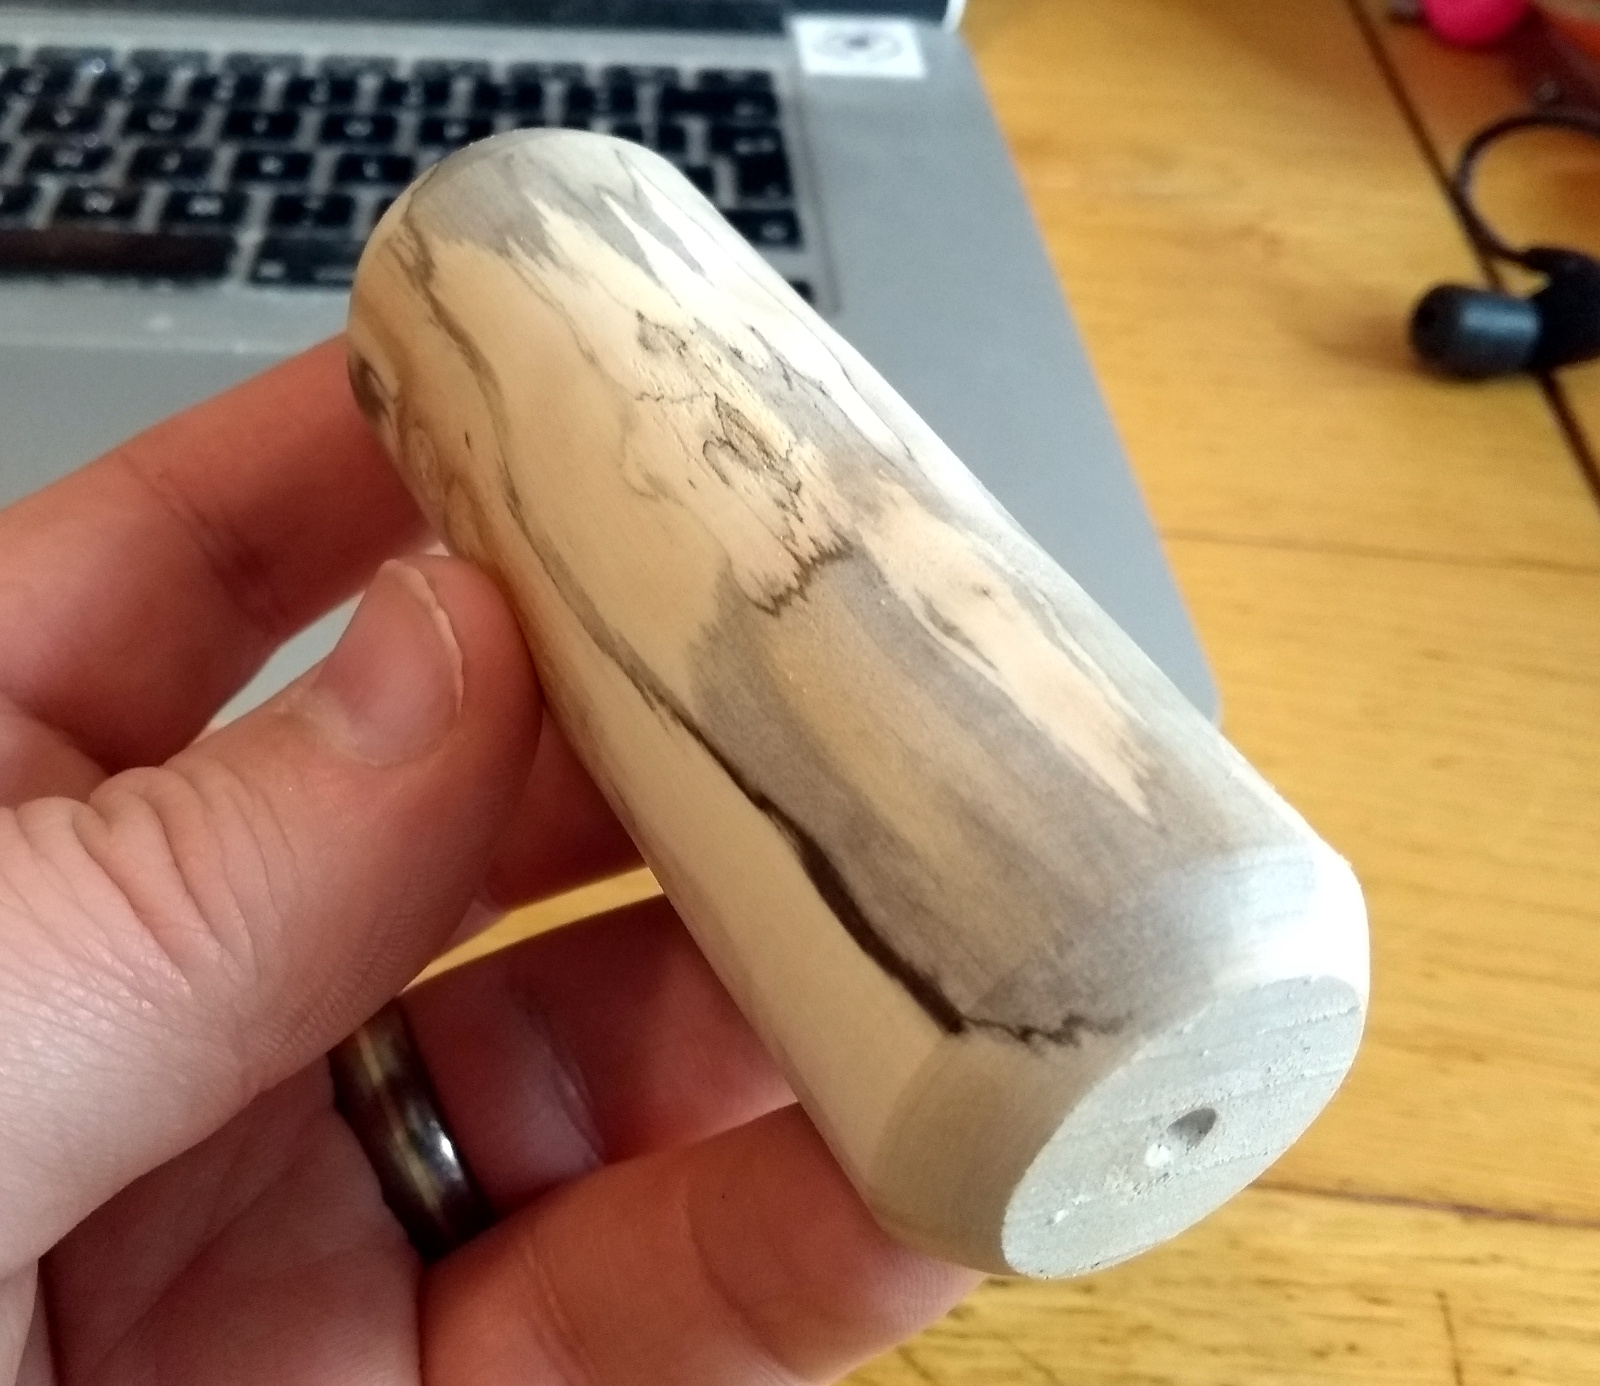
Some of the smaller pieces turned out to be spalted when rough-turned, which is kindof pretty in a monochrome sort of way.
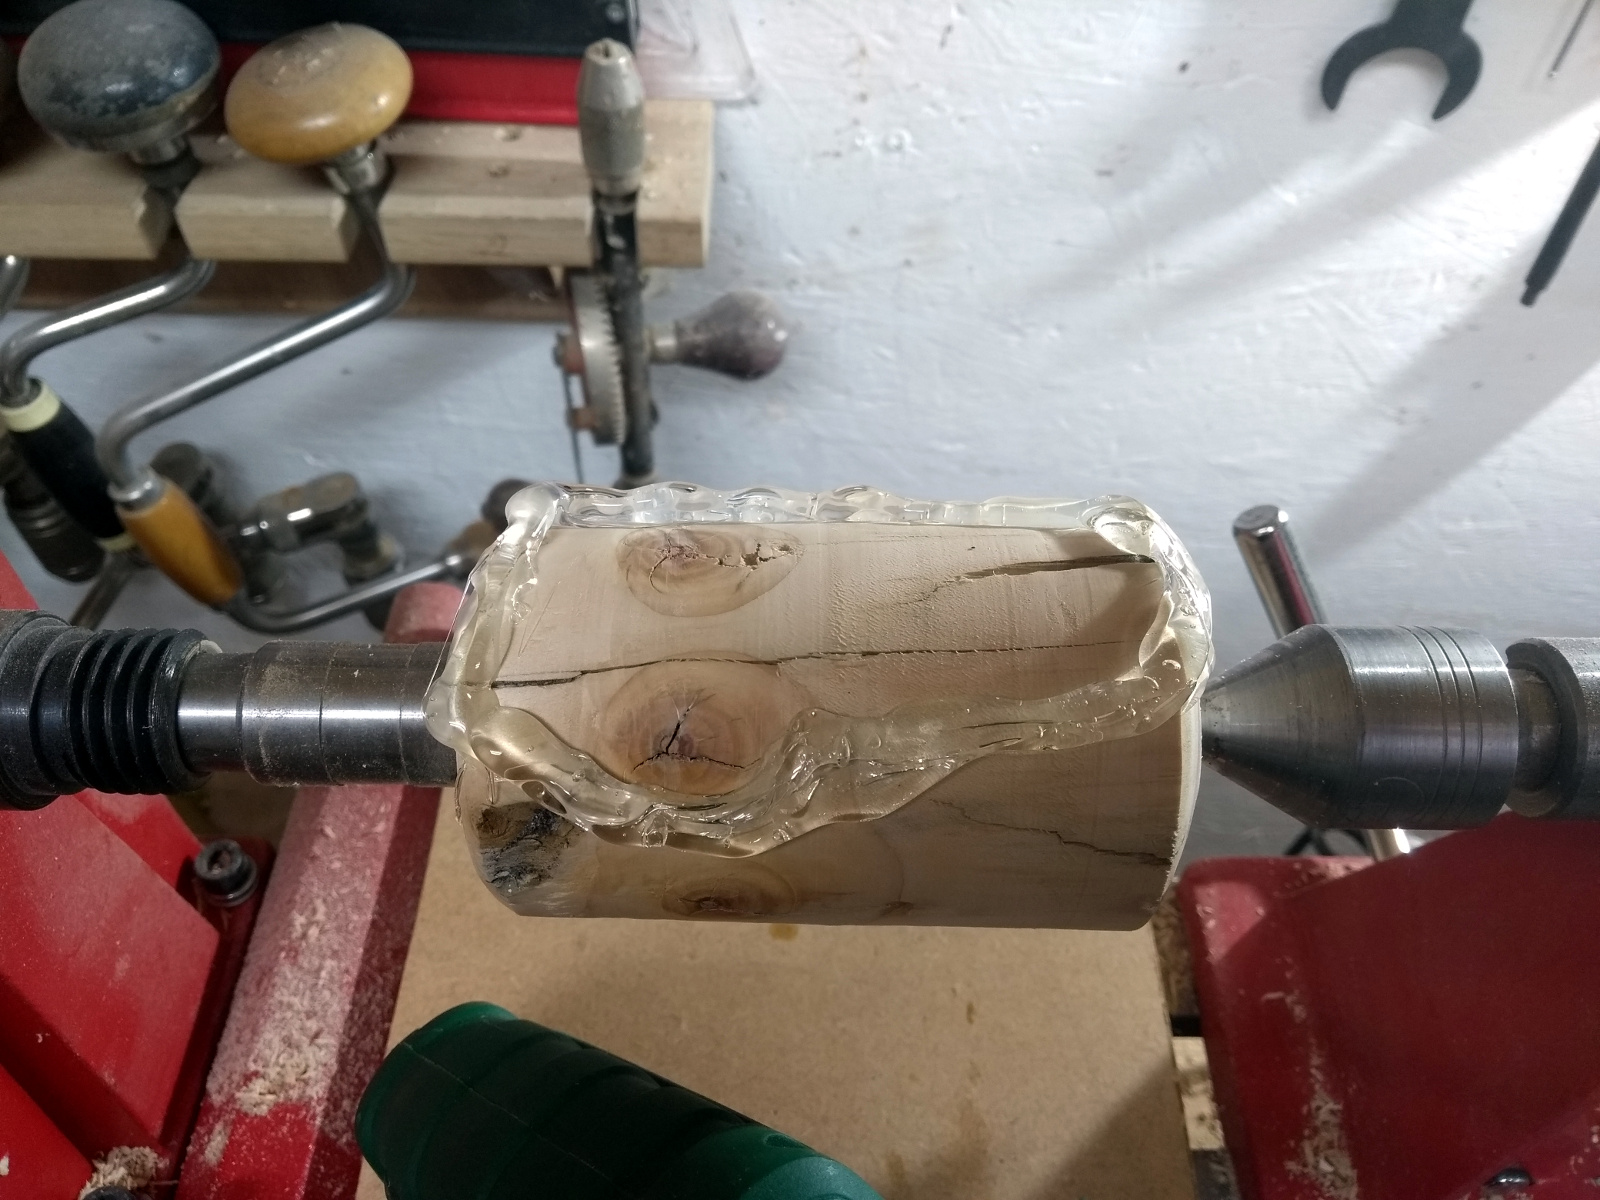
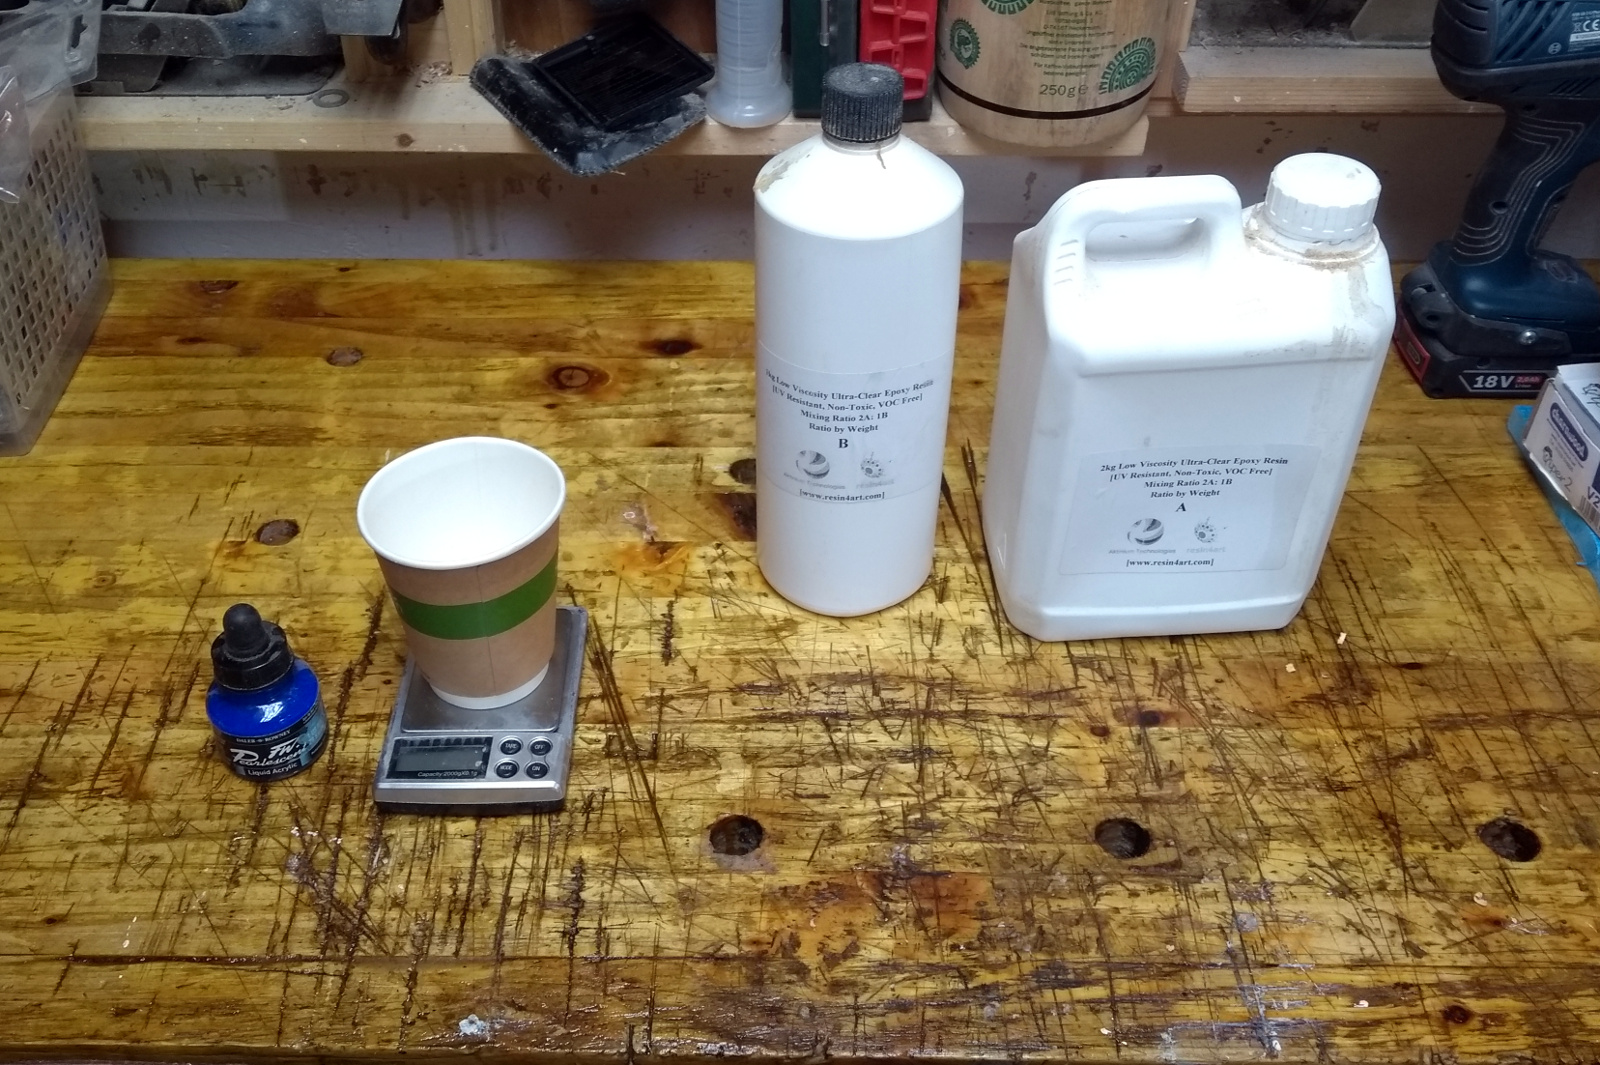
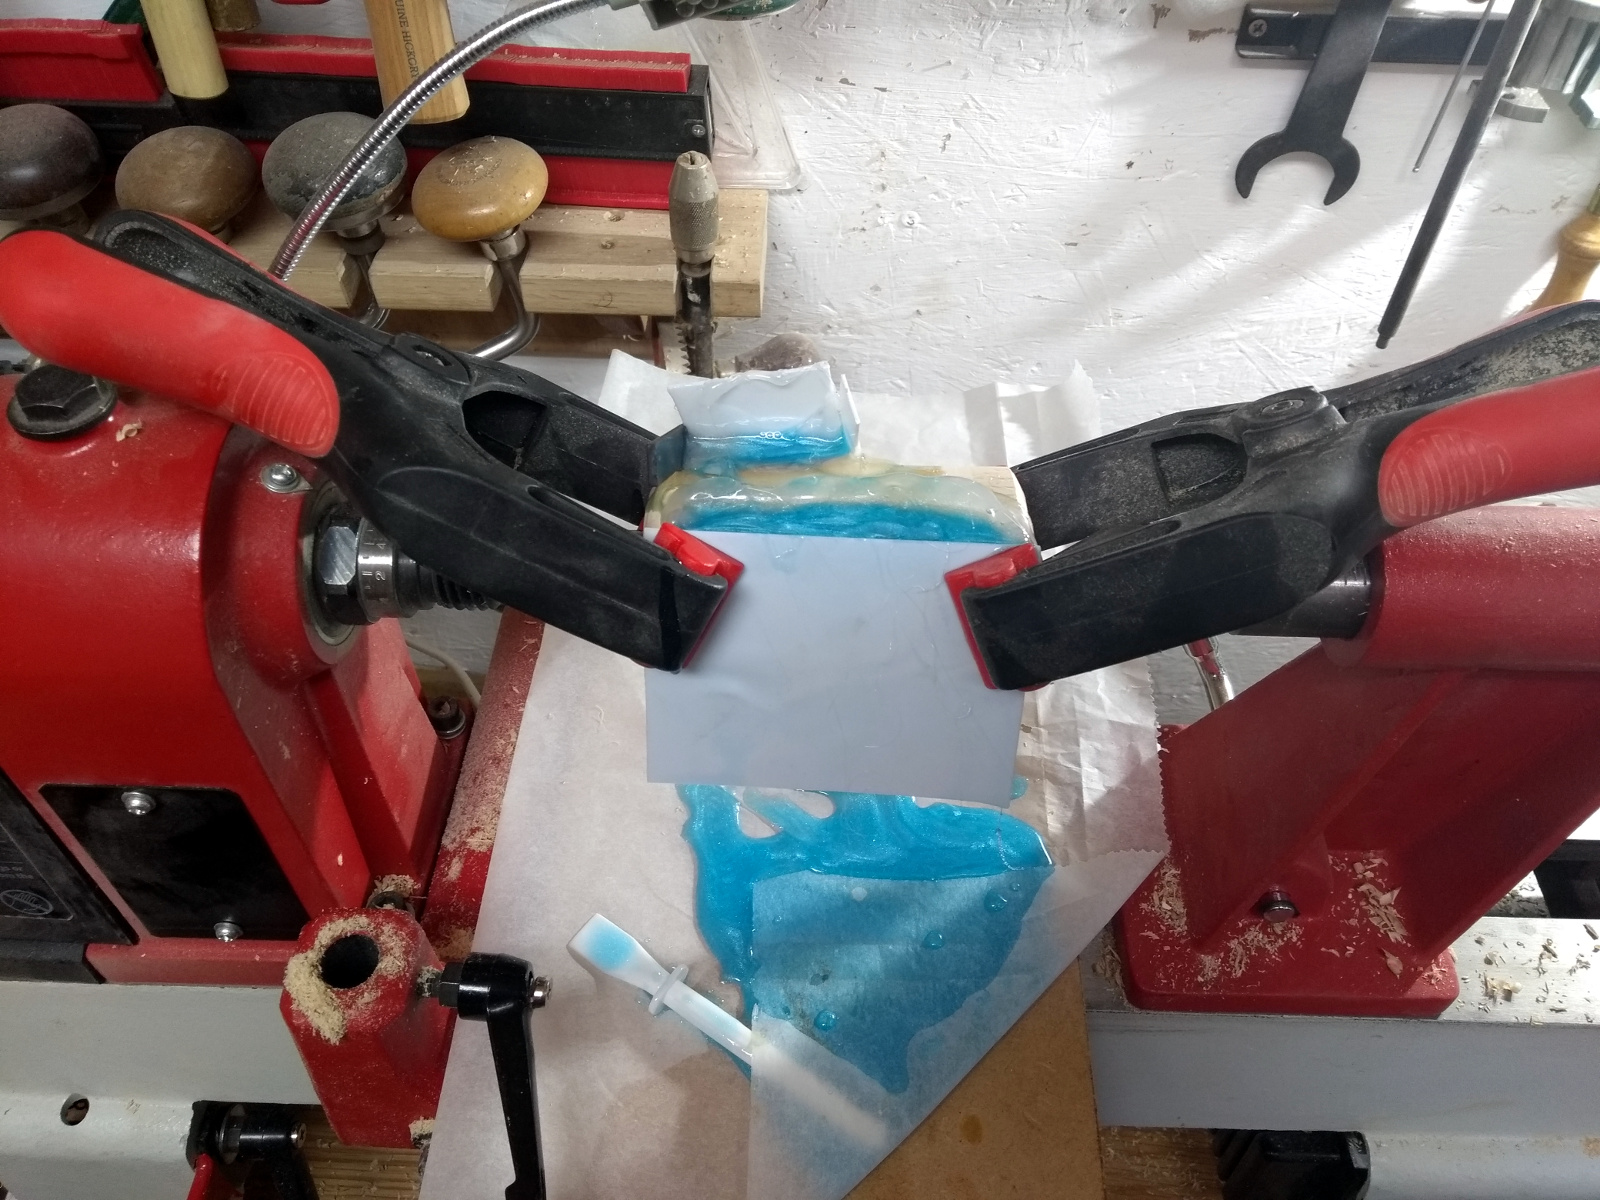
The shakes in this piece were just too large to ignore though, so out with the hot glue gun to make a dam and it’s resin time!
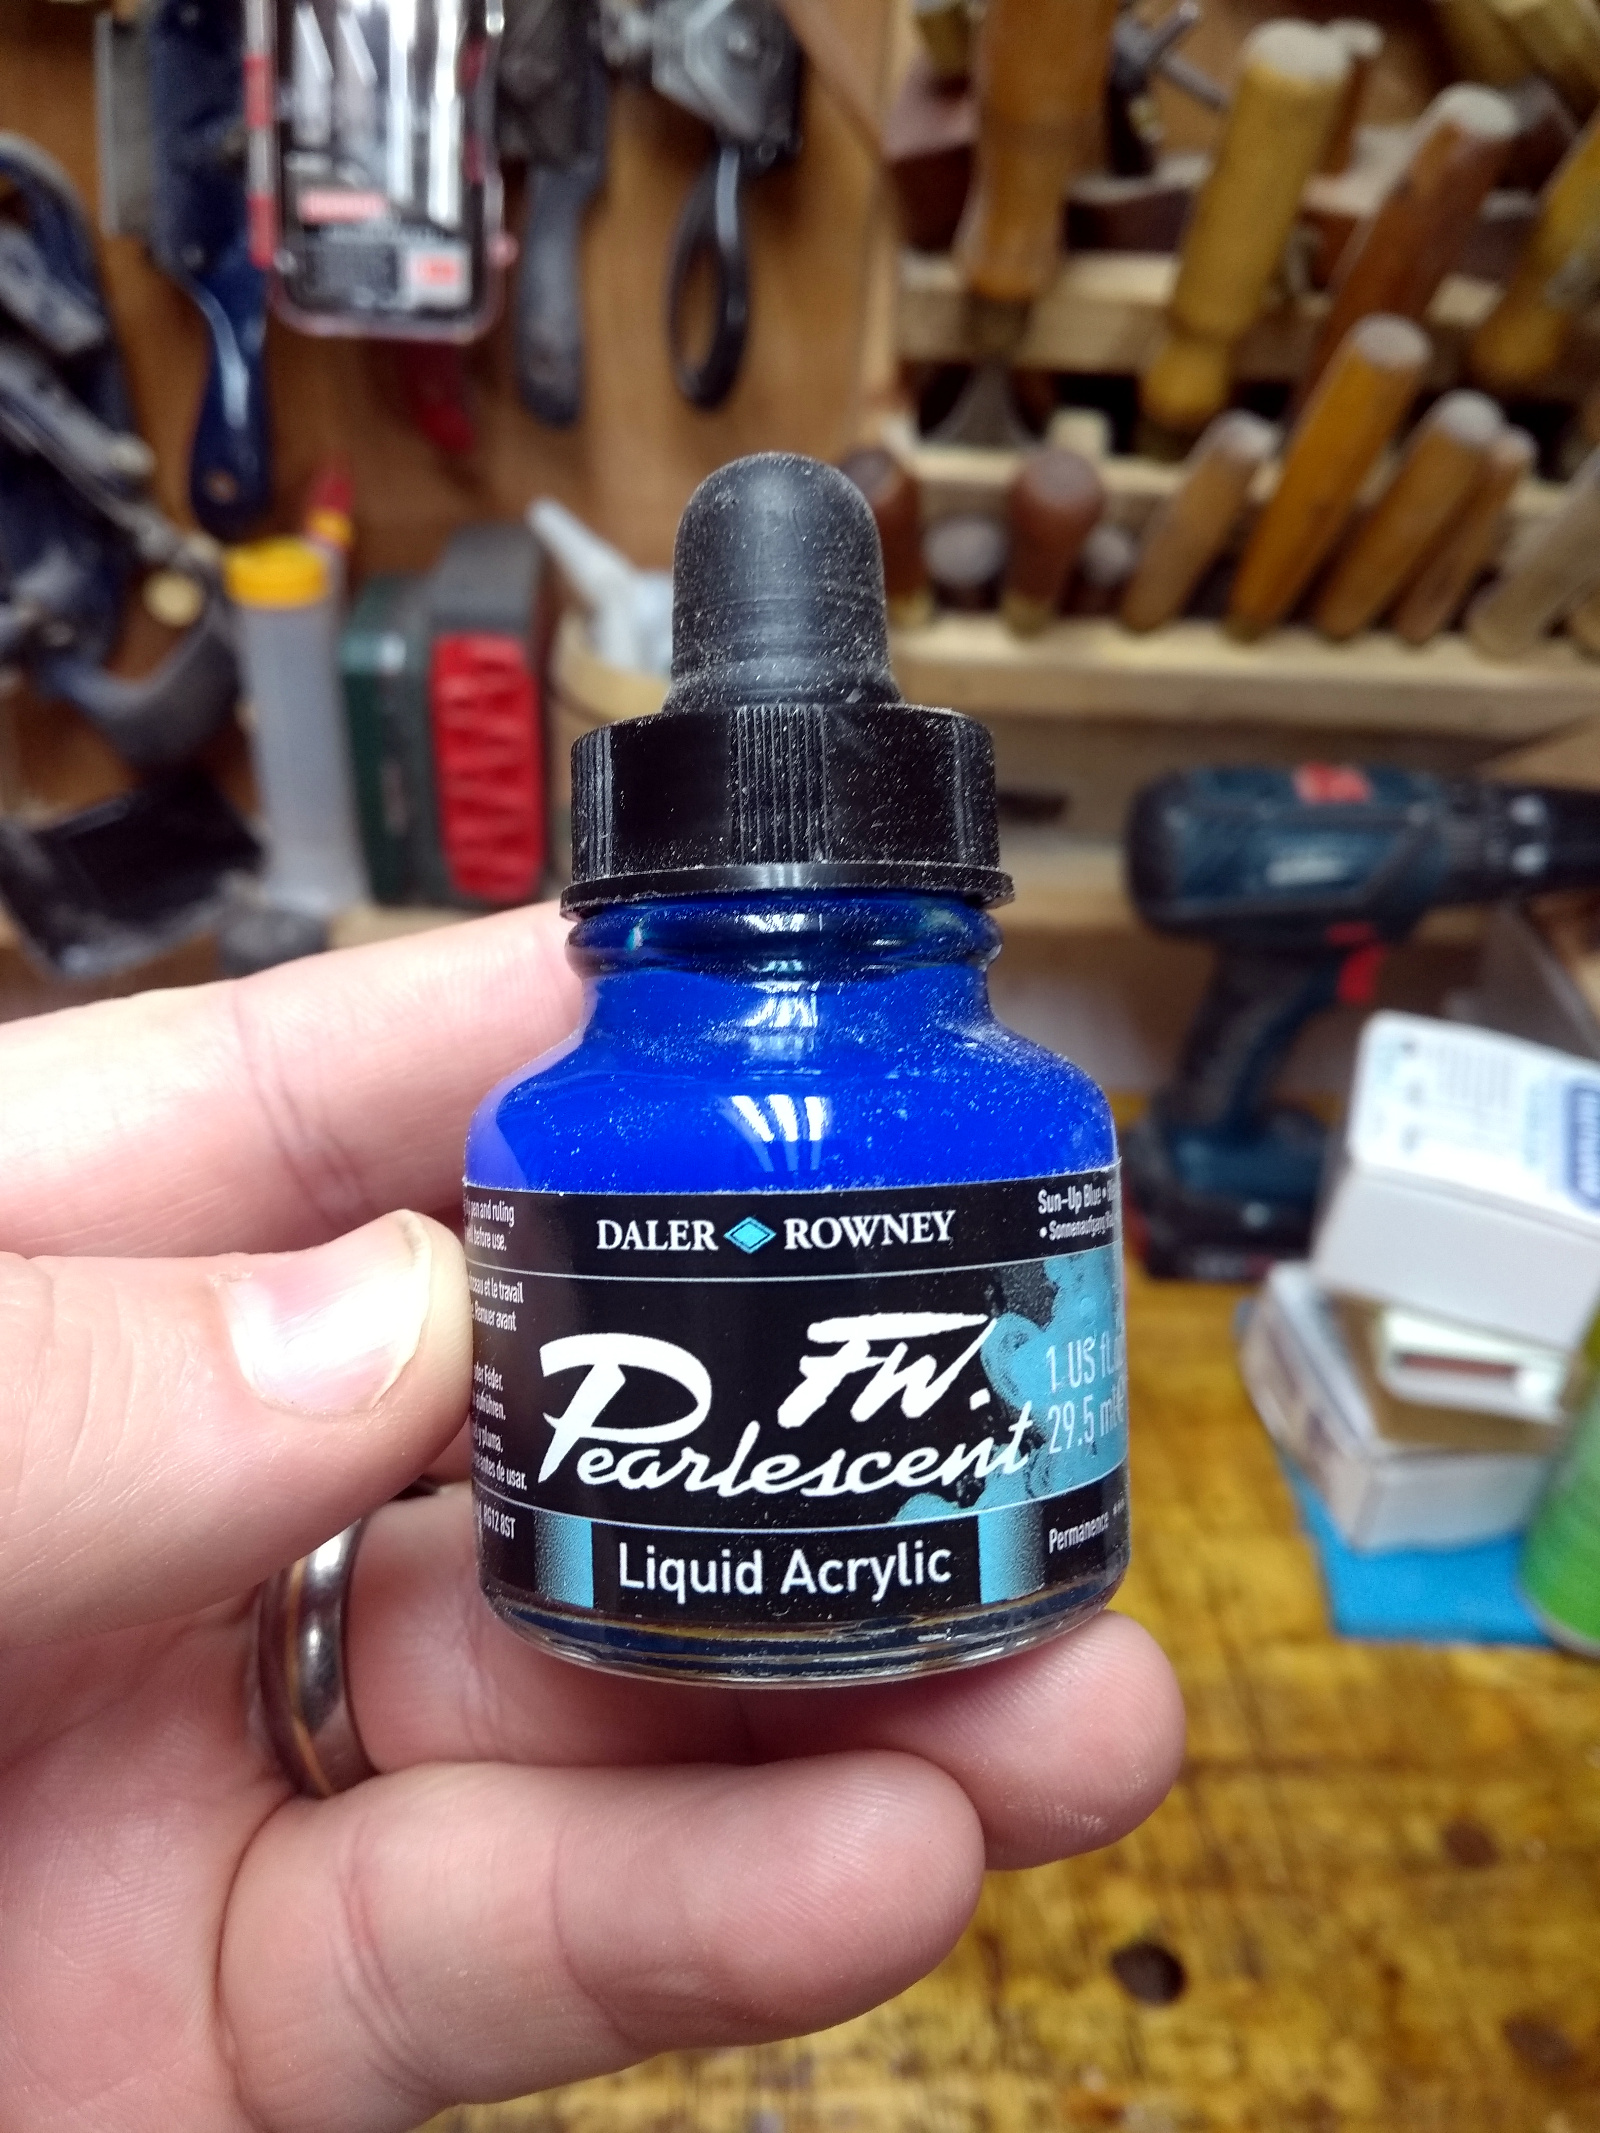
Daler-Romney pearlescent acrylic ink in sun-up blue, in case you’re interested.
It’s pretty nice stuff, and handles very well. I may need to get a few more of these. The resin pour proved messier than expected though…
And yes, the whole damn thing did in fact leak all over the live center, lathe bed and drive center and why yes, that was so much fun to clean up, how did you guess?
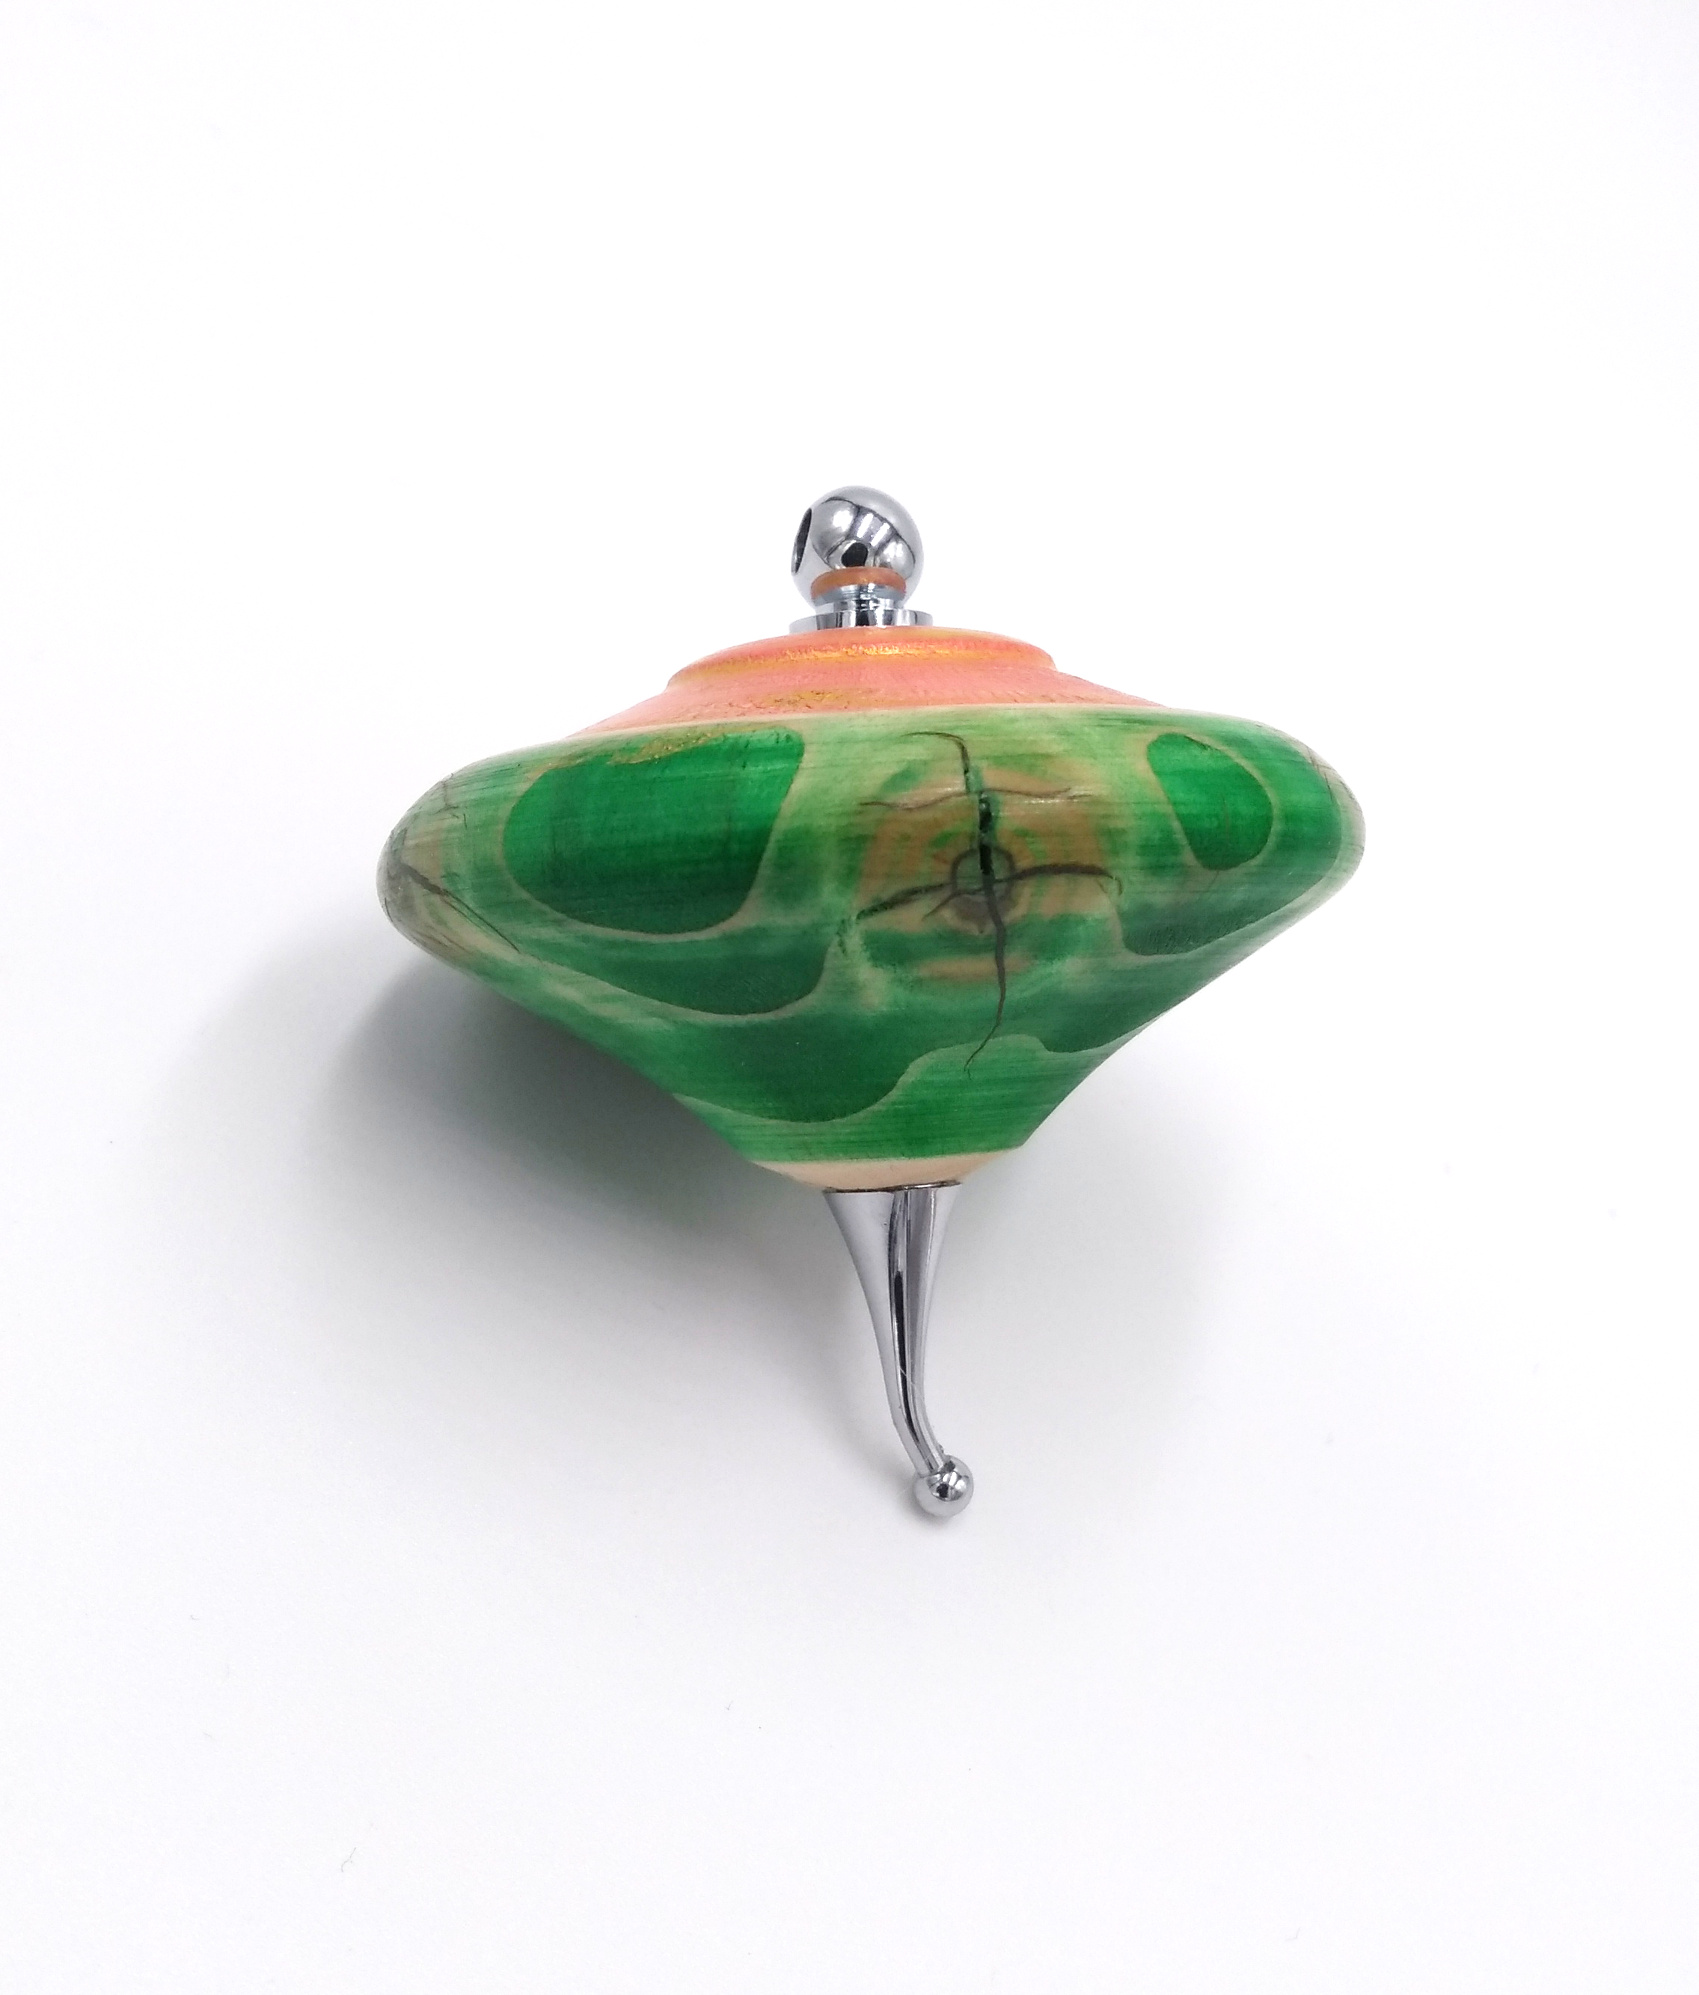
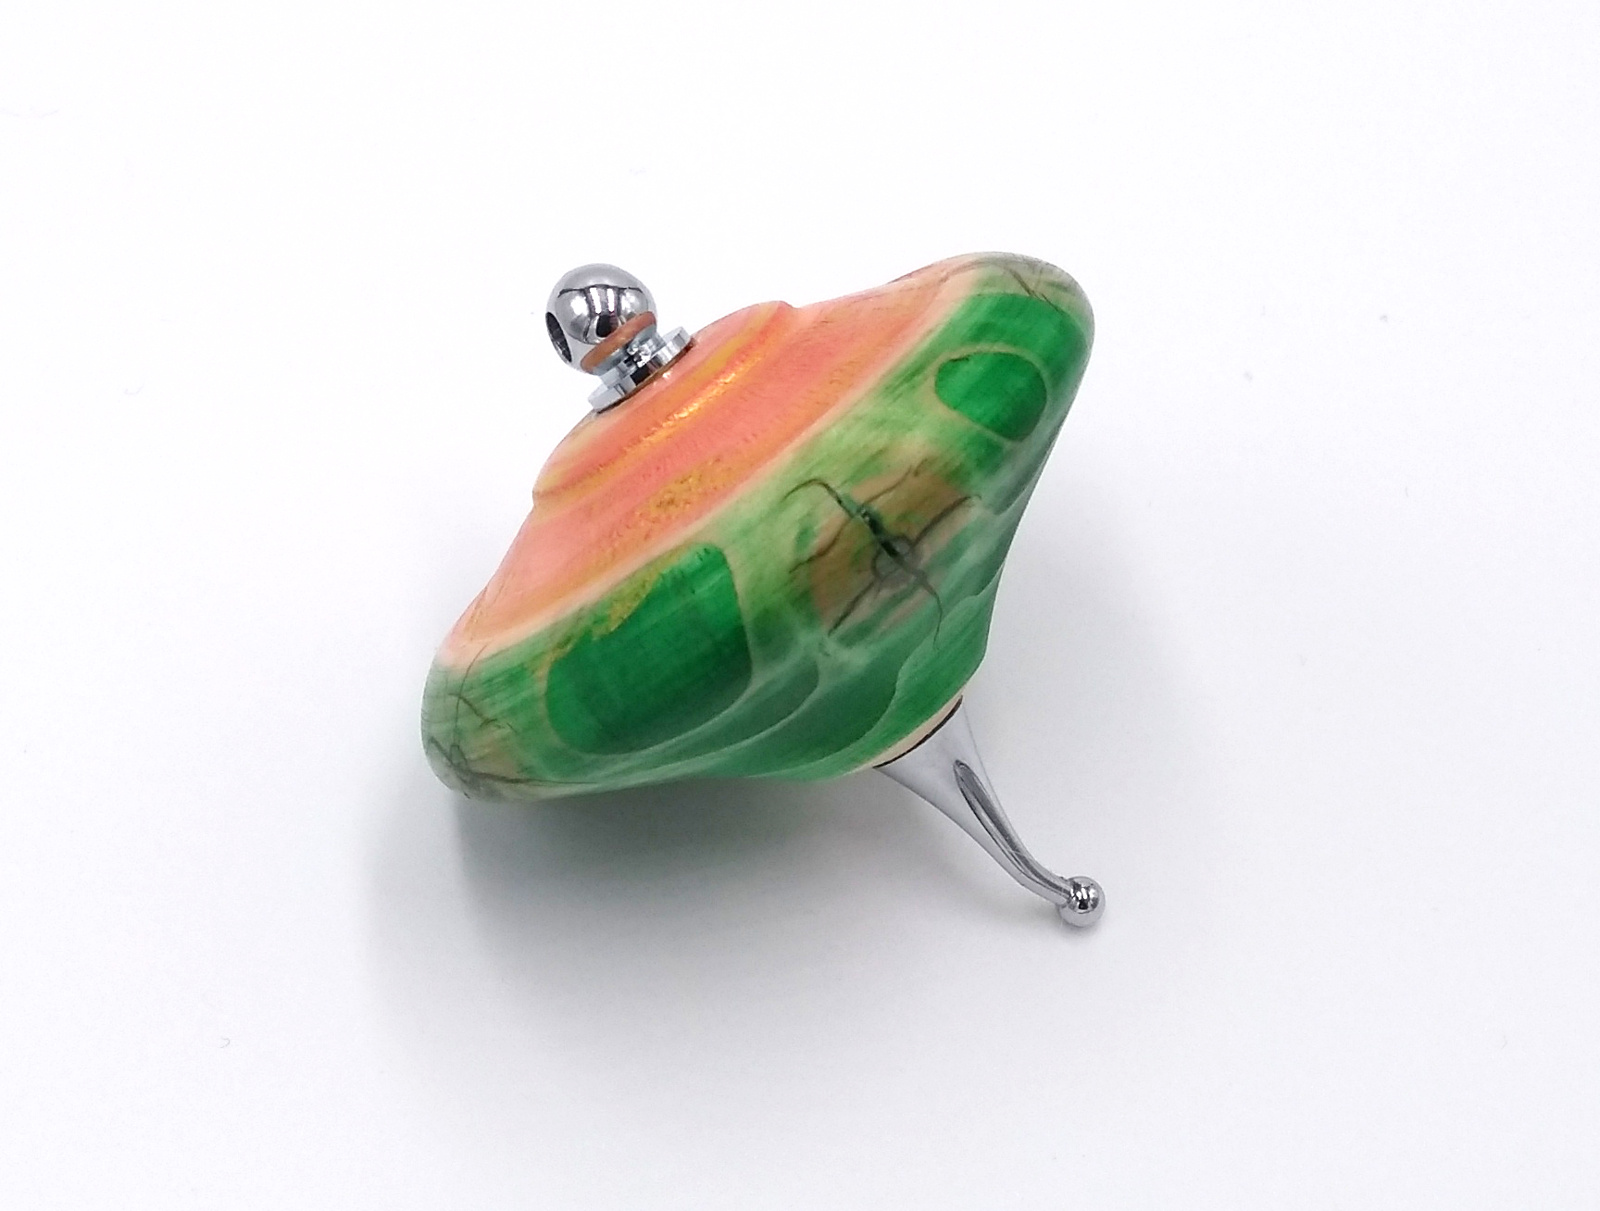
You couldn’t even really see the resin and its colour in the end. But it held the piece together while I chucked it up then put a jacobs chuck and 7mm drill bit into the tailstock and drilled out the center for an insert from a kit (bought mine from The Carpentry Store). I turned a small test shape to see how the wood handled, sanded it, sealed it, thought “no, that needs colour” and stained it then thought “wait, sanding sealer and stain should have gone on in the opposite order, oh bother”, and then promptly bent the ferrule learning how to get the head and ferrule into the tube running through the center.
Still. It’s only a test piece, I have three-and-a-bit trunks to play with still. And the stains don’t react too badly to pine (and it’s interesting to see how they react when you seal the surface first), and the buff-it gold compound I used as embelleshing wax works nicely (gold because, you know, xmas colours). So I learned a few things (like don’t try to pour resin into a crack in a piece while it’s still on the sodding lathe). Worth doing.
So there you go, an ex-xmas tree xmas tree decoration 😀
Random question for the non-woodturners out there, just out of interest - how much do you think it would cost to buy this pen (assuming you knew it was handmade)? [...]
(oh, and the rifle that they eventually replaced the 303 with was Finnish, not American....)#uspol [...]
Funny gun-related thing; in the far north of Canada, until quite recently (just before covid), Canadian army patrols (they're less pew-pew-pew and more photographs and scouting as the climate changes) [...]