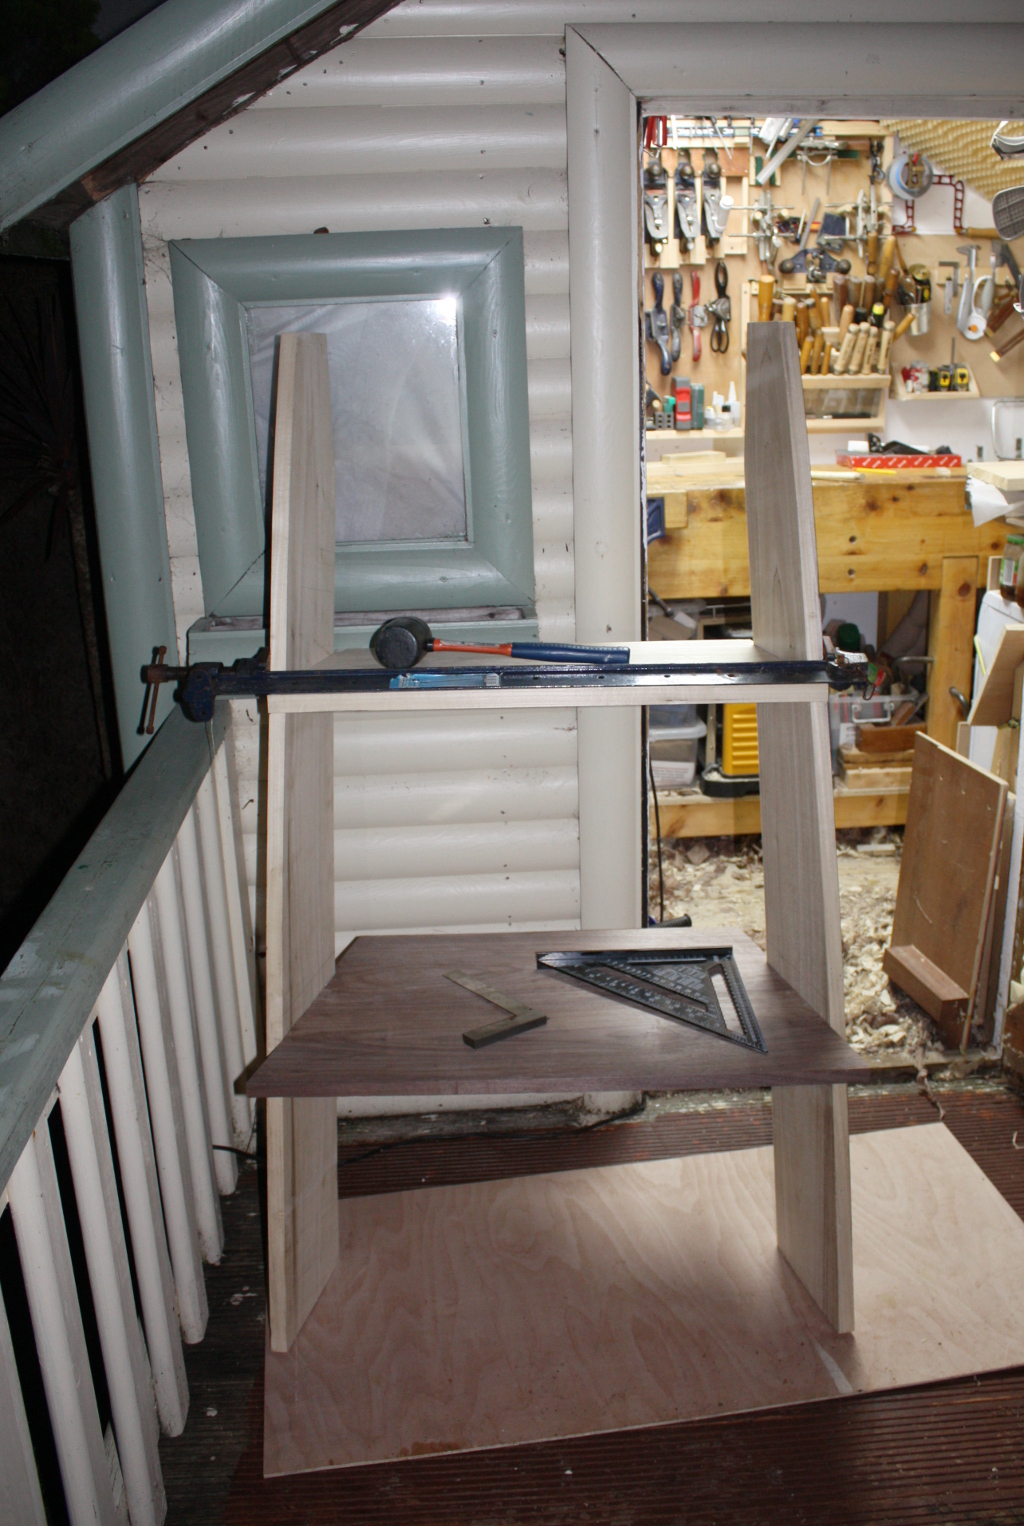
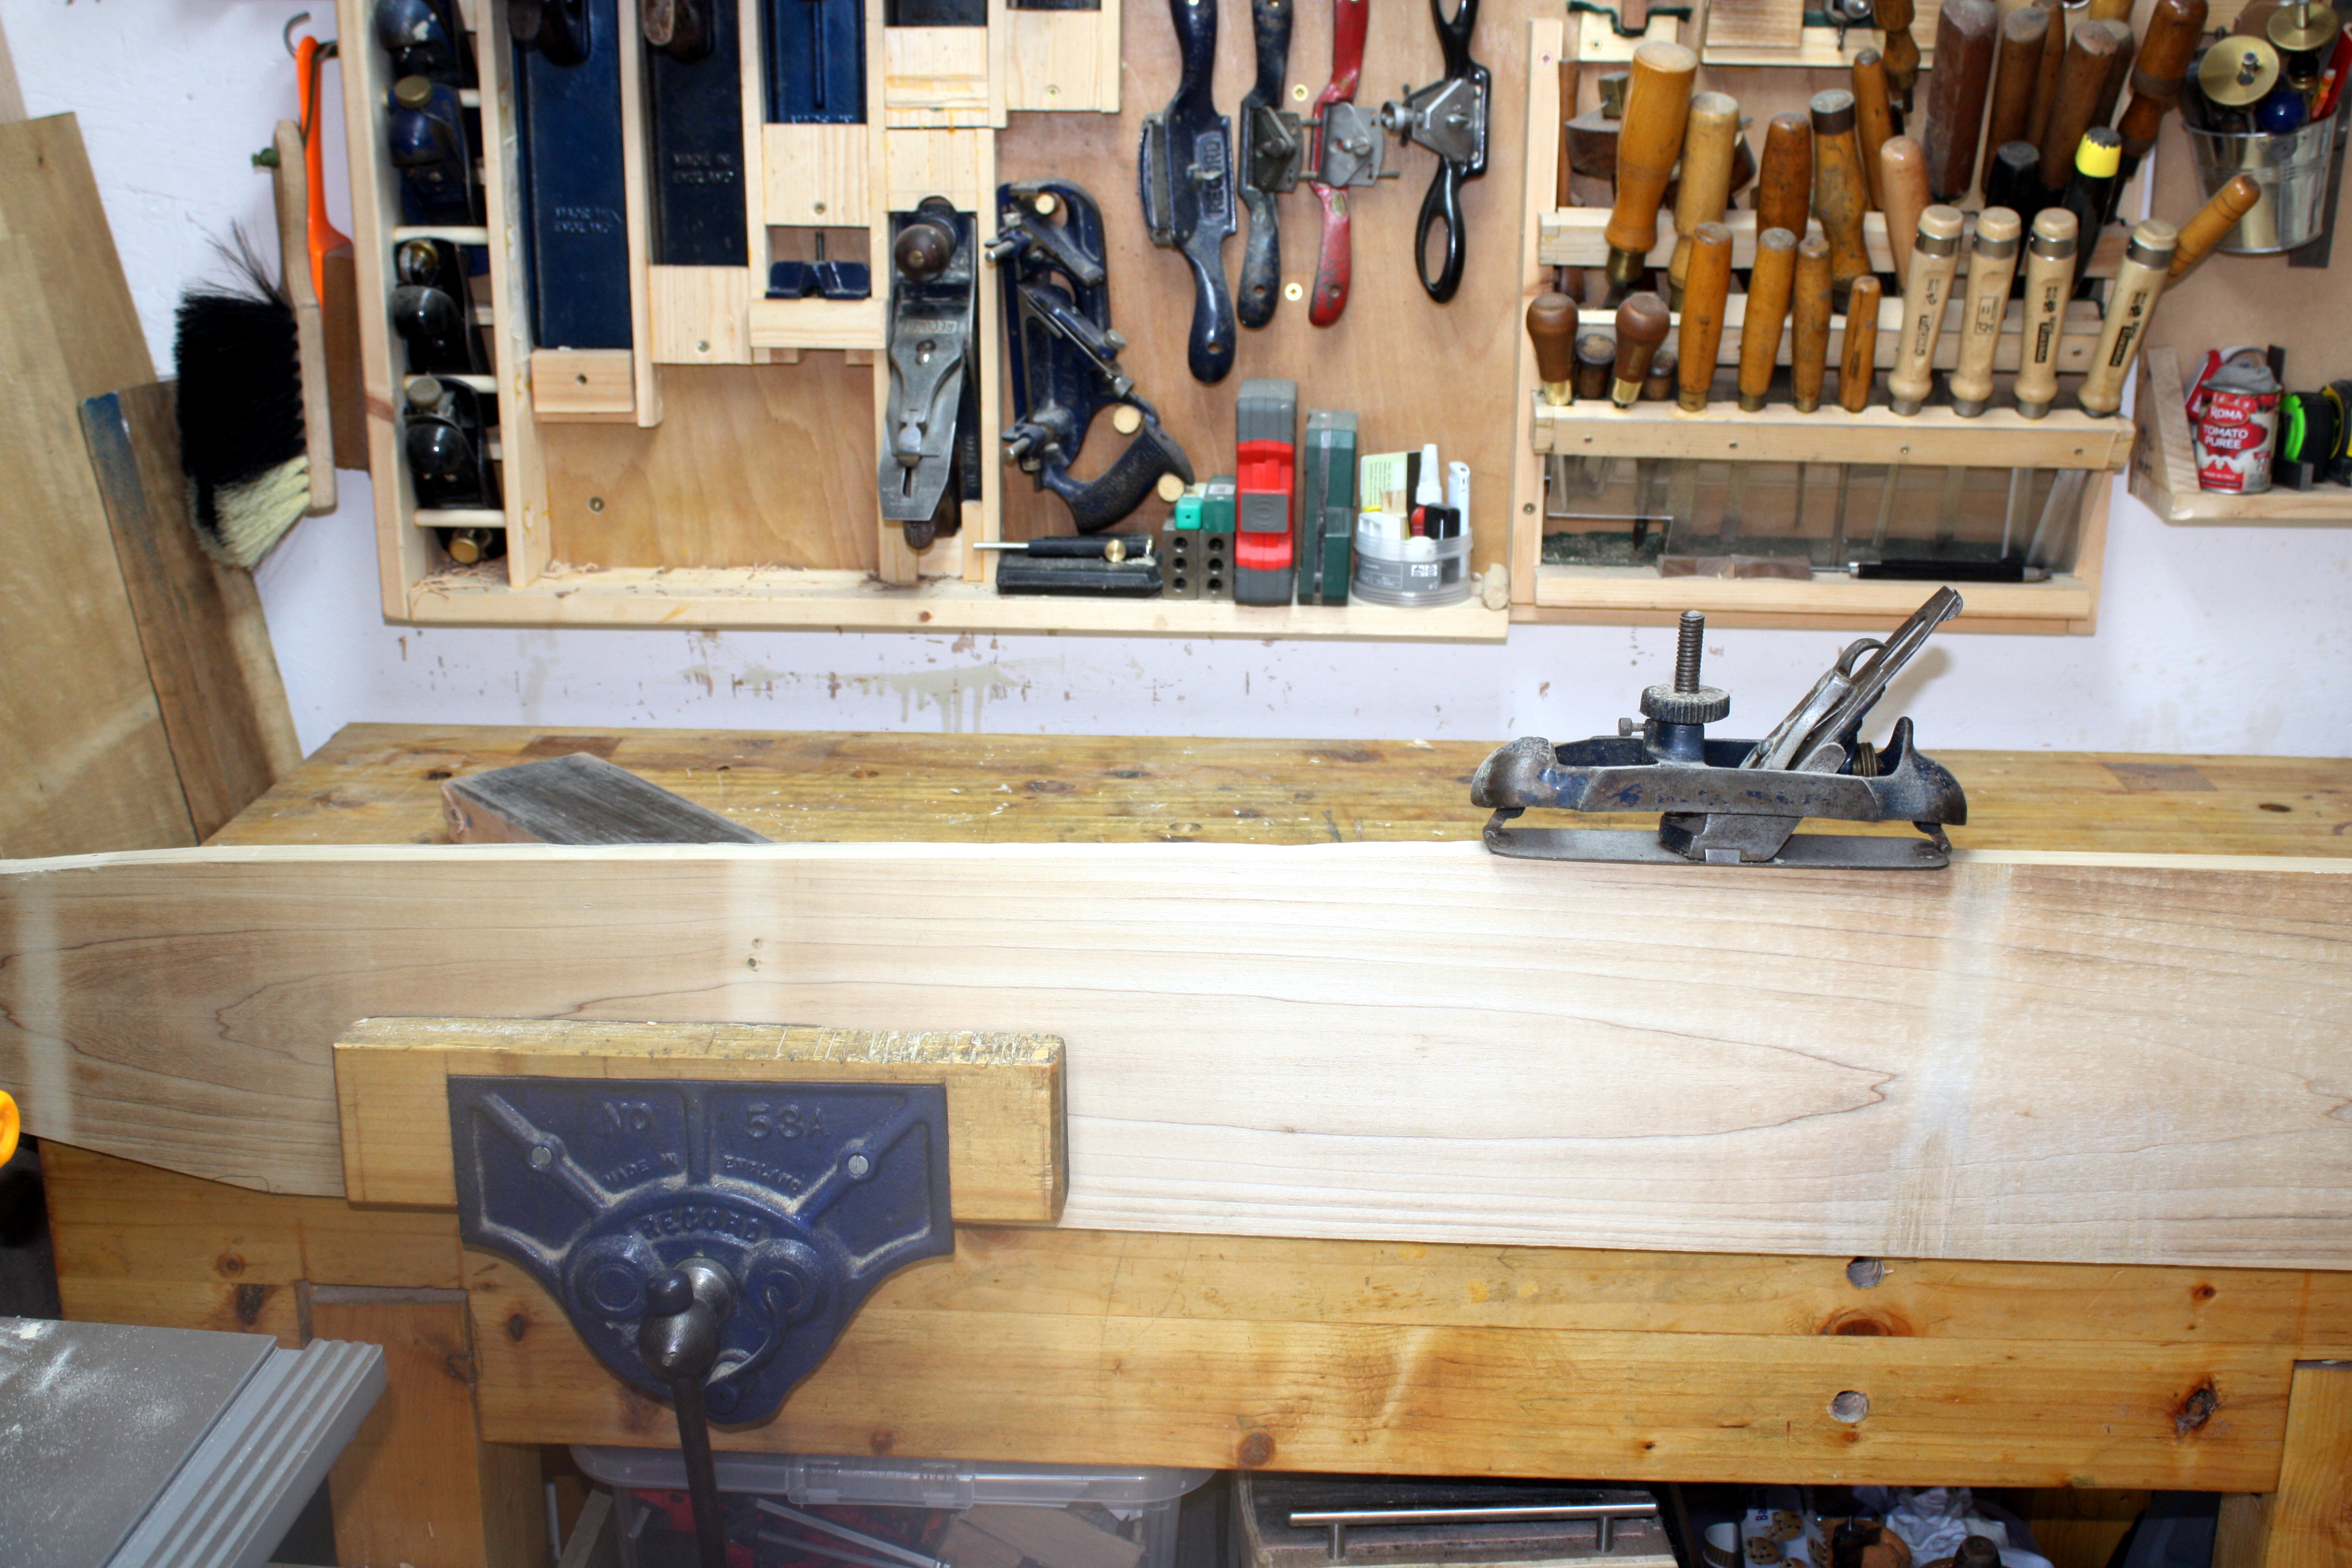
Shed time again (yes, it’s been a while, work stepped up a notch and it’s been a bit miserable and chilly here (granted, not -40C but you can’t move in my shed very much so you feel the cold rather a bit). Chopped the last housing joint and then spent some time wrestling with pieces that are definitely too large for the shed to do a test assembly.
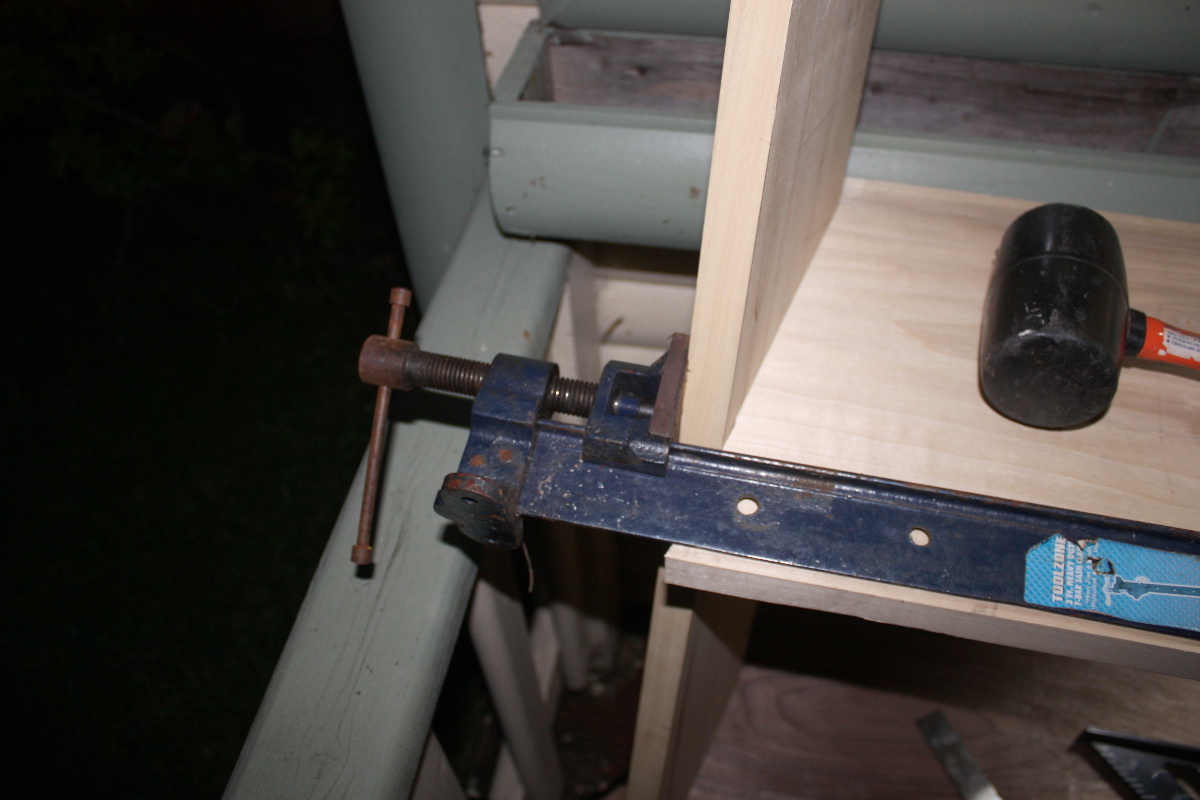
Rather awkward to put together (and those clamps are the largest I have, they were comfortably large enough to make the workbench with padding on the clamps and still they only barely make it).
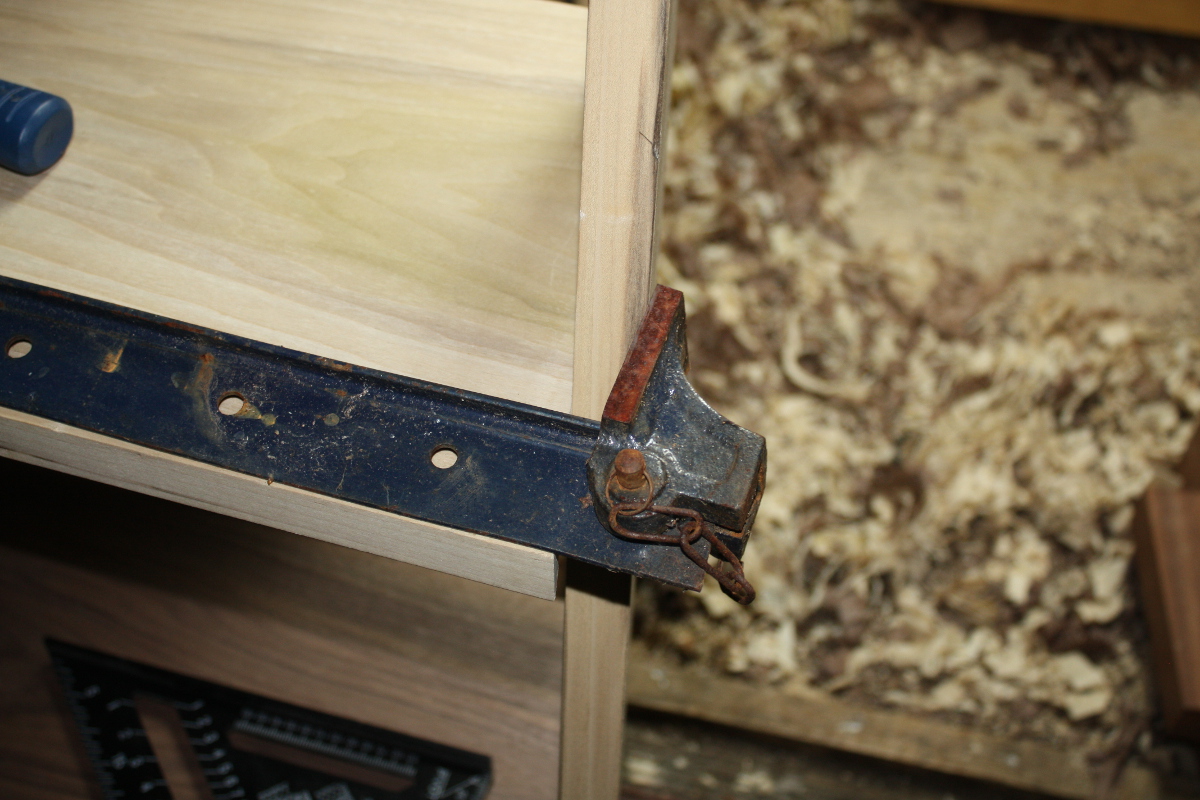
That’s going to dent the outside corners of the edges, but that’s okay, they’ll be shaped to a round profile and those corners are coming off anyway. I will need to take the angle grinder and flapdisk to the clamps though, they’ve been “stored” outdoors for some time and the rust is criminal (don’t judge me, there was noplace else to put them and the job of rehabbing them has been on the list for a while now).
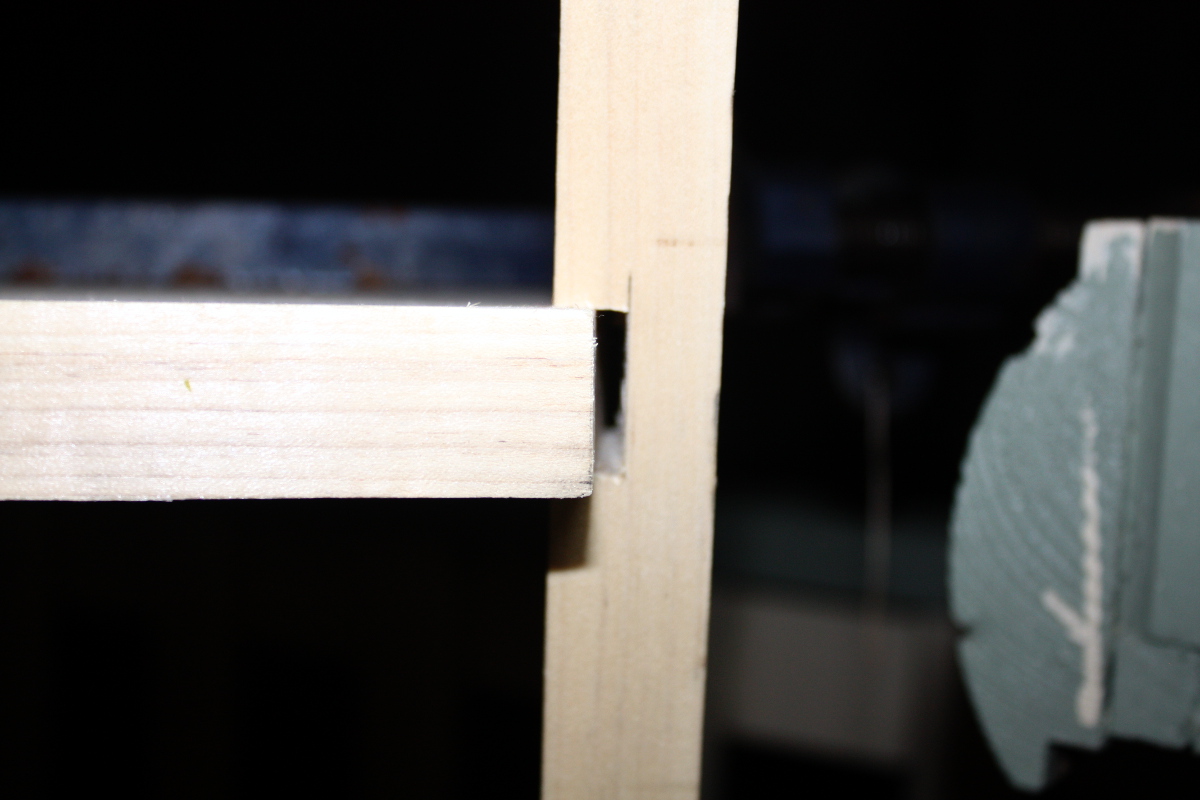
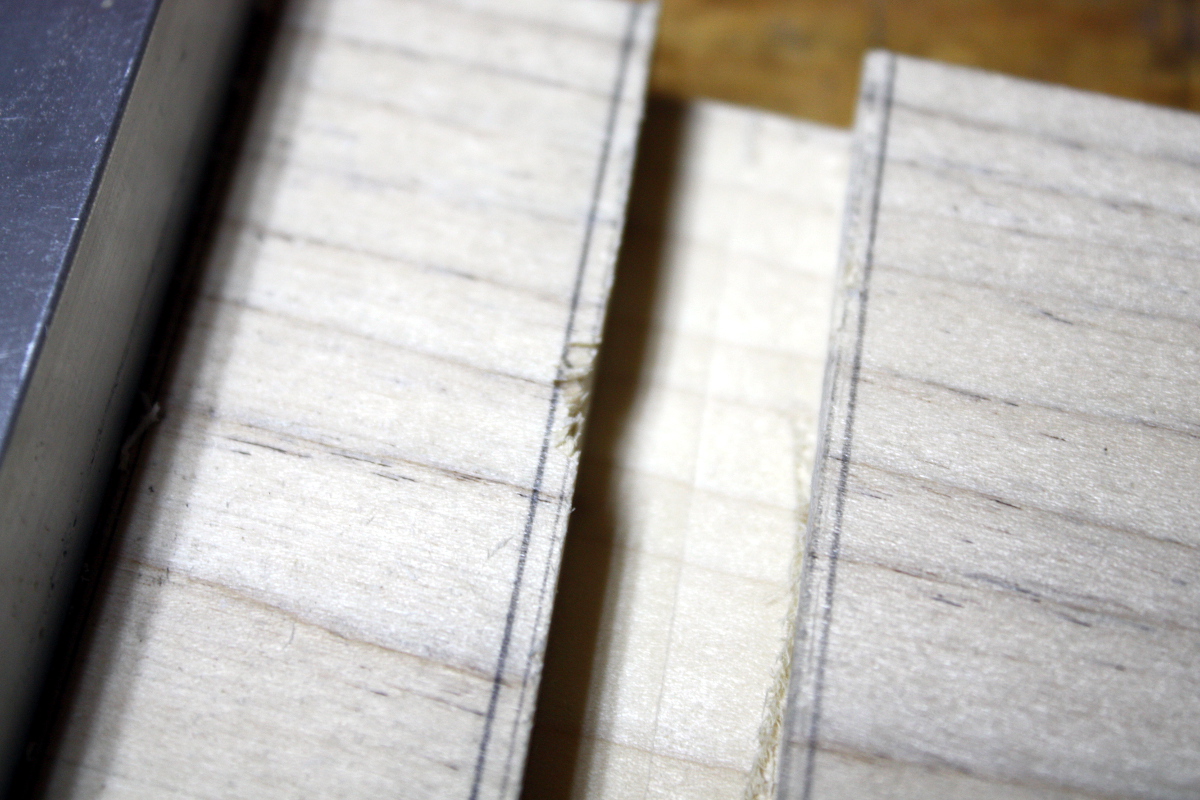
More worryingly, the housing joints don’t fit very well…
And as a result, the sides are pushed out of true.
I mean, the fix for that is pretty straightforward (fettle the joints) but it’s going to be a bit of a pain disassembling and reassembling the whole carcass. But, once that is done, I can get on with cutting the dovetails for the top shelf, and once that is done, I can take the whole thing back to pieces again and trim the left side’s foot (it’s a mm long, which might well get hidden by the carpet, but it’ll annoy me…) and then there’s a long bout of inlay work and shaping before the final assembly and glue-up and finishing process.
And then I’m doing small stuff for a while. This building furniture that won’t fit through the door nonsense is a pain in the fundament.
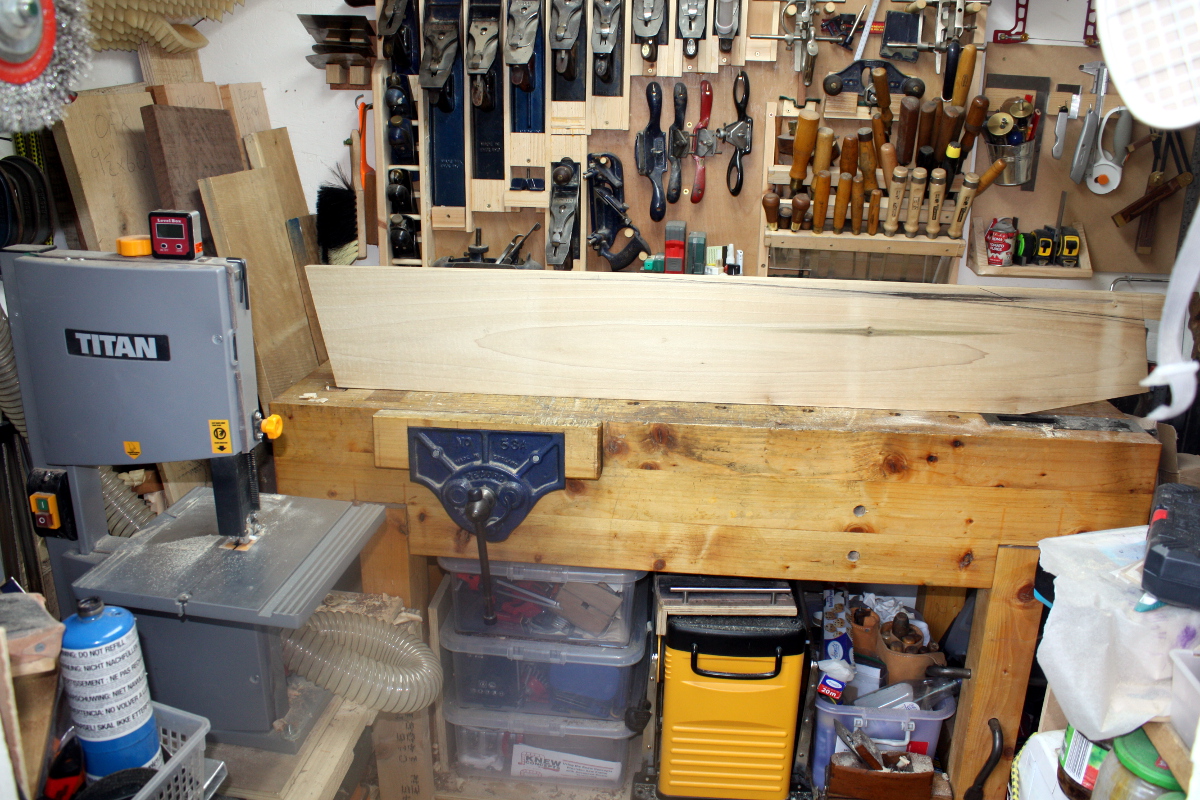
So the last time I worked on the desk wasn’t as far back as October, but I didn’t get a chance to write it up (work has been a tad busy and other stuff has also been eating time). But with xmas dinner done, holidays finally kicked in for me and after collapsing for a few fallow days, I got back out to the shed in the last day or so. And managed to avoid breaking my neck on the decking outside the shed as well (some anti-moss napalm has been deployed and I’ll have to repaint that decking with some sort of high-traction paint before any really cold weather hits I think, and possibly drill a few sneaky drainage holes against standing water).
So in previous days, I got the dovetail mortice cut on the sides, using my normal technique for a stopped dado joint, which is to chop a small mortice at the point where the dado stops (so the saw has somewhere to go, though I wonder if a stair saw would solve that). It’s a bit complicated here by the line of the grain not lining up with the dado angle very well, but it wasn’t unmanageable. Then out with the ryoba and very carefully sawing down the edges of the dado. Cutting on the pull here helps a lot, but the japanese saws not really wanting to track on a flat surface doesn’t (western saws I think would be happier as they have thicker plates, but all of mine hate me and won’t work for me at all). So in this case I chopped along the line with a chisel and cut a little knife wall to help guide the saw, then sawed down to depth once the cut was deep enough to let the saw blade track.
With the edges cut down to depth, out comes the chisel and I hog out the bulk of the waste pretty quickly, then switch to the router for the last one or two millimetres of depth. Not the powered one, the one that actually likes me.
Then just repeat that for the other side, being sure to mirror image rather than carbon copy…
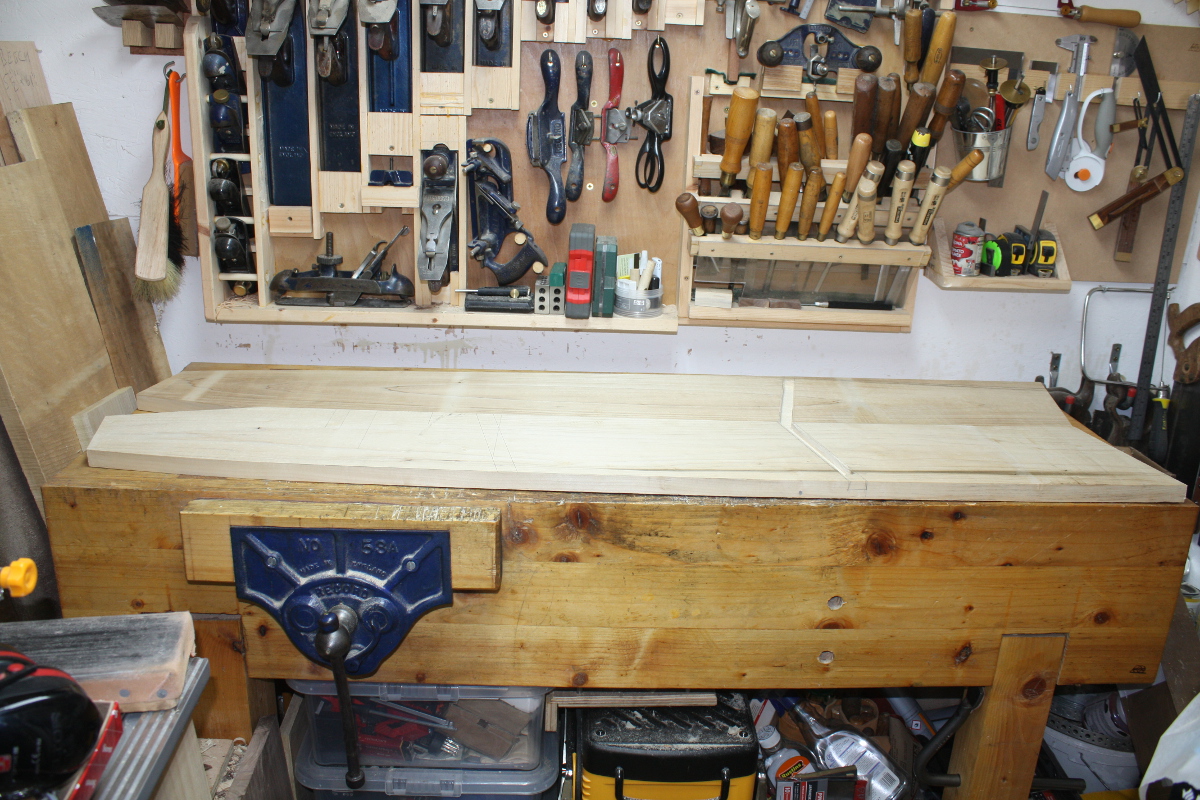
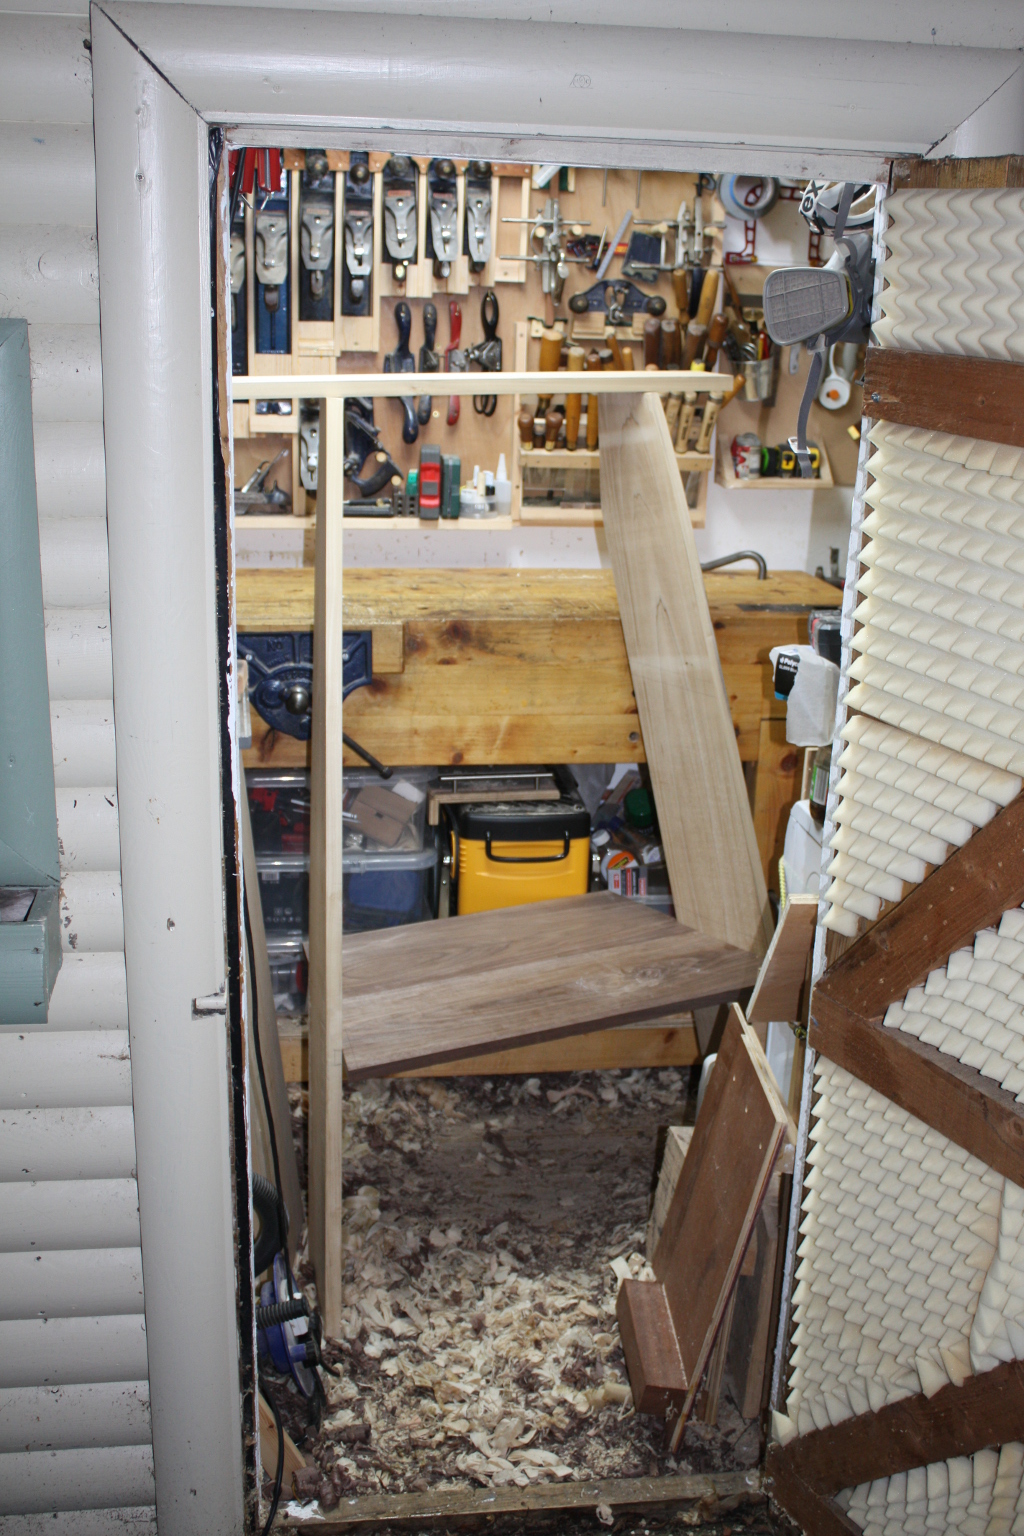
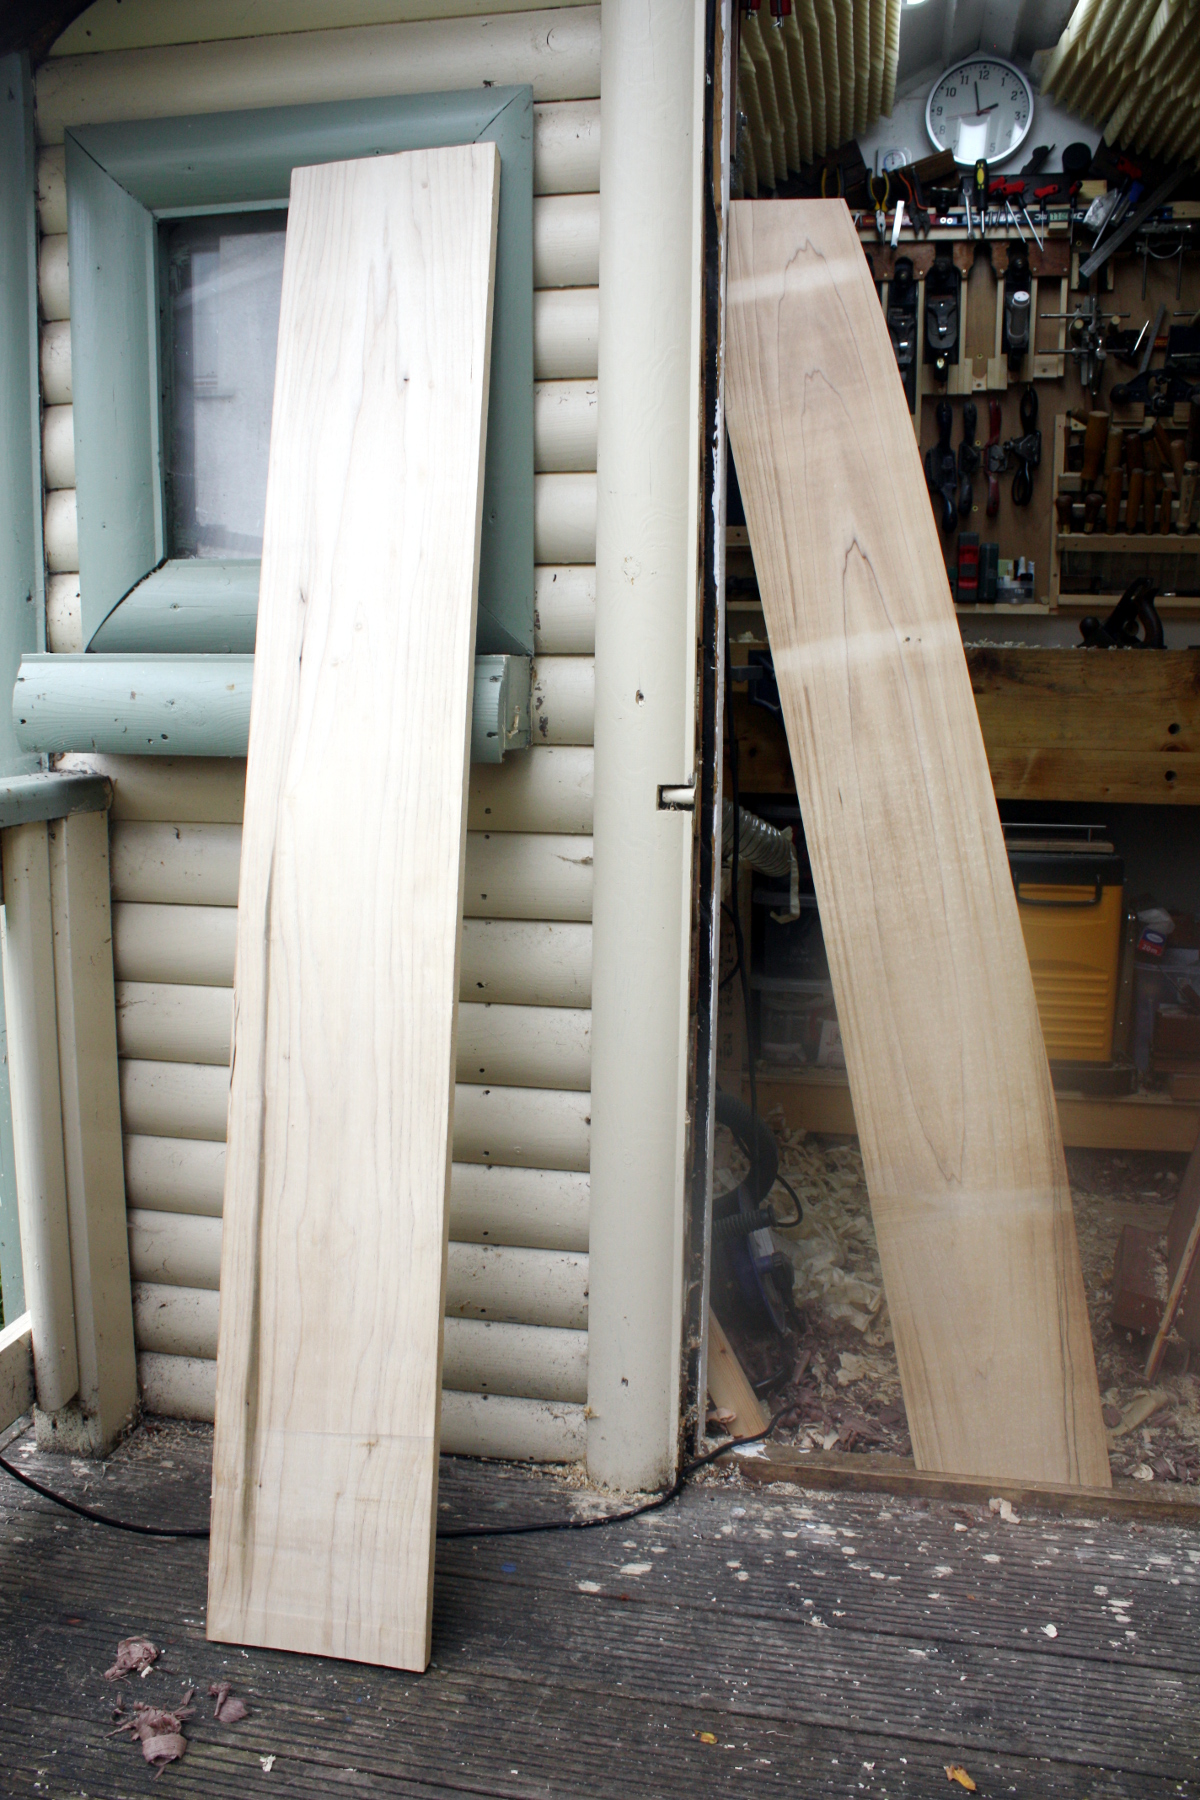
This project is right out at the size limit for my shed by the way, if not well past it…
So now I had two dados cut, both of which are as narrow as the minimum width of the dovetail (the bit at the shoulder where the joint is thinnest), so now I had to remove the last bit of waste to form the dovetail. However, after watching some of The Woodwright’s Shop (one of PBS’s gems) I thought I’d just make one side of the dado into a dovetail instead of both. I mean, if it works for Roy…
So, I clamp a straightedge in place to both hold the side and give the router something to run against, fit the dovetail bit, don all the PPE, triplecheck where my fingers are, and I fire it up and make the cut.
And it didn’t come out too terribly. I mean, it’s not pretty, but there’s a noticeable lack of severed and mangled body parts in the cut, which I’m a fan of.
Okay, so just repeat for the other side and…
…promptly forget which way the blade is spinning and that this is a mirror not a carbon copy, and that I’m now climb cutting without being ready for it and the fecking thing actually jumps for my face.
Enough with routers, I say. Stupid things. Anyway. It’s done. The joint mortices are cut. And feck setting up a router table to cut the male part of the joint, I’m done with that sodding tool for now. And in fact, that was the last time I got to work in the shed from then until this week, which is when the rest of this all happened.
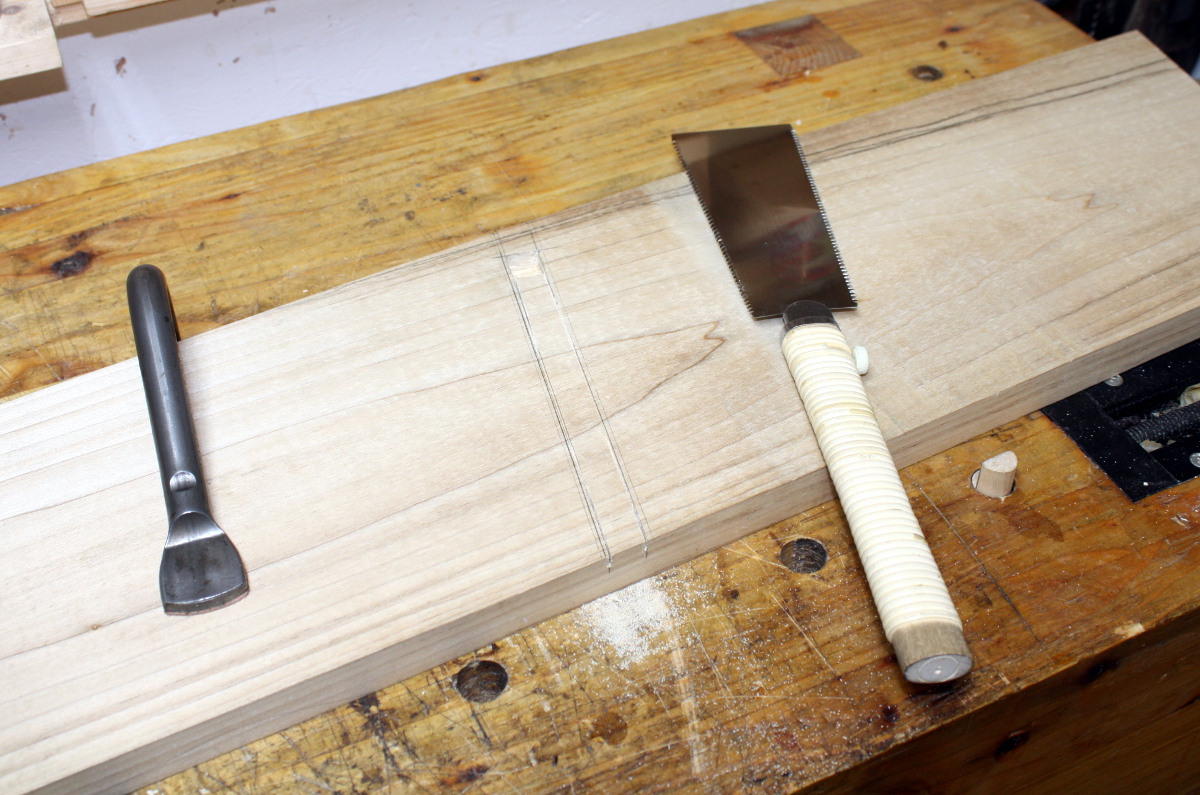
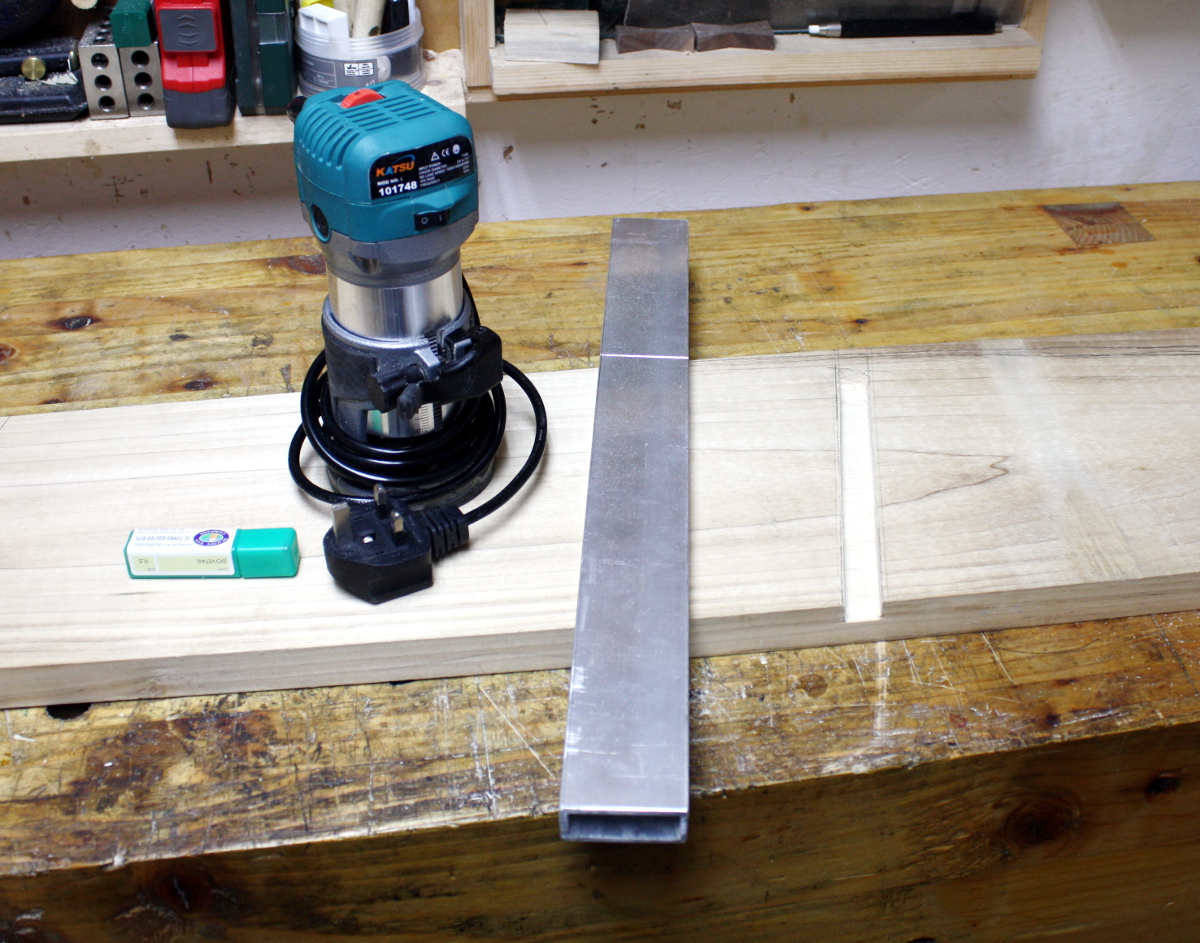
Right, so I have to cut the edges of this now to let it be driven into the sides with the male part of that dovetail joint, but it also has to protrude out the back far enough to almost reach the wall it’s leaning against. So there was a bit of footering about to get measurements and scribe lines and so on, but finally I got that sorted.
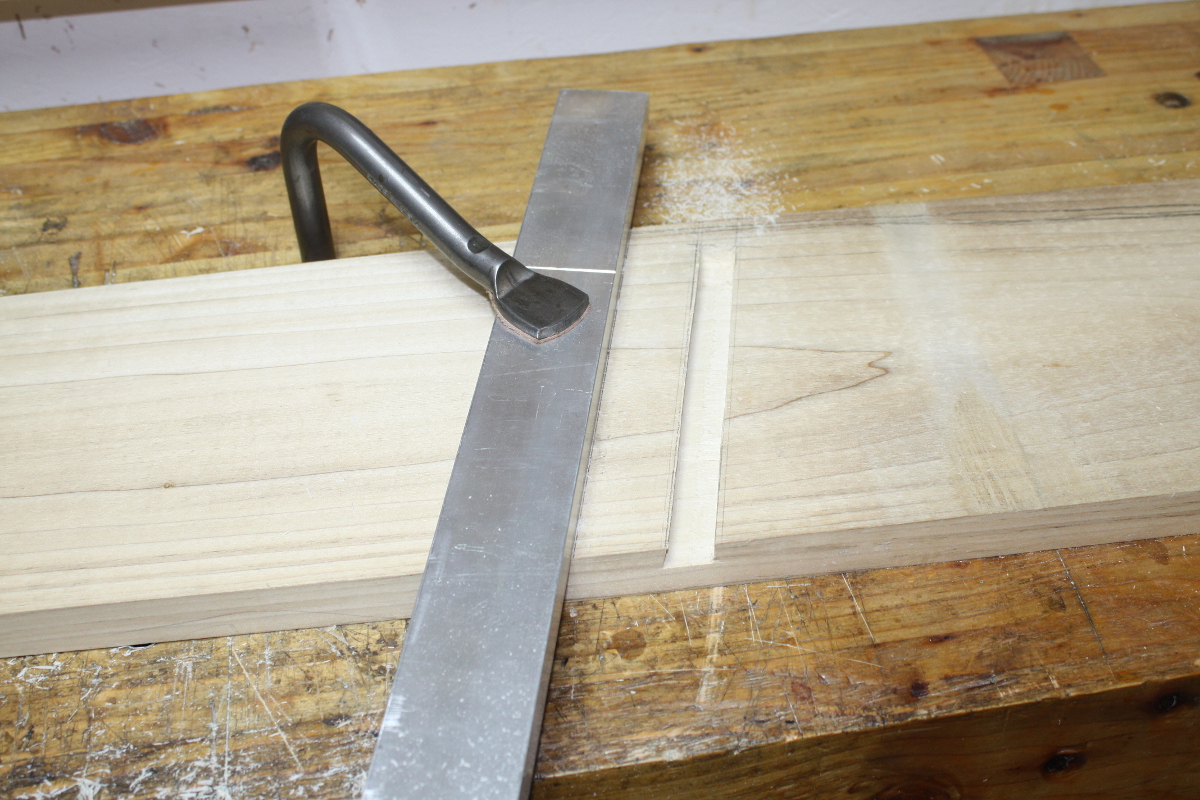
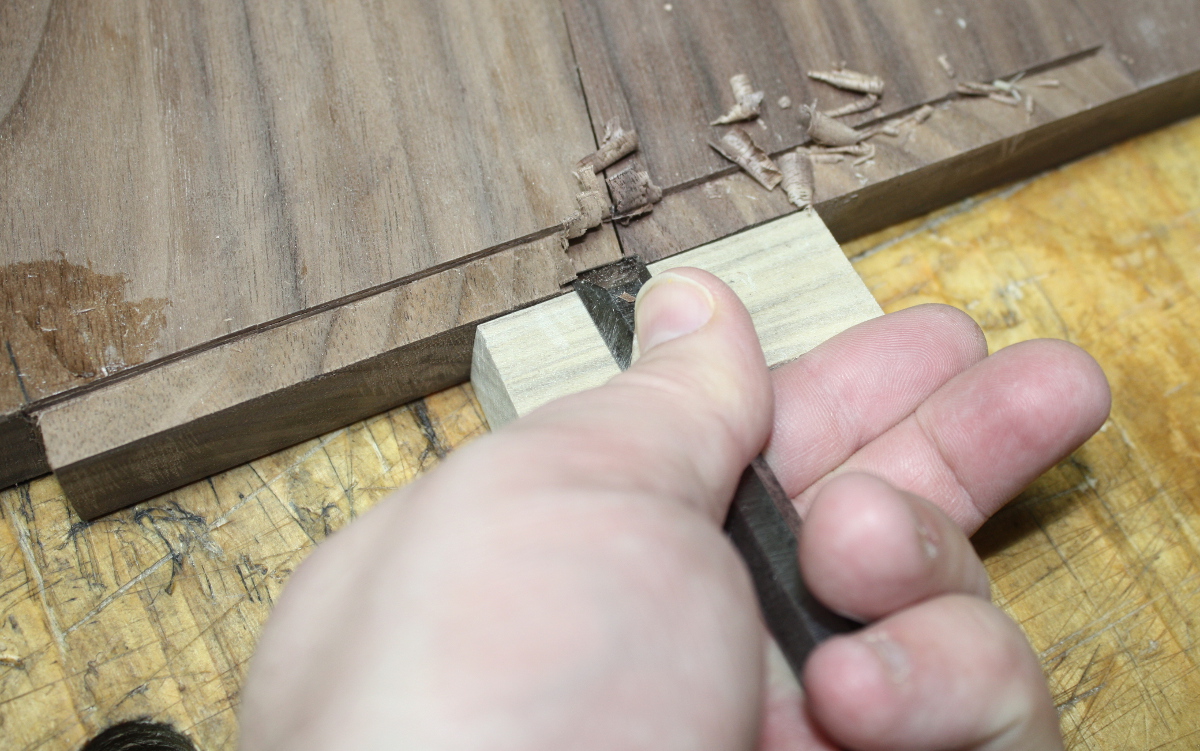
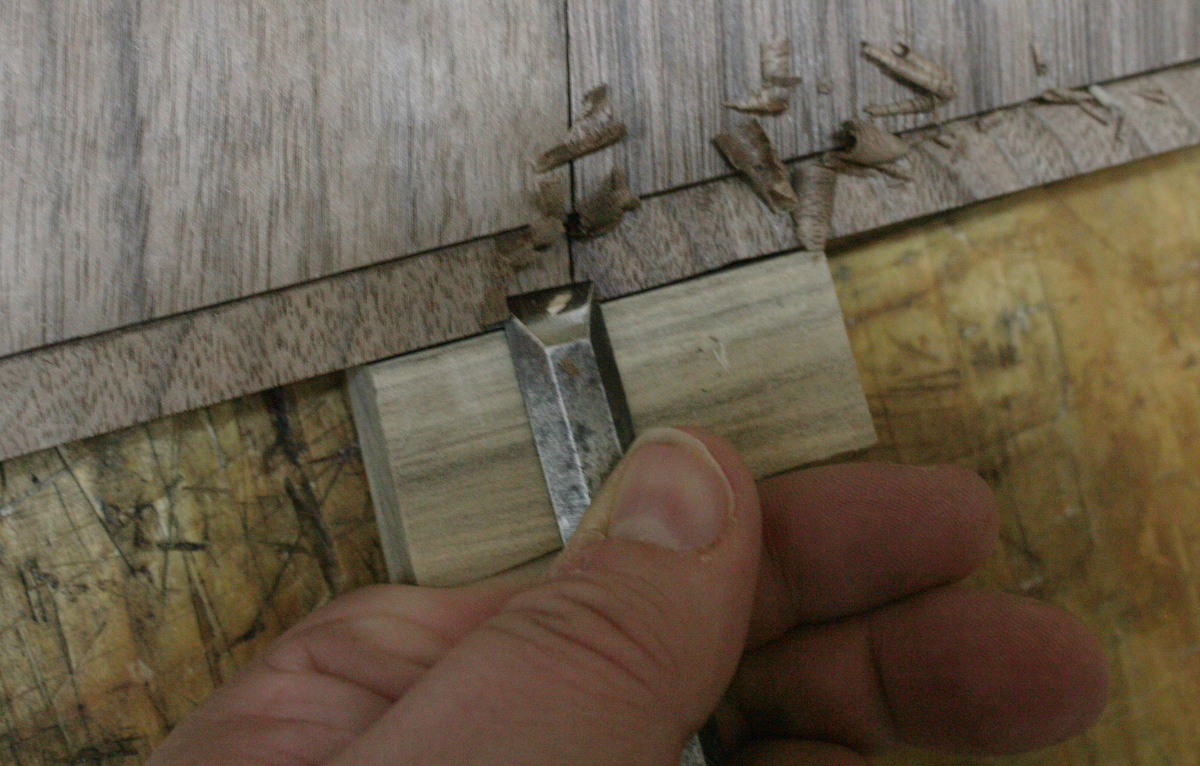
Next up, cutting the dovetail part of the joint. I measured the router bit’s angle, set a bevel to that angle, then planed a scrap offcut from shaping the sides so that its edge matched that angle relative to a face.
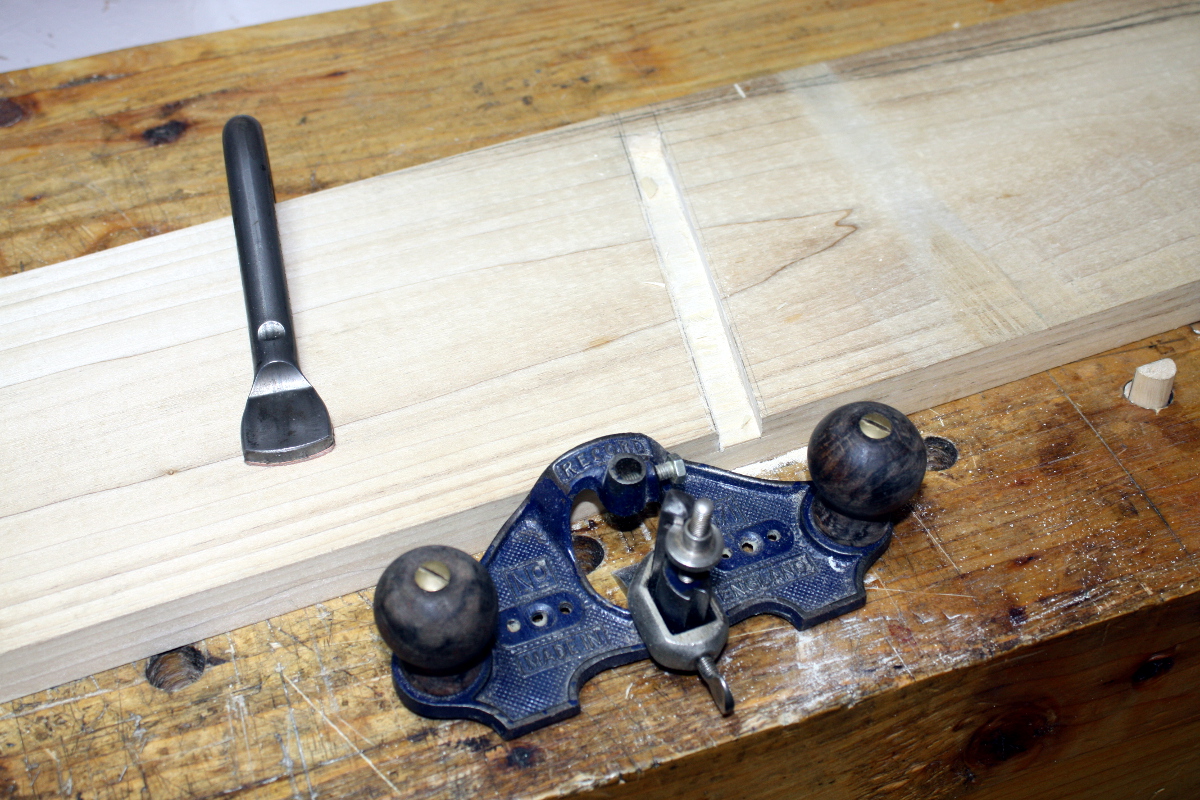
And now I had a paring guide for a chisel. Next I pared out the dovetail along the joint.
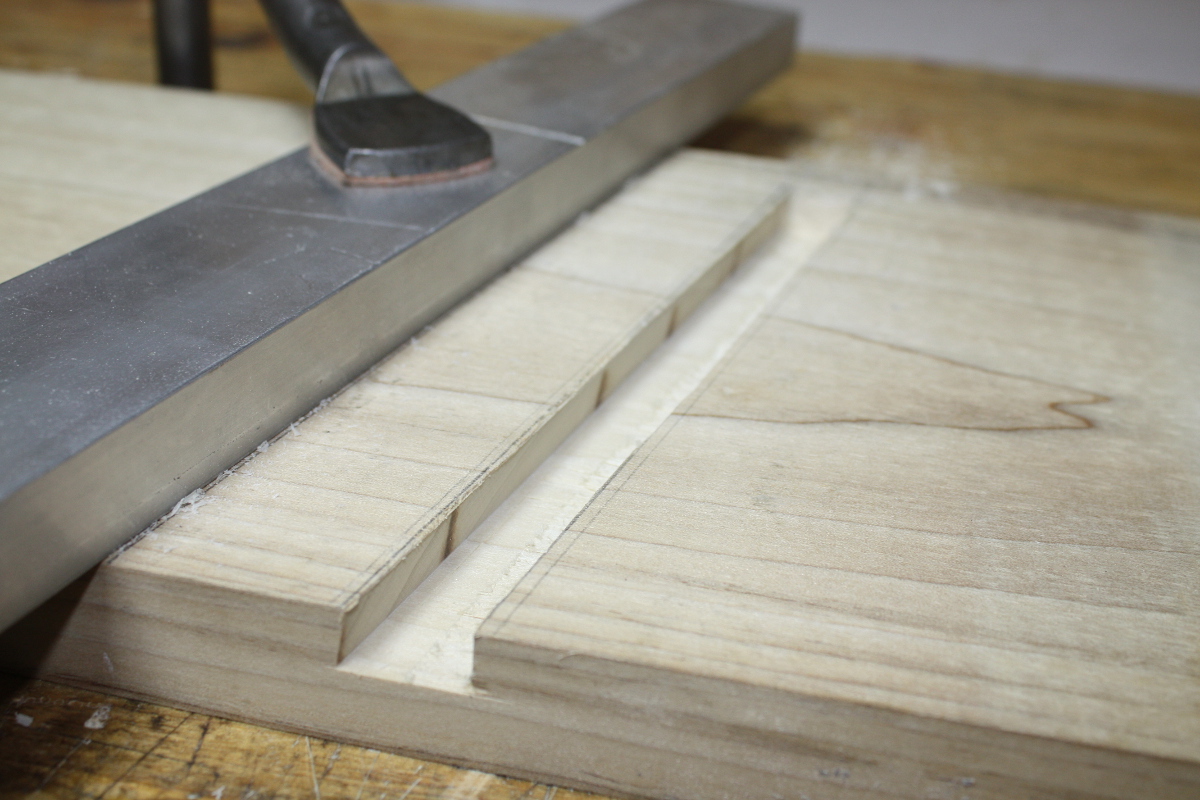
The back end of the paring guide is up off the bench, with pressure from my index finger holding the angled edge flat against the edge of the desk, which puts the face of the paring guide at the right angle; then I slowly pare away, nibbling at the cut on the second pass, which is when I put a shim under one side of the desk so as to angle the board and thus give me a sliding stopped dovetail joint.
You can see, with the shim under one side (and the other side held down by holdfast), the paring block naturally carves a sliding dovetail shape.
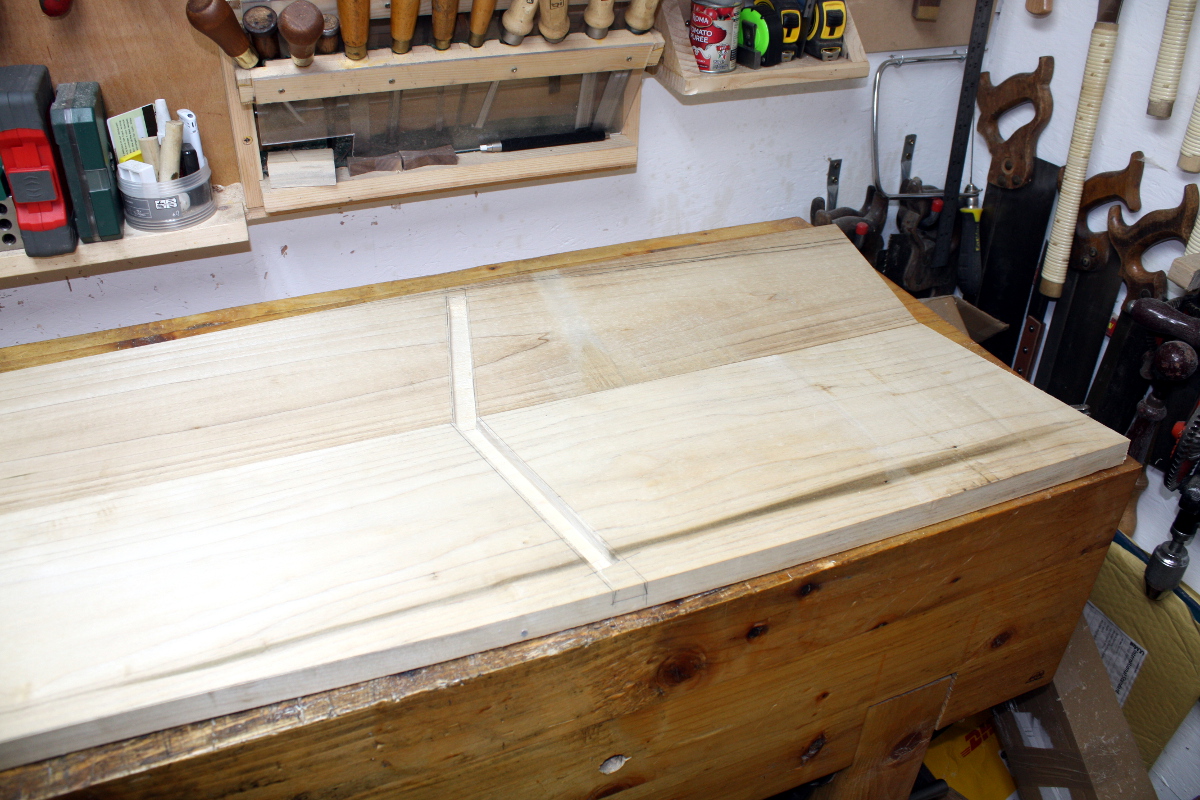
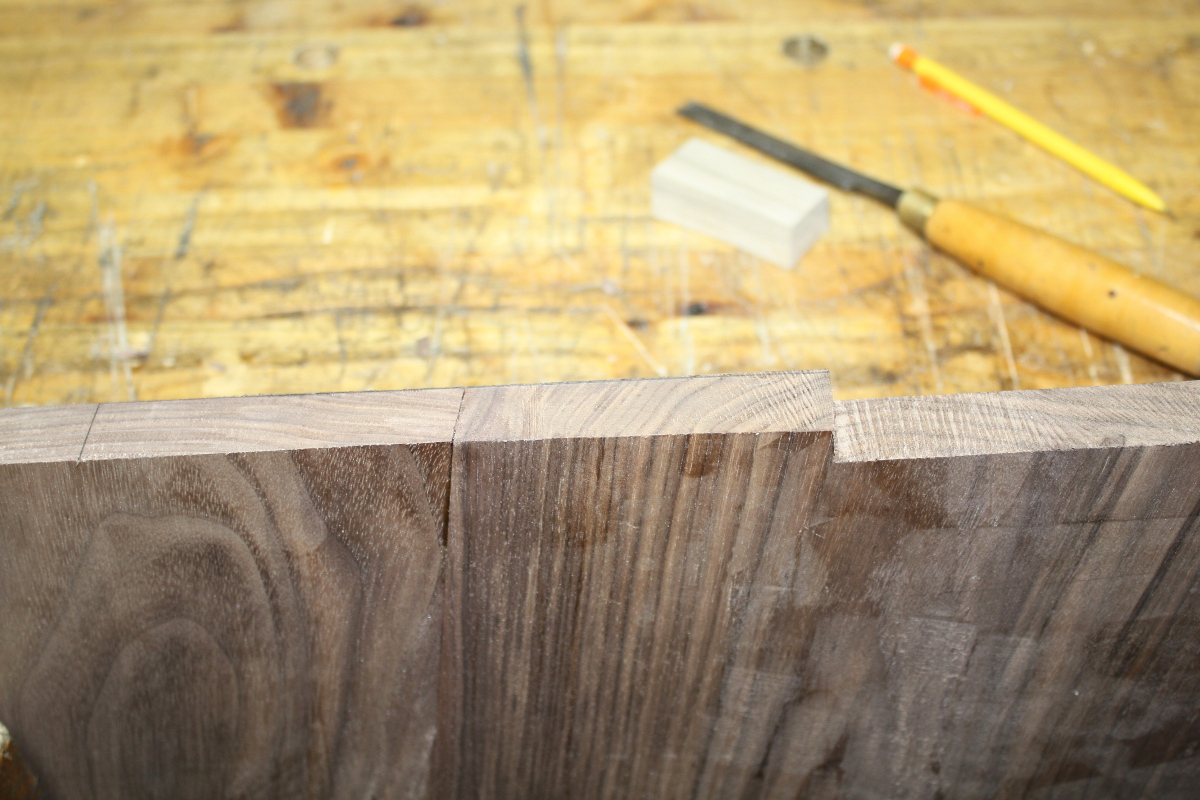
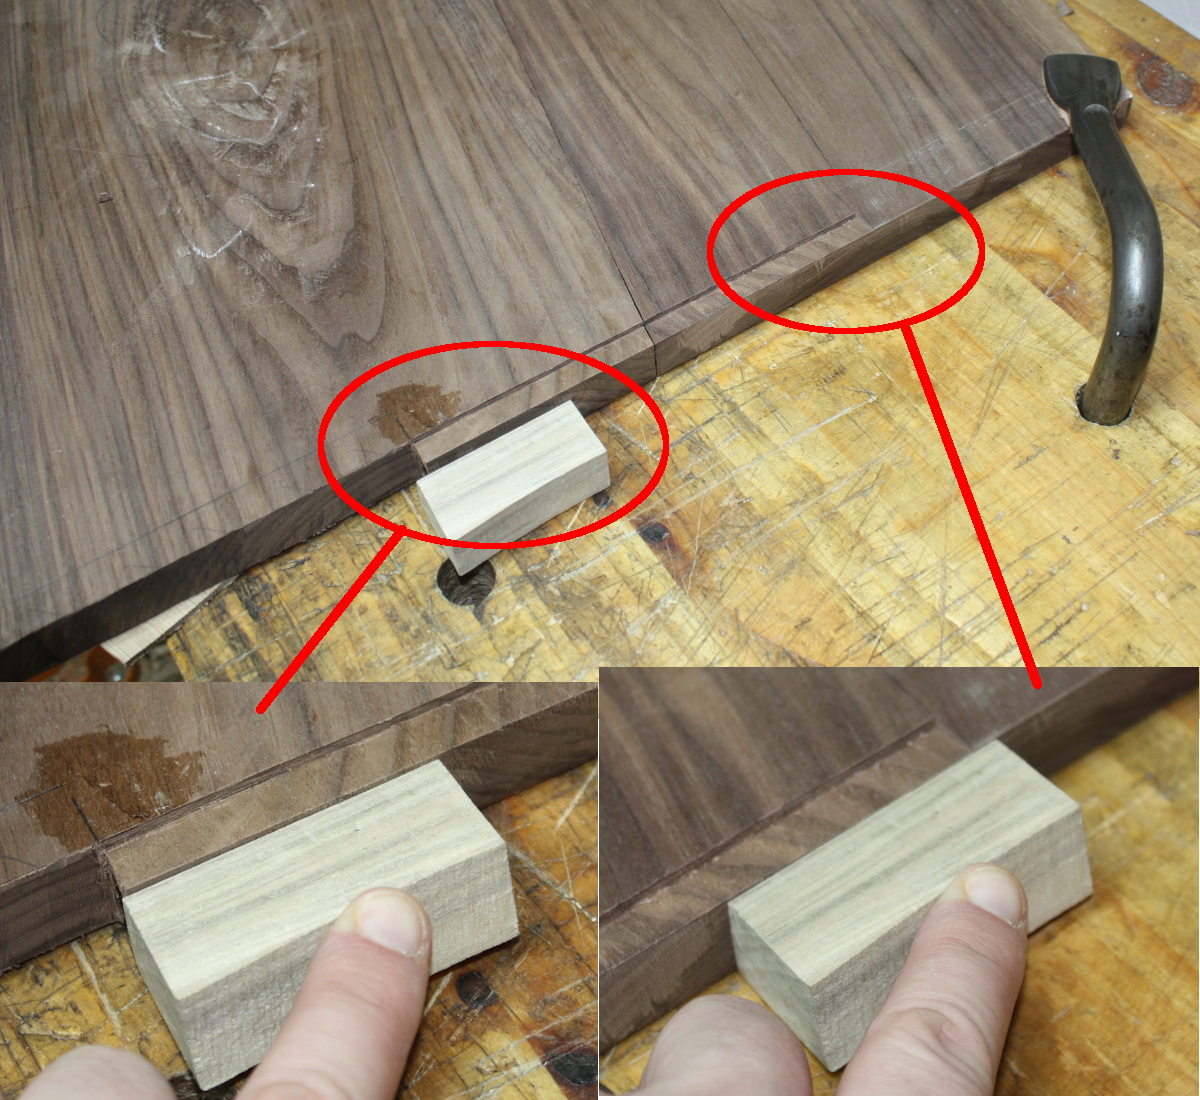
And then I did a test fit and of course it didn’t fit at all 😀 So I trimmed the vertical edge of the dado a few times and eventually got a nice solid fit. And then repeated the process on the other side.
It’s not perfect, I’ve not done this kind of joint before but it works.
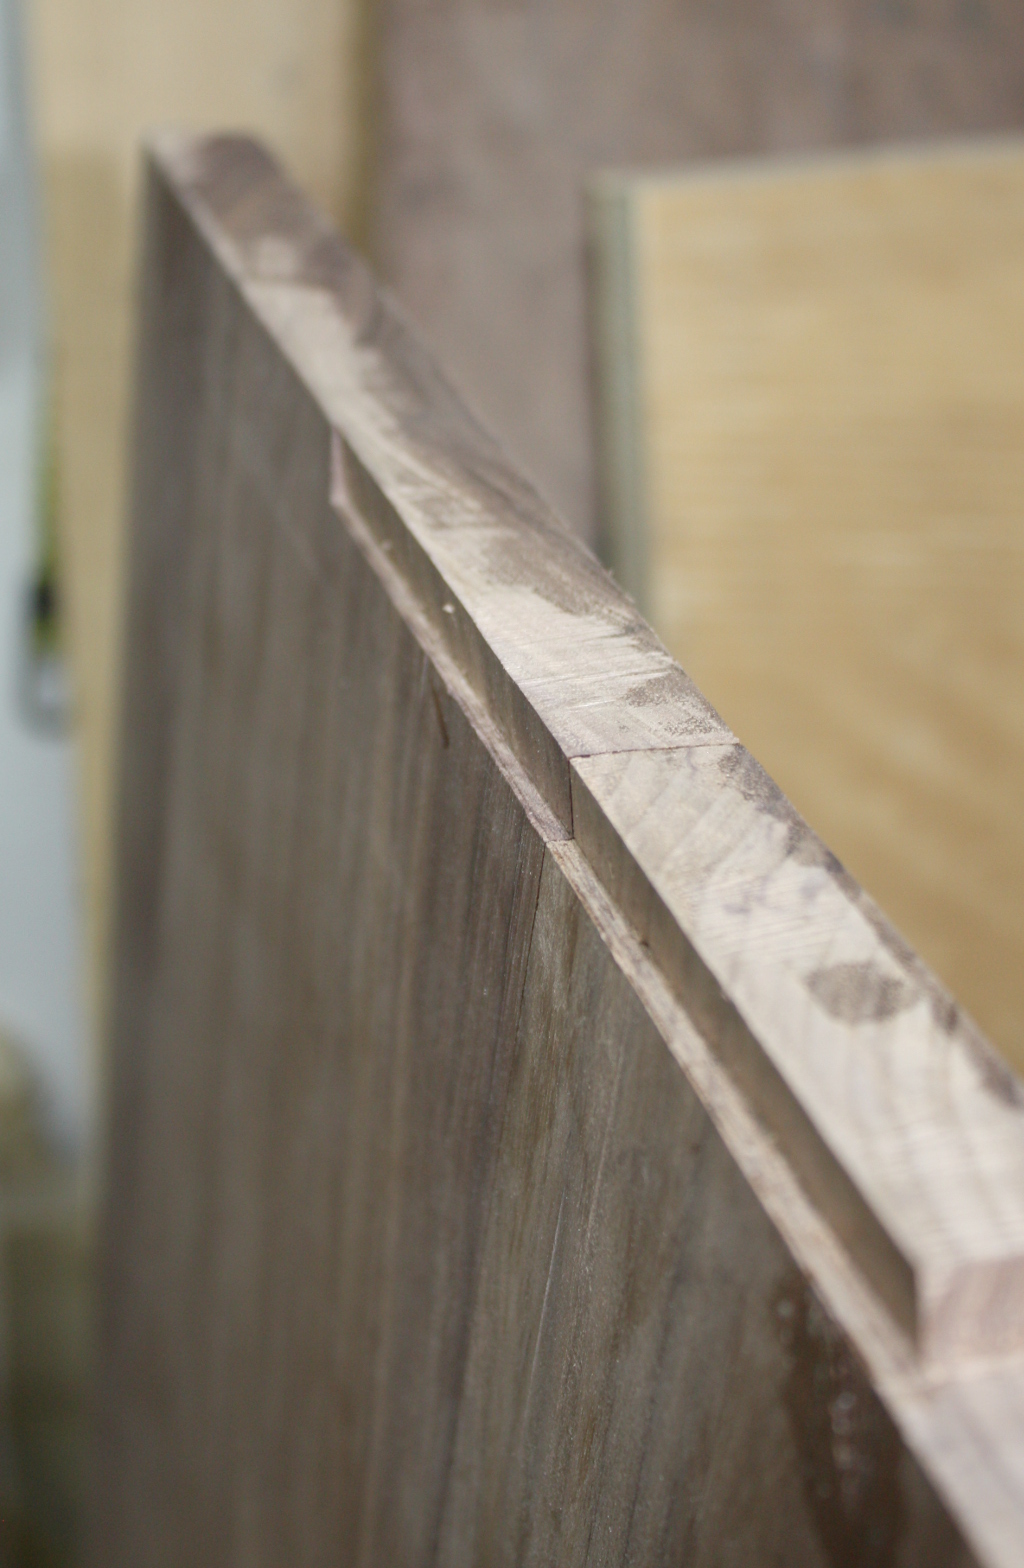
Self-supporting! And also way too big for my shed 🙁
Barely fits. Also, the joints are not yet driven all the way home there. It’s a solid fit, but it’s a little tight still (I have yet to finish plane the sides or the desk and I expect that to loosen things a little). And I have to scribe the angles for the top shelf yet, which will be dovetailed in because I hate myself.
Scribing it won’t be a major hassle. Cutting the dovetails while the joints are loose however, isn’t a great idea because the shoulder to shoulder distance varies as the joints get driven home. I might well cut one side’s dovetails, leave the bevel set for the other side and not cut that until closer to final assembly which will be a tad finicky but less so than trying to cut both and then undoing the joints, I suspect. Or maybe I’m wrong about that.
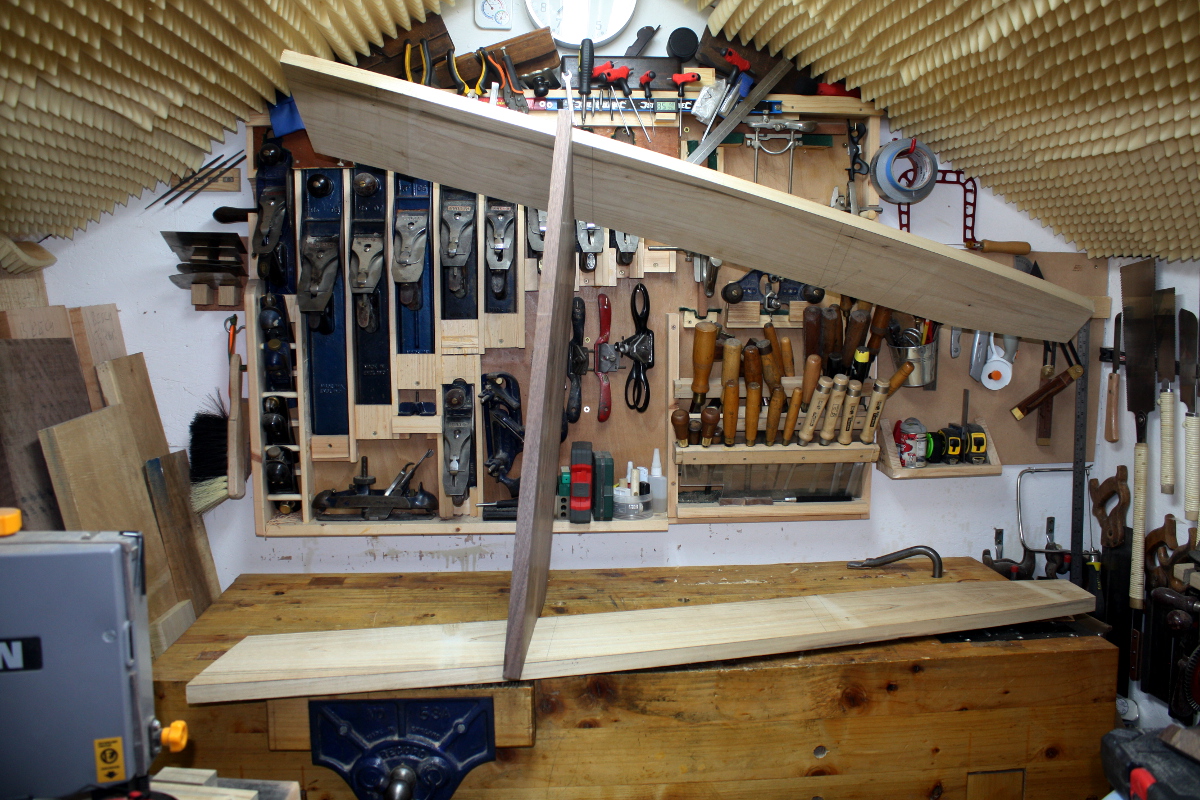
Either way, I suspect the bigger issue is going to be space to work…
And to think I was pondering putting a lathe in here. I mean, I still am (I got a lot of woodworking gift vouchers for The Carpentry Store over the solstice) but I have no idea how I’d get it in there without freeing up a lot of space (and one of those vouchers was for The Timber Yard so there’s even more timber to go in there soon as well).
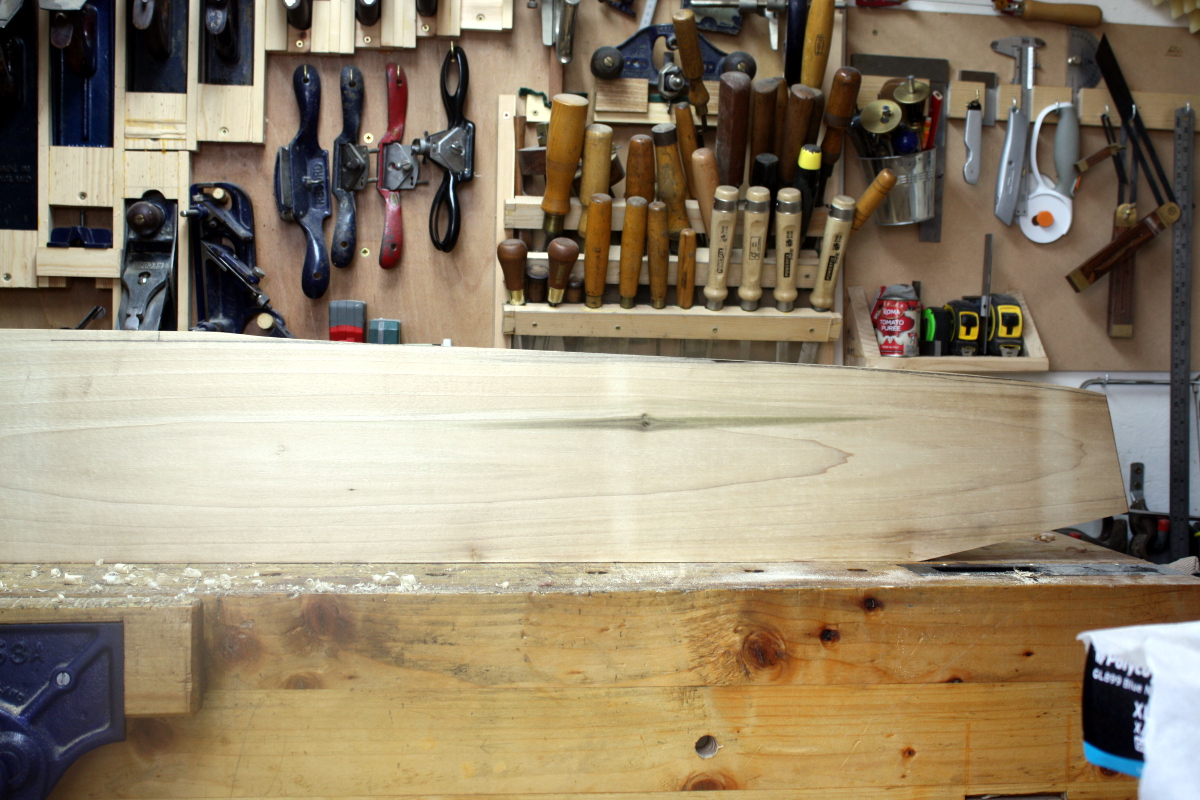
So I decided to go ahead and shape the front curve today, since it was going to be awkward to cut and might be noisy so it’d have to be a weekend job really.
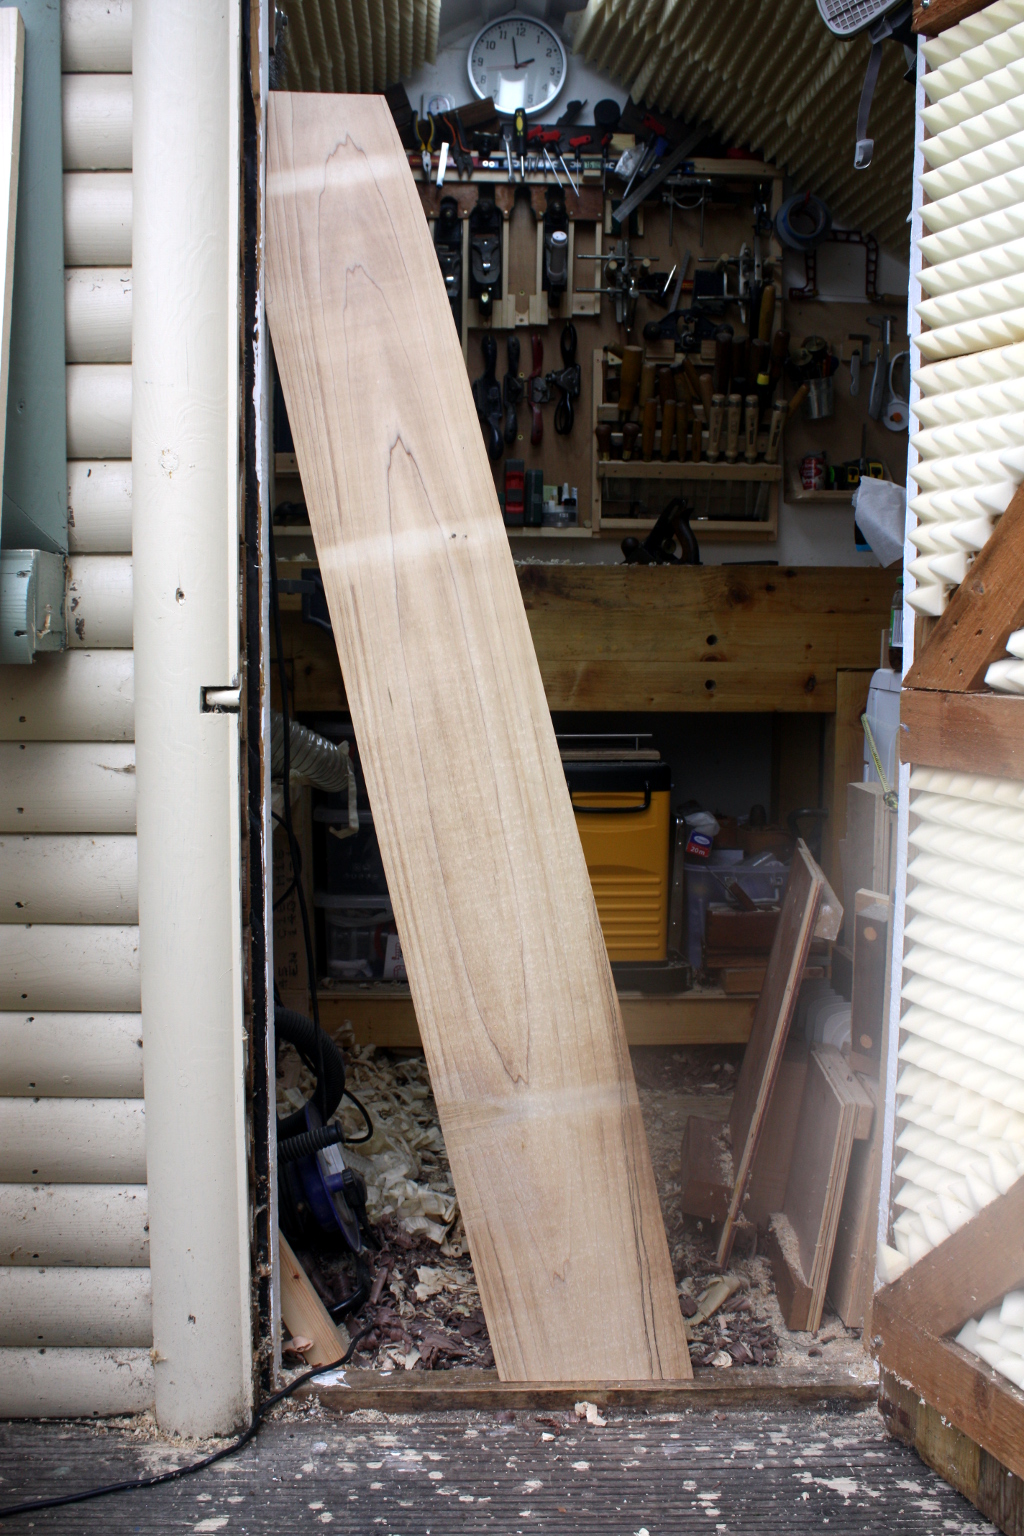
Why is it awkward? Well, the plan is to make the first rough cut with the bandsaw and then to get down to the line with the compass plane and the board is long enough that swinging it around through the bandsaw inside the shed would be awkward and would probably need the door open and the plank sticking out at some point.
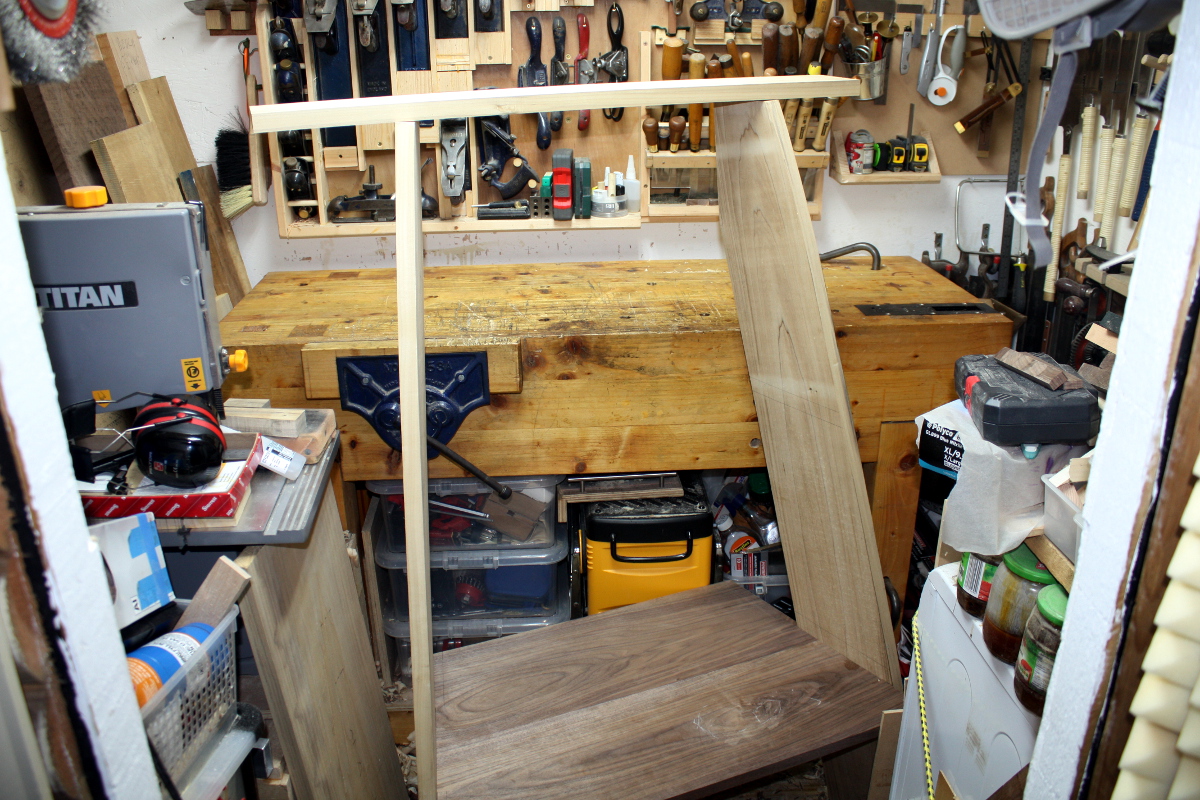
See what I mean? There’s not enough room for a cat to stand in here, let alone be swung around. But, with much swearing and cursing and with the door open and the plank sticking out for at least half the cut, it got done.
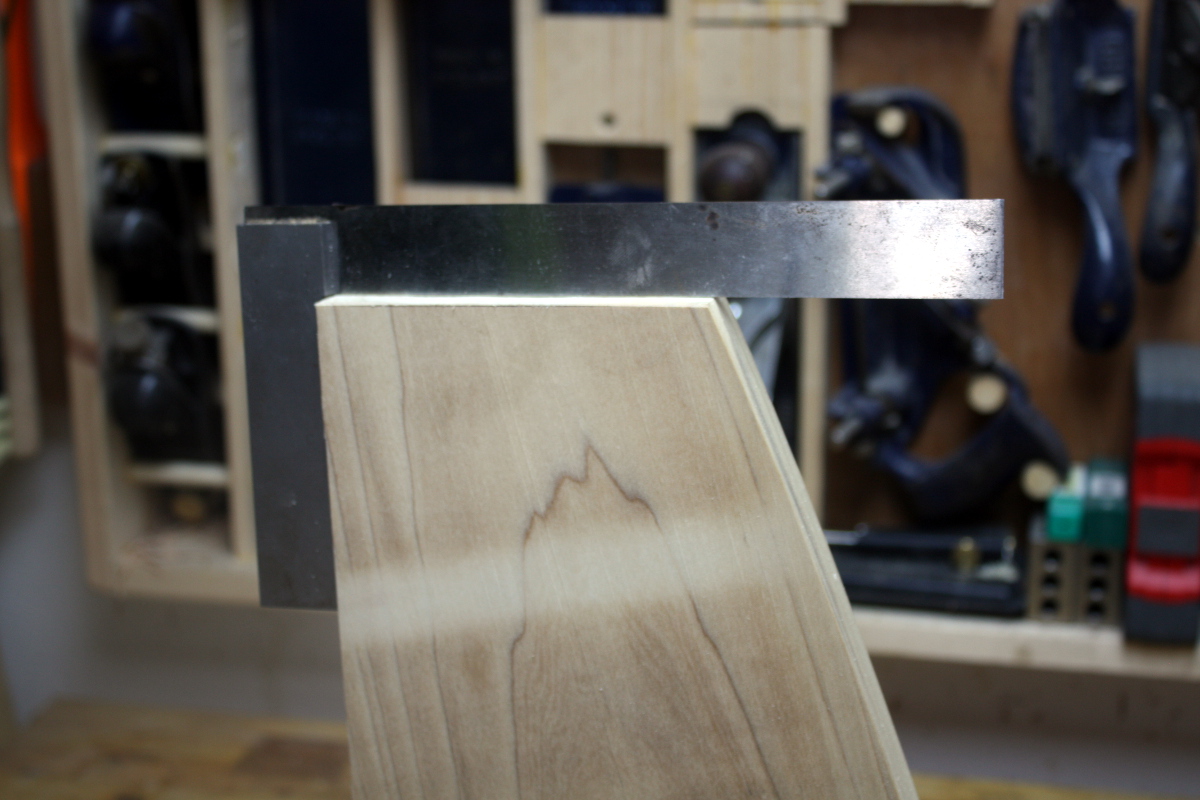
I even cut the top of the side to be parallel to the floor again while I was at it.
You will notice the artisan scalloped edge, and I’ll have you know that it takes a lot more effort to create such an artistic statement than it does to just cut a straight clean boring line.
Or something.
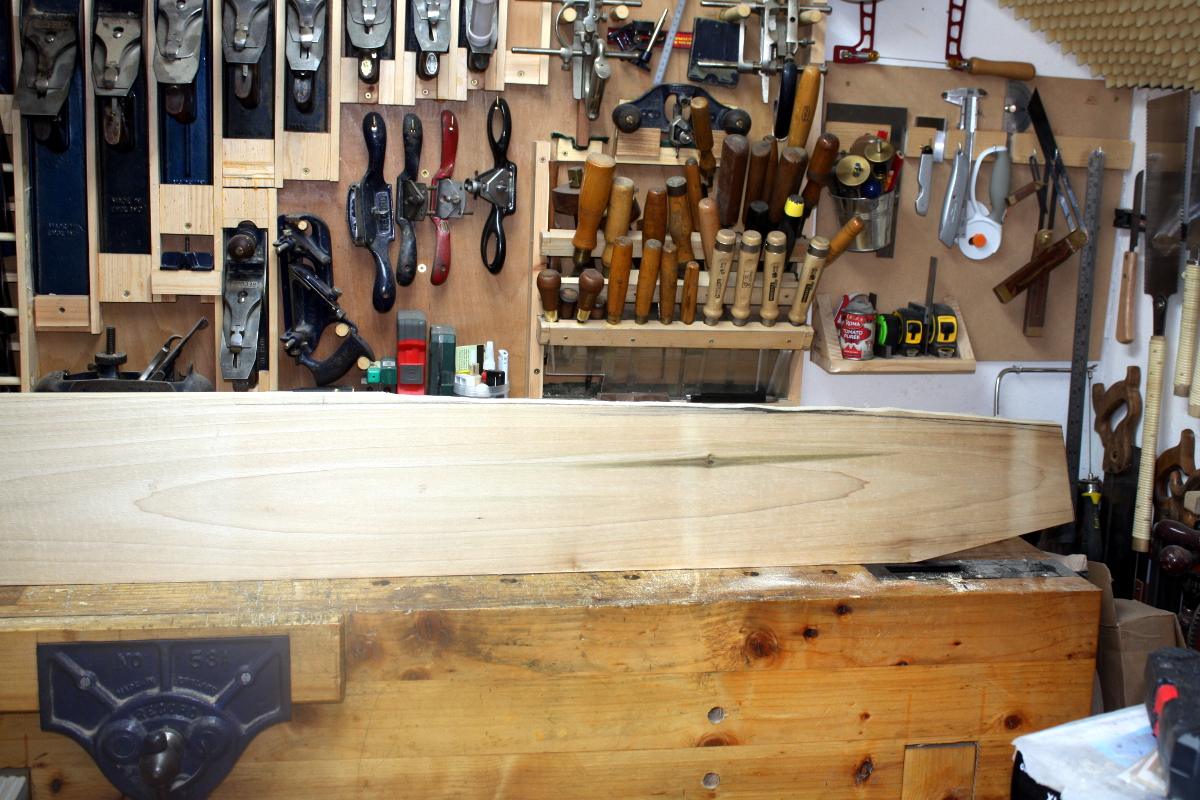
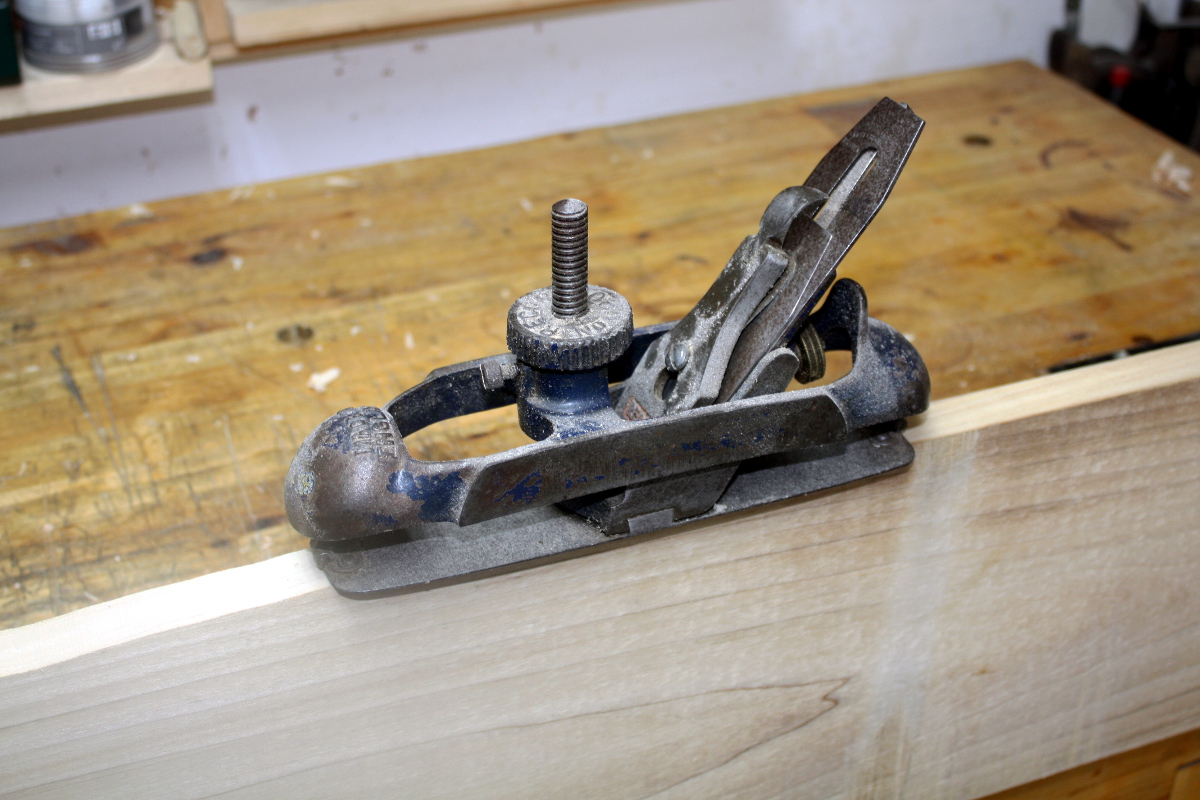
Anyway, it’s just a rough cut, so out with the #05 to knock off the absolute worst of the knobbly bits and then time for the fun tool.
The Record #020, variously known as a compass plane, a circular plane, a radius plane or a shipwright’s plane, it’s basically just a plane for curves. That big spinny dial yoke on top pulls the bit with the blade up or down relative to the ends of the sole, and the sole being flexible, takes on a curve that you can then plane into the wood. It’s a natty little tool, and while there are limits to how curved you can go, within those limits it’s great.
Mine is a little worse for wear in appearance. Everything works, I had it apart, cleaned, oiled and resharpened everything, but it’s had some light surface rust over the summer and the enamel’s long gone (and I still haven’t figured out a good way to restore that with the kit I have or can use). But anyway, it’s more than good enough to do the job and between that and the spokeshave I soon had a smooth curve instead of a decaying sine wave.
And I hate the look of it completely. The curve itself is more or less okay, I got rid of almost all that ugly damaged bit, but that little flare-out at the point where the desk will be just doesn’t work. It looks wrong in several different ways. So I ran the plane over the entire edge to get a nice single smooth curve instead of that little flare-out.
I’m more or less happy with this. I was thinking of making that curve into a bow rather than a sweep, so that the front edge would be almost vertical at the foot (that’s what those black lines there are for, they’re not spalting even though they’re following the grain line, I was just trying to see what it would look like). I’m not sure about this though. I’m worrying about the width of the sides and the strength of the piece if I start hacking off that much, but I might just be getting paranoid.
Anyway, I’ll leave it at that for now and maybe think about it again later before I cut the sliding dovetails (which will be the point of no return for the shaping I think). Next job, start to transfer the shape from this side to the other one…
I’ve already gotten the foot done (and it matches its counterpart well) and a reference edge planed on the back edge, but I haven’t finished the top straight-line cuts yet and then there’s the second front edge to shape. That should be interesting. I haven’t changed the compass plane’s setting so in theory it’s going to be grand…
So, four weeks into being bombed flat with the old heads of state assassinated, Iran fires at Diego Garcia, with a weapon that's got twice the range anyone thought they [...]
Like, jaysus. You're literally selecting for engineers whose parents didn't tell them they were loved and who developed deep-seated mental health issues as a result, so that you can burn [...]
Watching companies advertise jobs as "996" is so fucking infuriating. It's illegal in most of the world (even in China, where it started) and it doesn't actually work *and* it's [...]