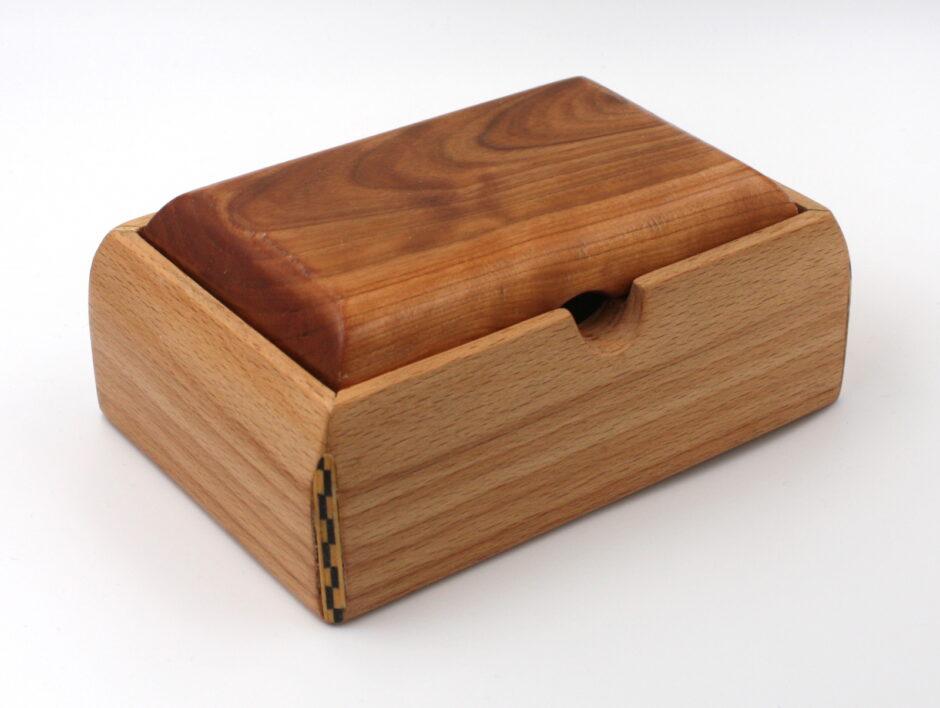
Been a lot of lathe work of late ‘cos it’s novel, so back to some rectilinear stuff. A friend was looking for some boxes for their favorite tarot card packs and I don’t quite get the tarot thing, but the artwork is interesting and there was a box design I’d been thinking about doing for a while…
Adrian Preda’s stuff is almost therapeutically methodical and precise sometimes. I didn’t go with walnut for the sides, and I did the base differently, but I mostly followed what he did here.
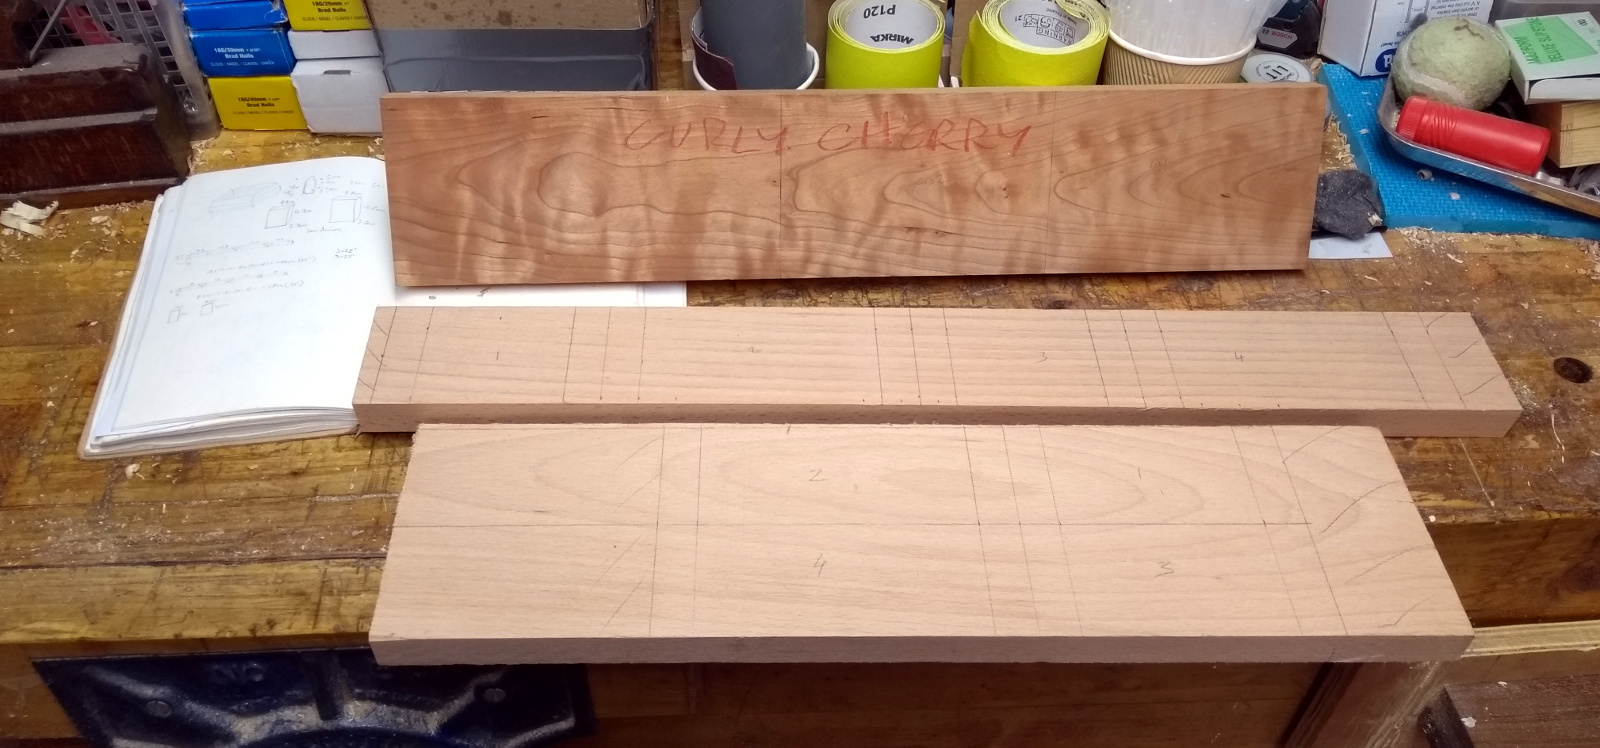
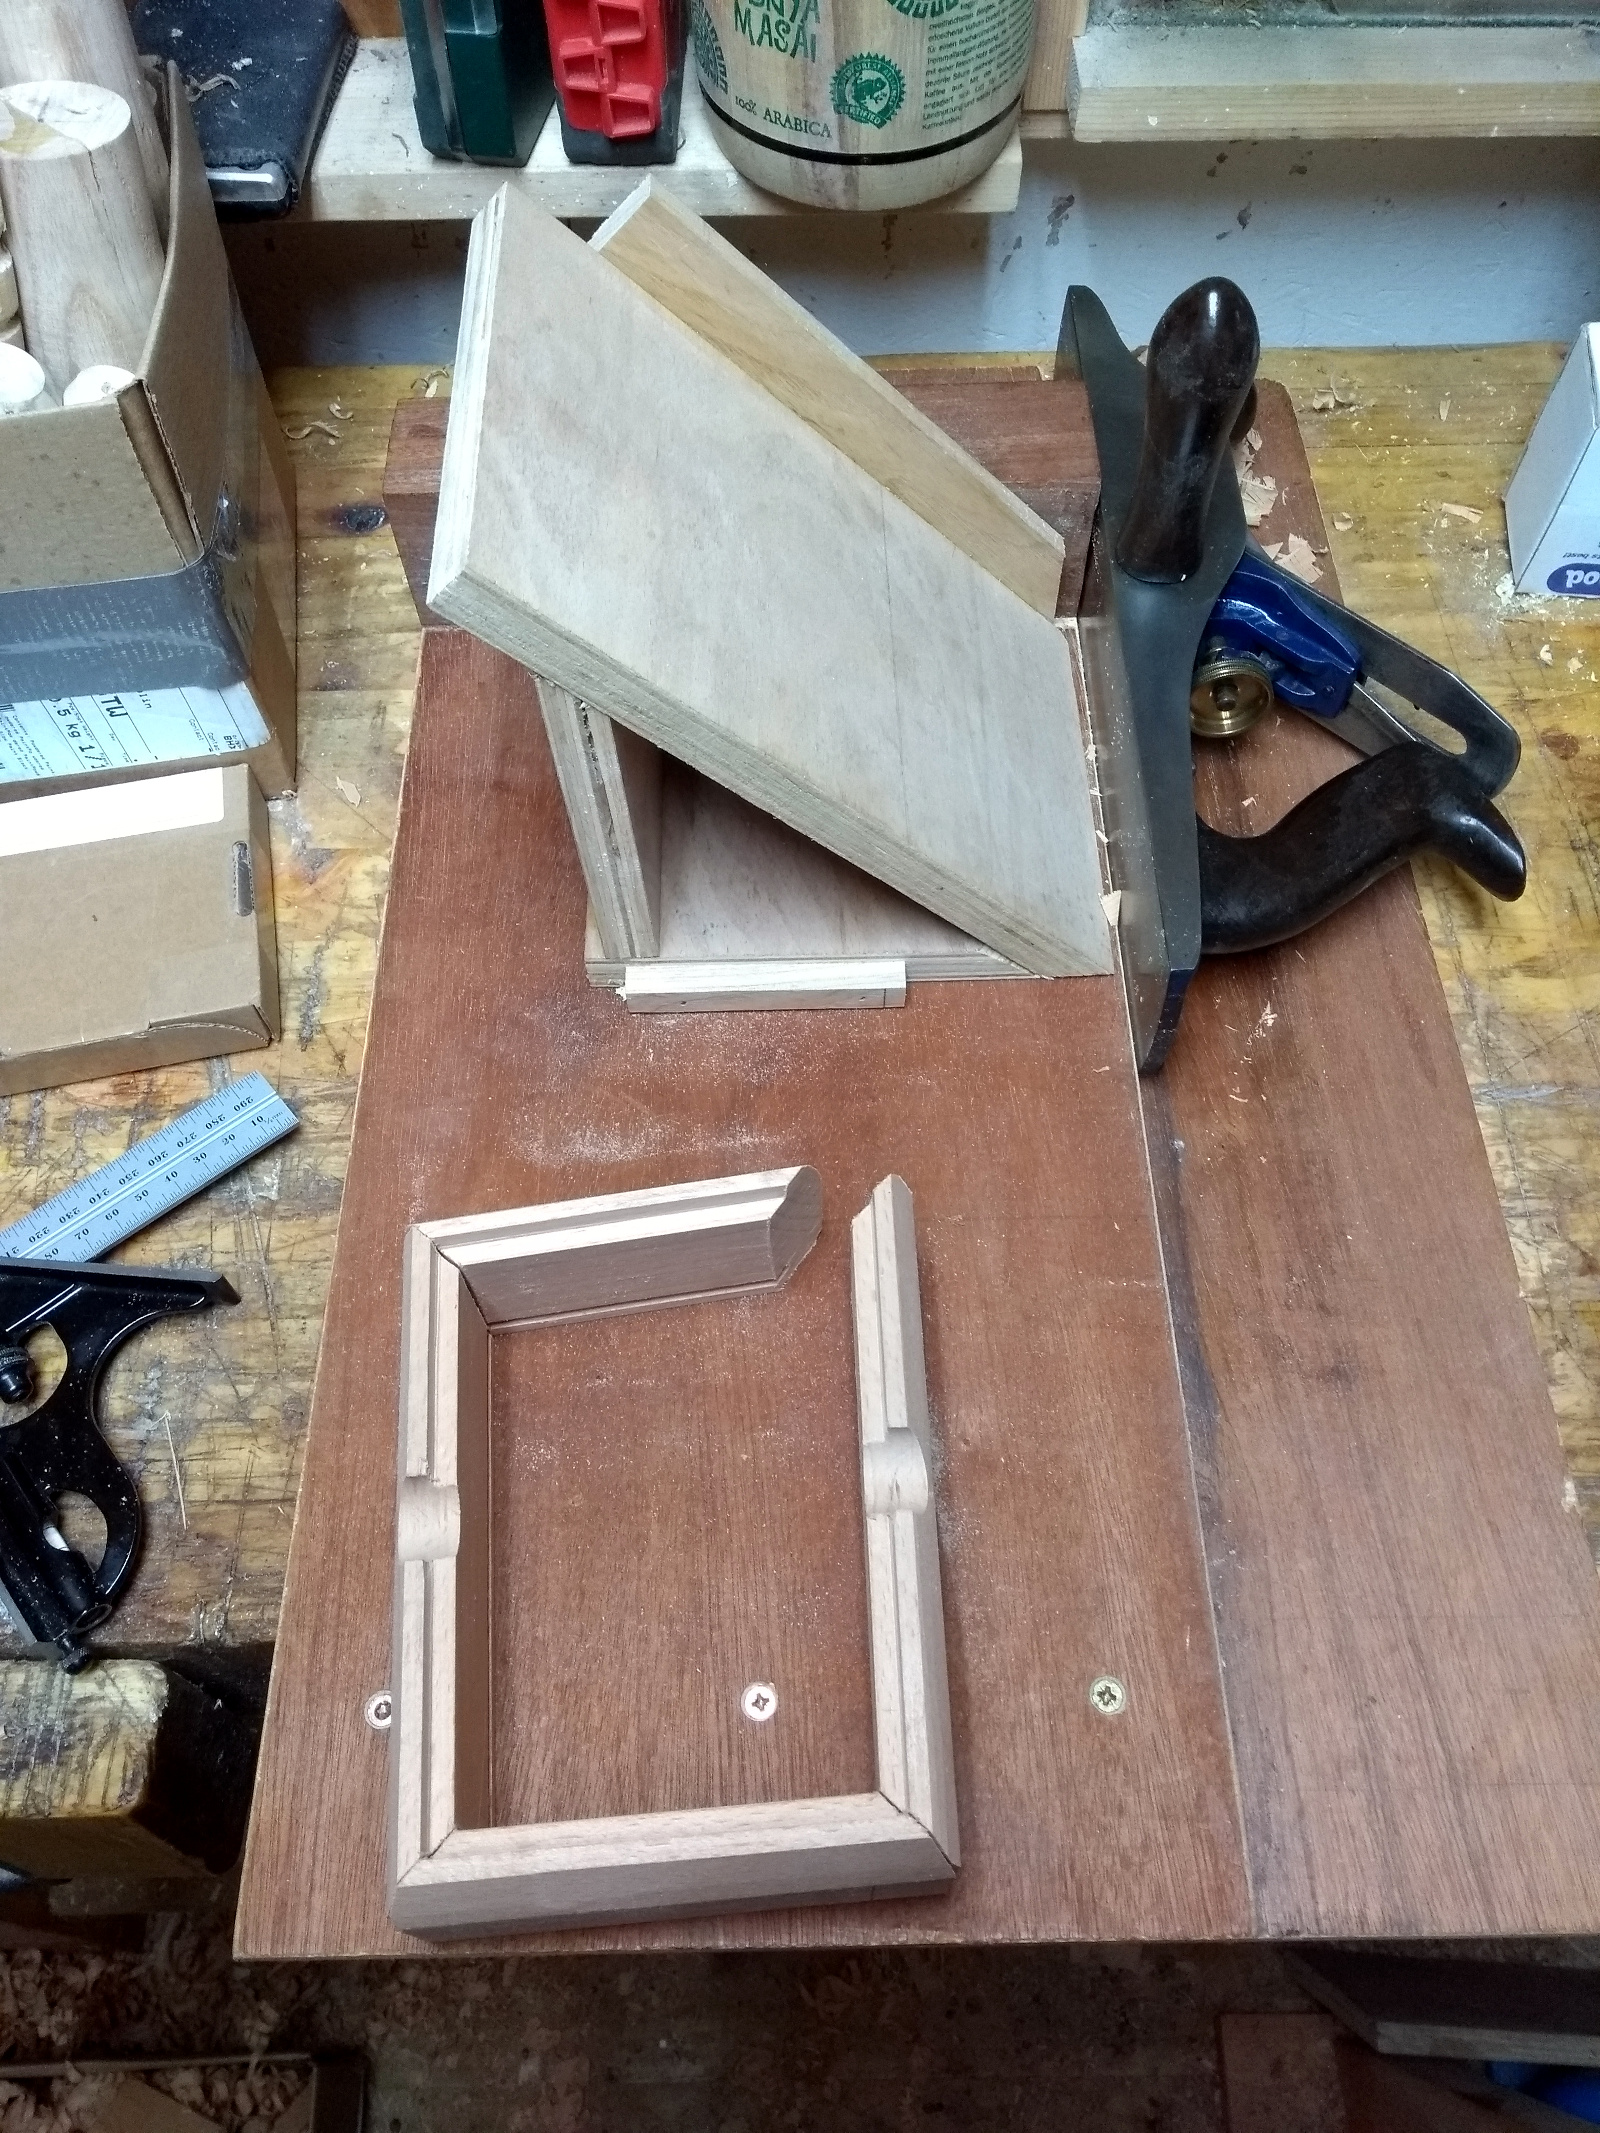
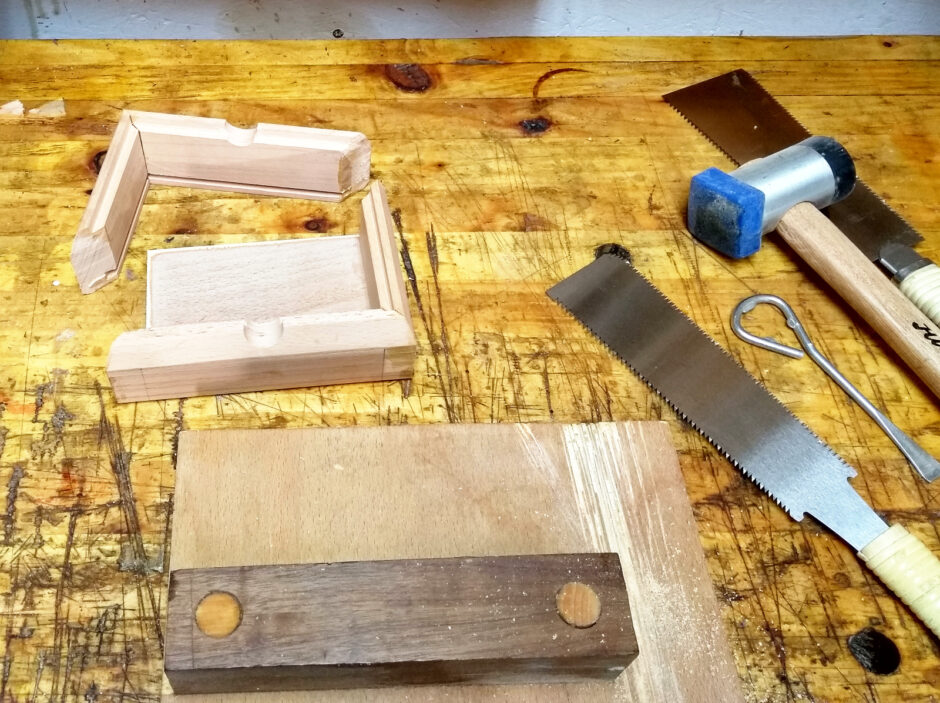
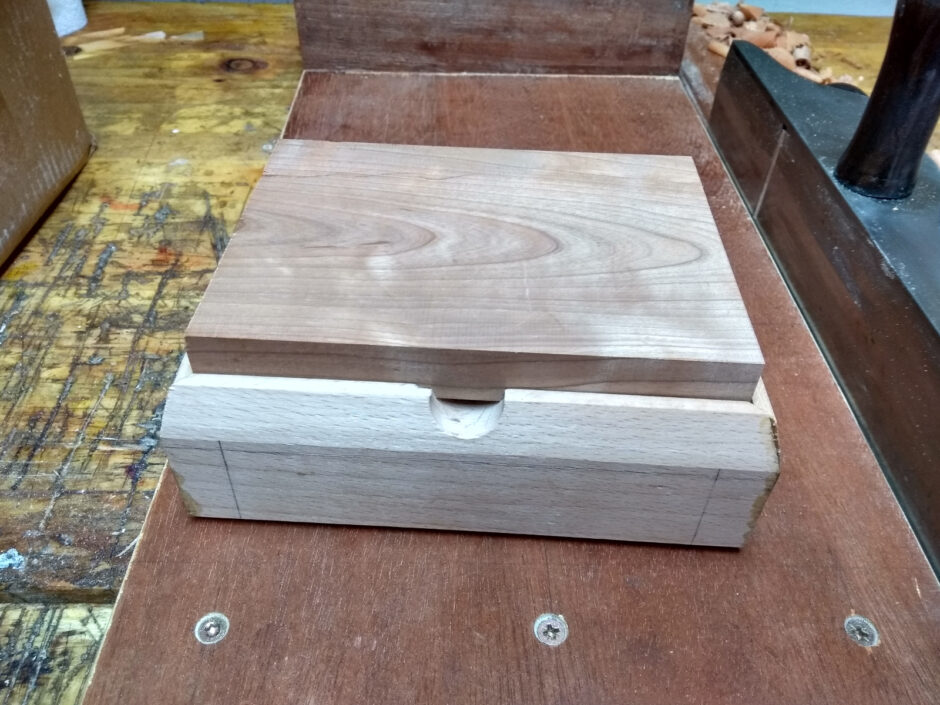
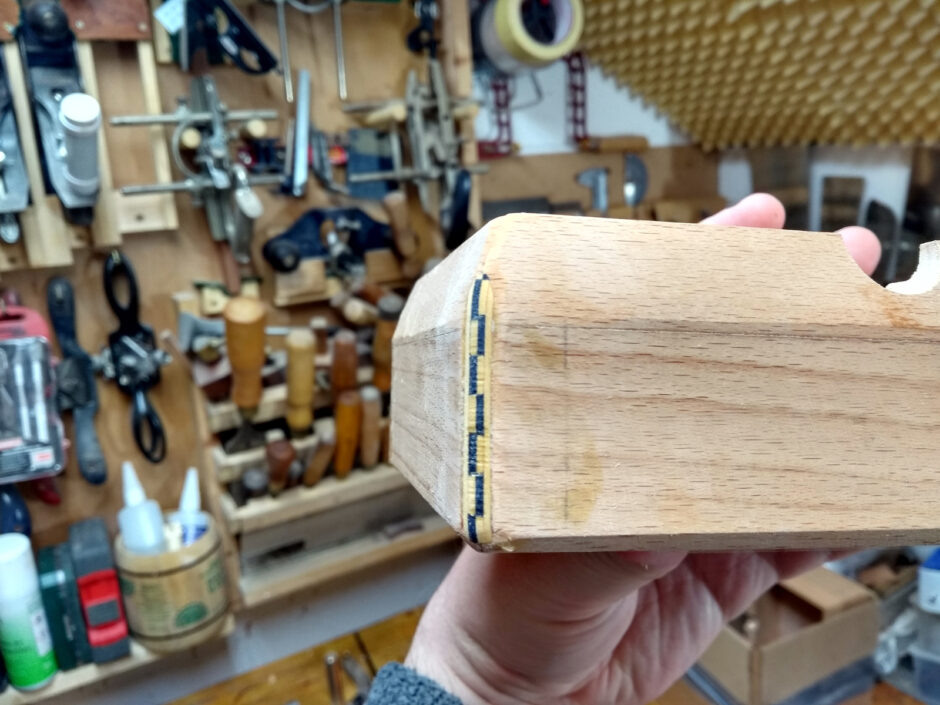
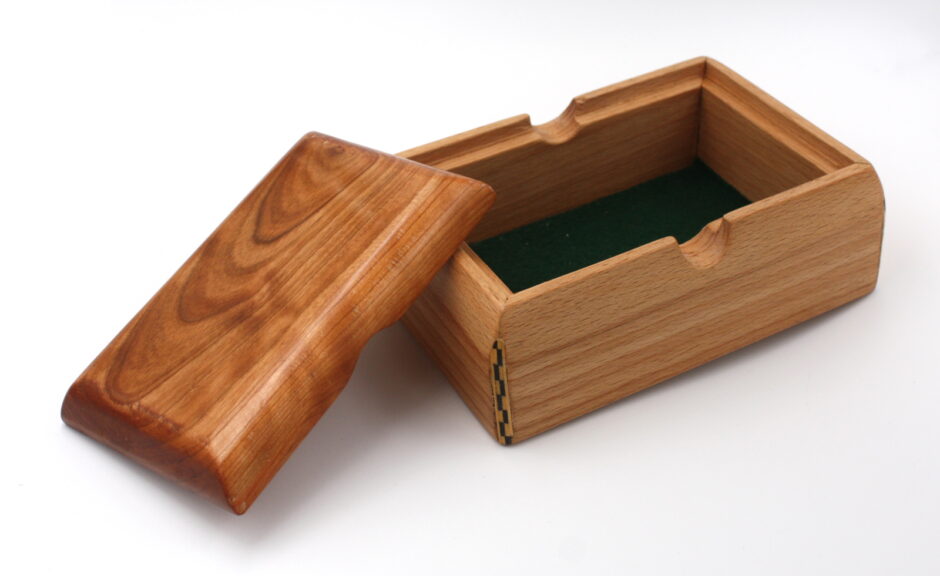
German steamed beech for the sides, and some curly cherry for the lids seemed like a good idea. I ripped the wider board down the middle so I could get all the sides out of it for the larger box and let the grain at least flow around two of the corners (it flows round all the corners on the smaller box). Before crosscutting to length, I used the #778 to cut the top rebate for the lid and the #043 to cut the rebate for the bottom – only 3mm wide and 3mm in but for a box this size, that’s fine. Then a forstner bit in a pillar drill cut out the thumbhole by just offsetting the point just to the edge of the board and slowly cutting down so the bit didn’t want to dive off to the side. I also rounded the bottom corner and put the top bevel on the sides with a handplane.
After all that but before cross-cutting to length, it was time to bring out the donkey’s ear and shoot the ends to a 45 degree miter (but I rough-cut the miter with a saw beforehand just to save on rough work as the shooting plane edge shouldn’t be a roughwork tool).
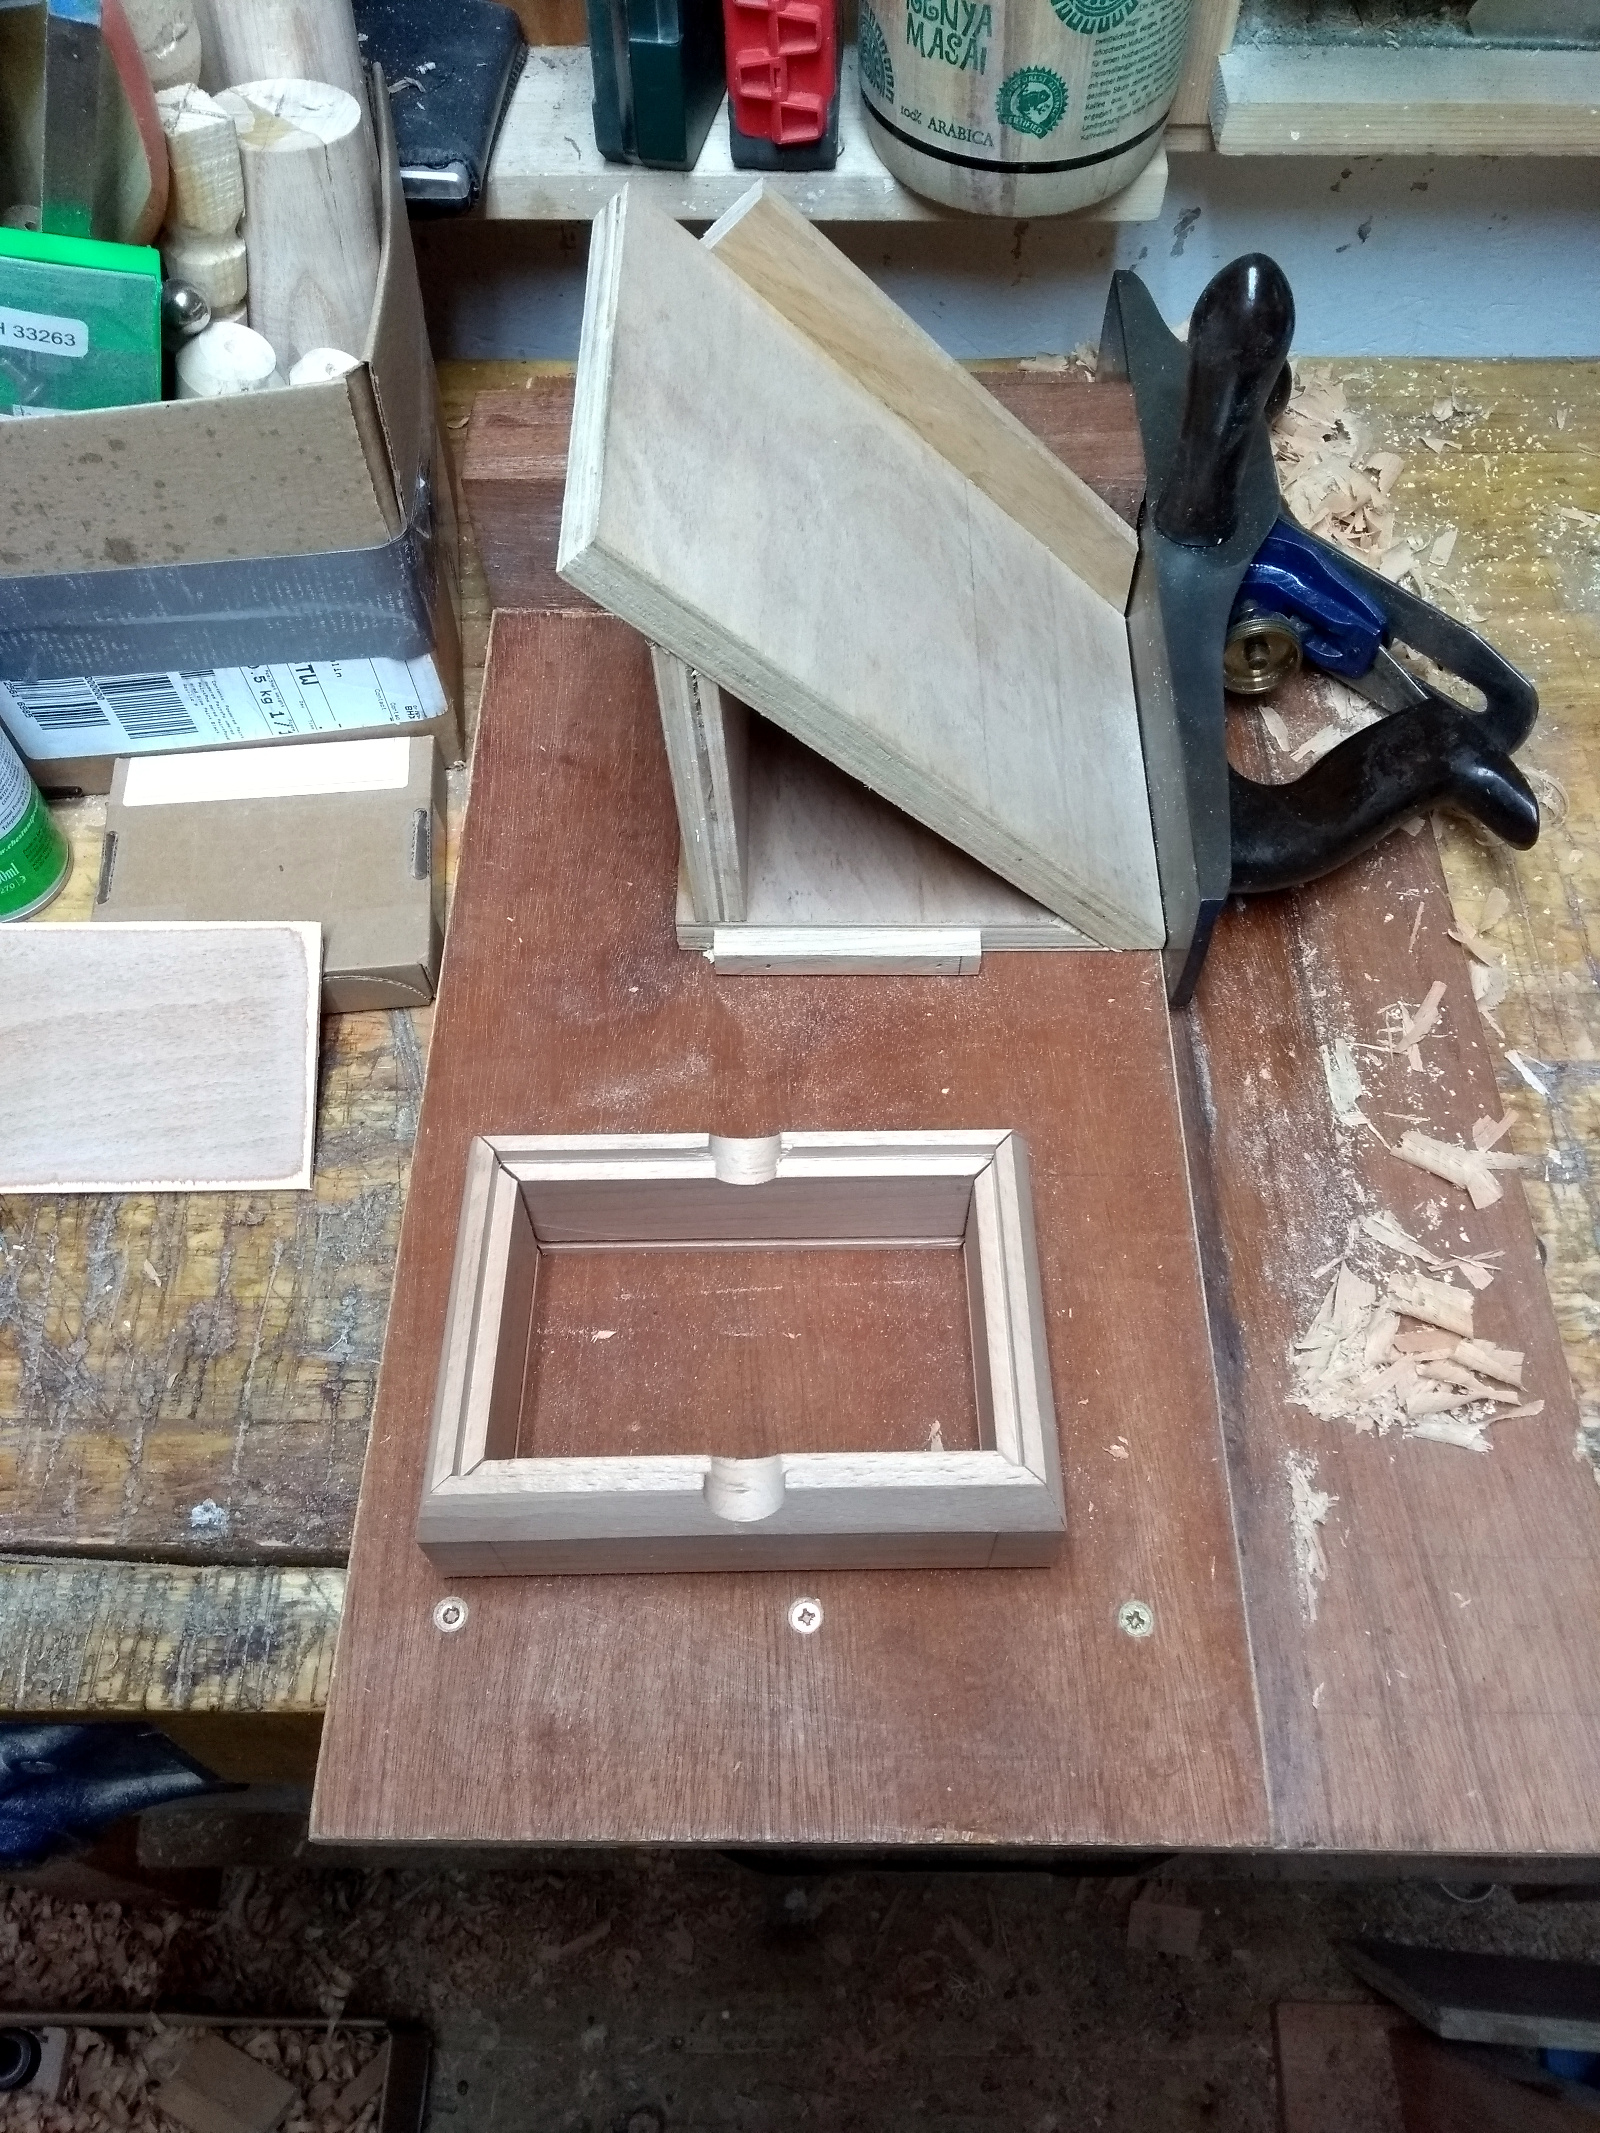
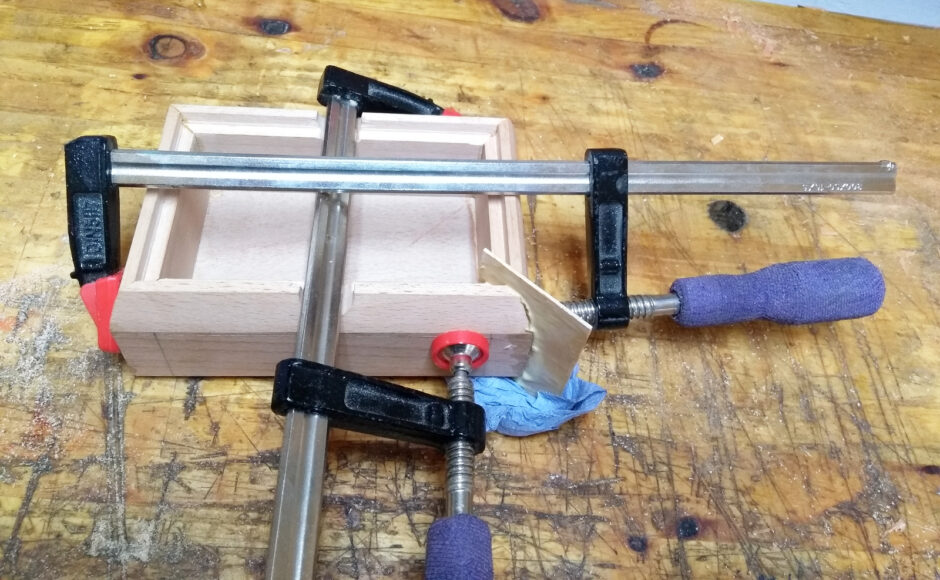
Okay, dryfit looks good, time to glue up and clamp.
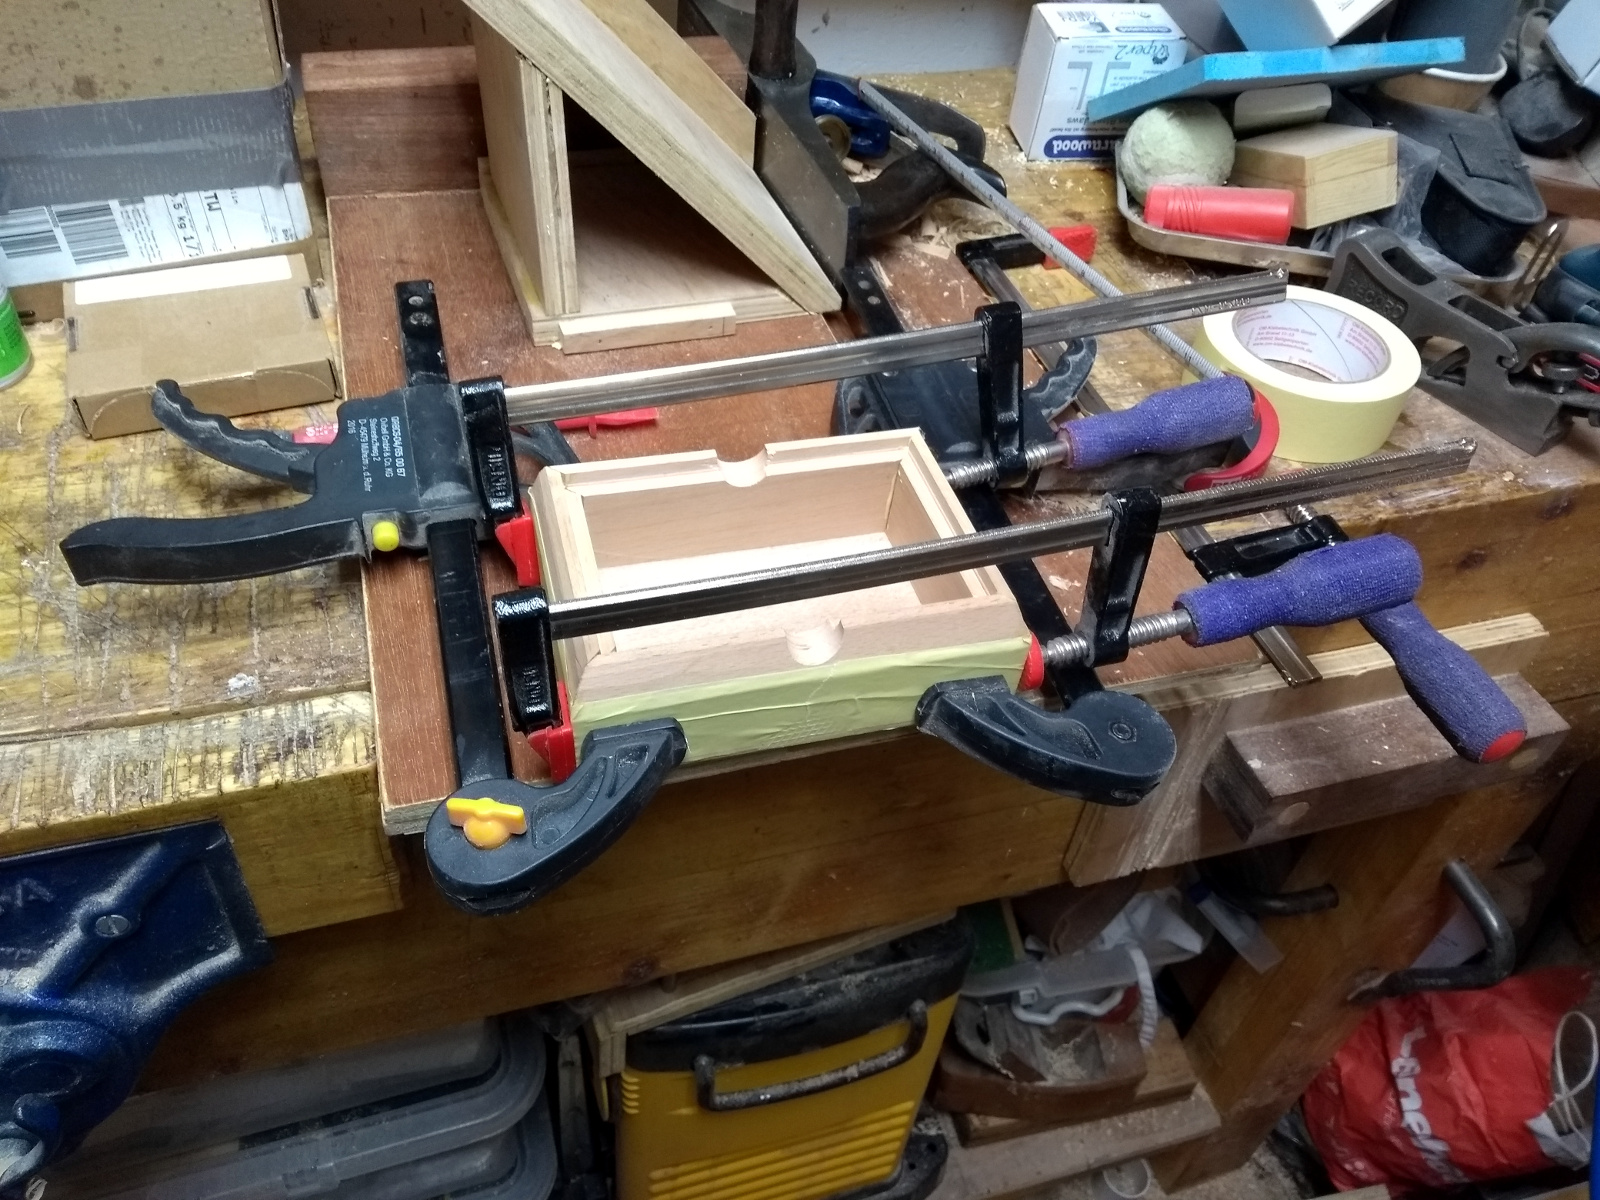
There are better ways to clamp this kind of box, I’m certain. And there’s good reason for those ways to exist, because I cocked this one right up:
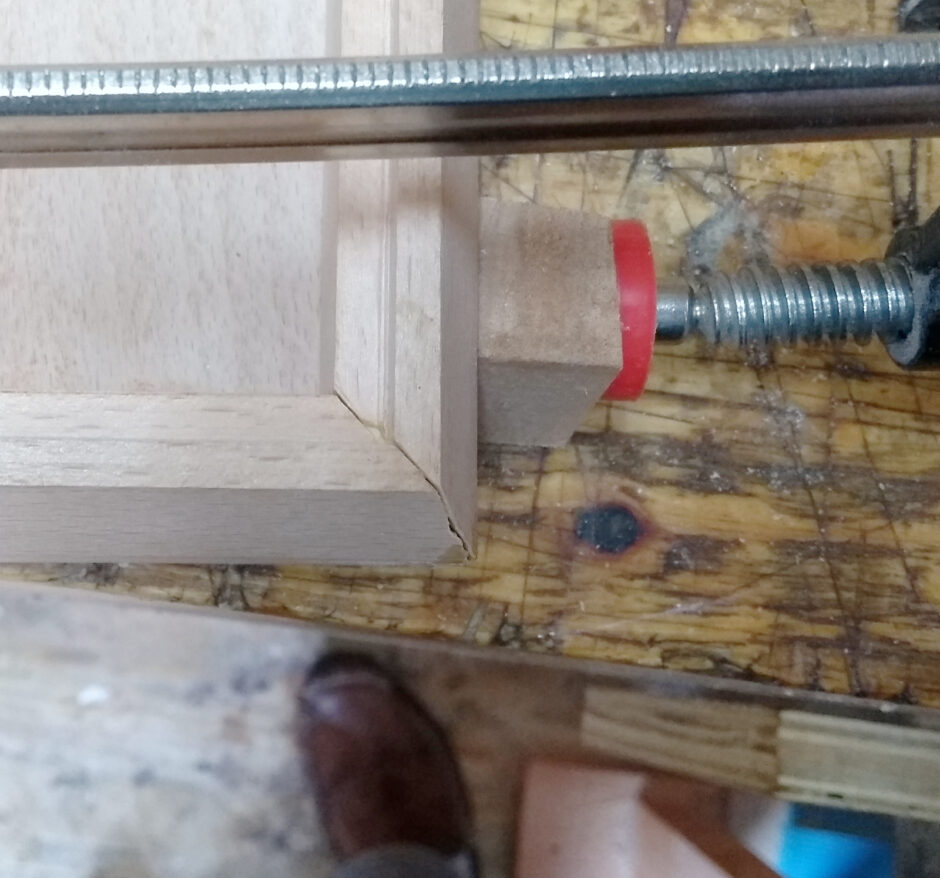
Clamp pressure was unbalanced enough that the miters slid slightly out of alignment and there wasn’t any nice way to fix this, so out with the saw and a framing trick:
The idea was to cut the joint in – you saw down the exact line of the joint and your kerf trims both sides so what’s left matches perfectly.
Yeah, didn’t work quite so well and after the second glueup still didn’t look right for one box (the other was grand) it was time for emergency measures and out came the veneer.
I know, it’s ugly, but I Have A Plan.
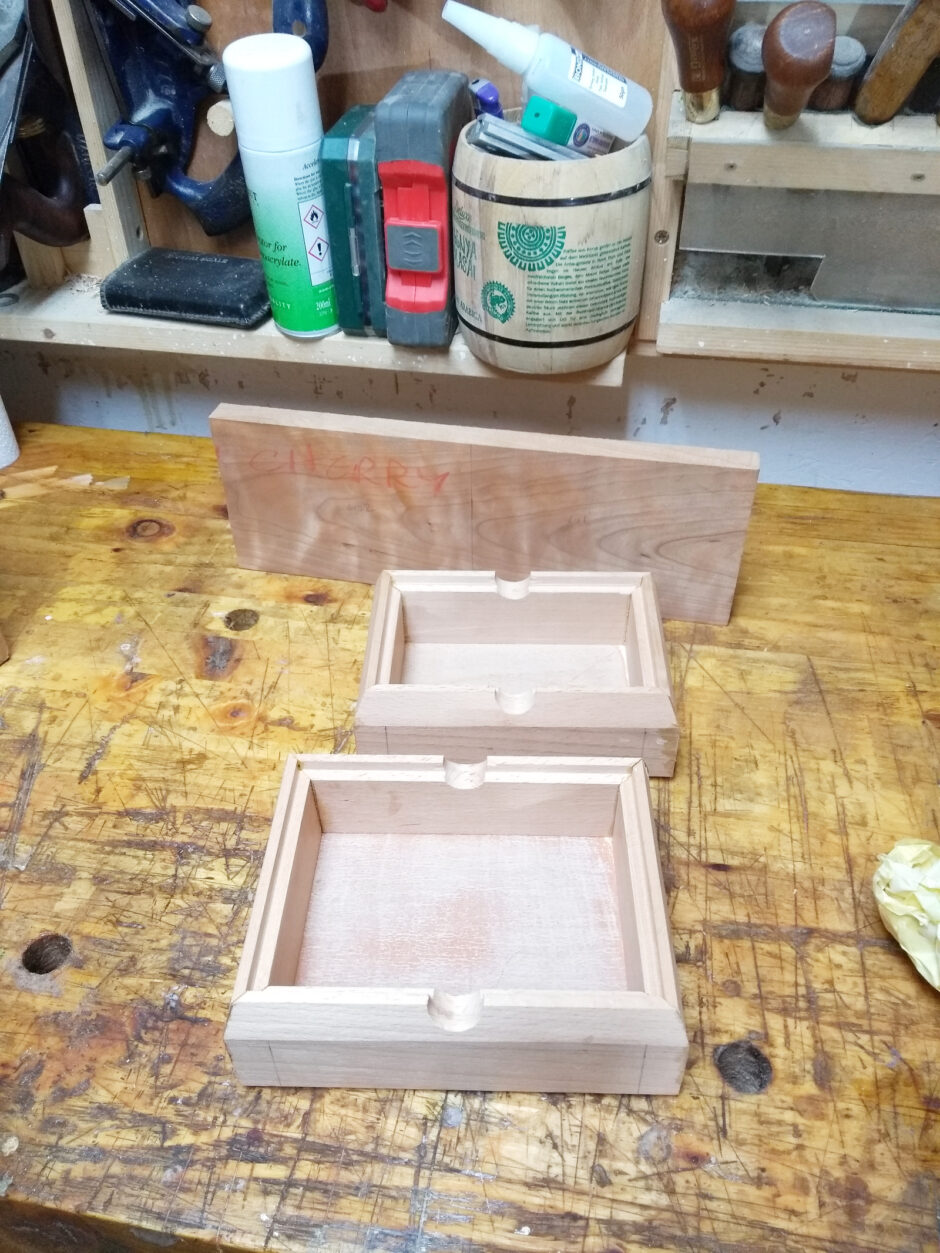
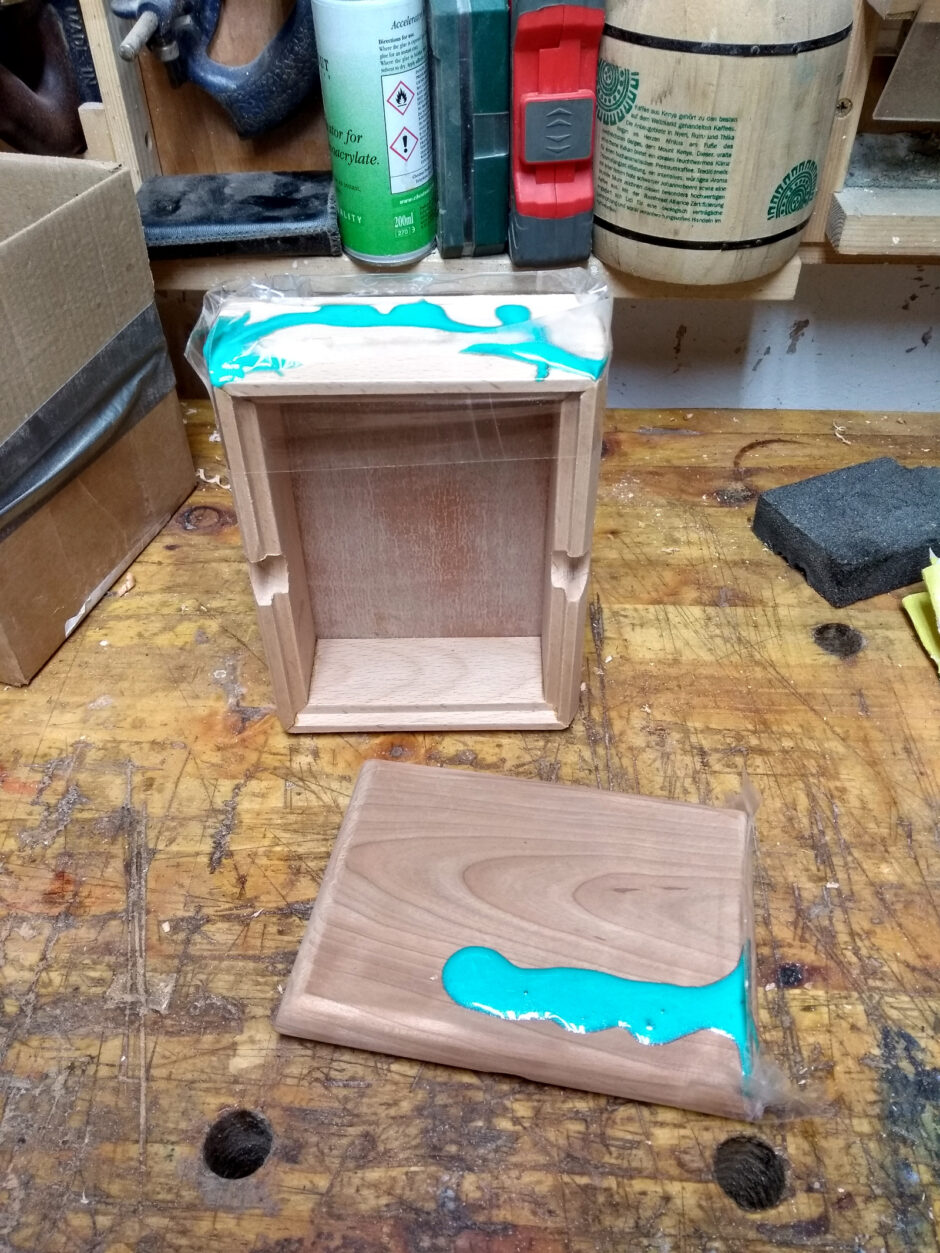
Both boxes glued up, cut the lids out now and then on with the fixing of mistakes.
I mean, shaping the lid has to come yet, but getting a nice fit first. This…. isn’t perfect but it’s not bad. Now, onto hiding mistakes…
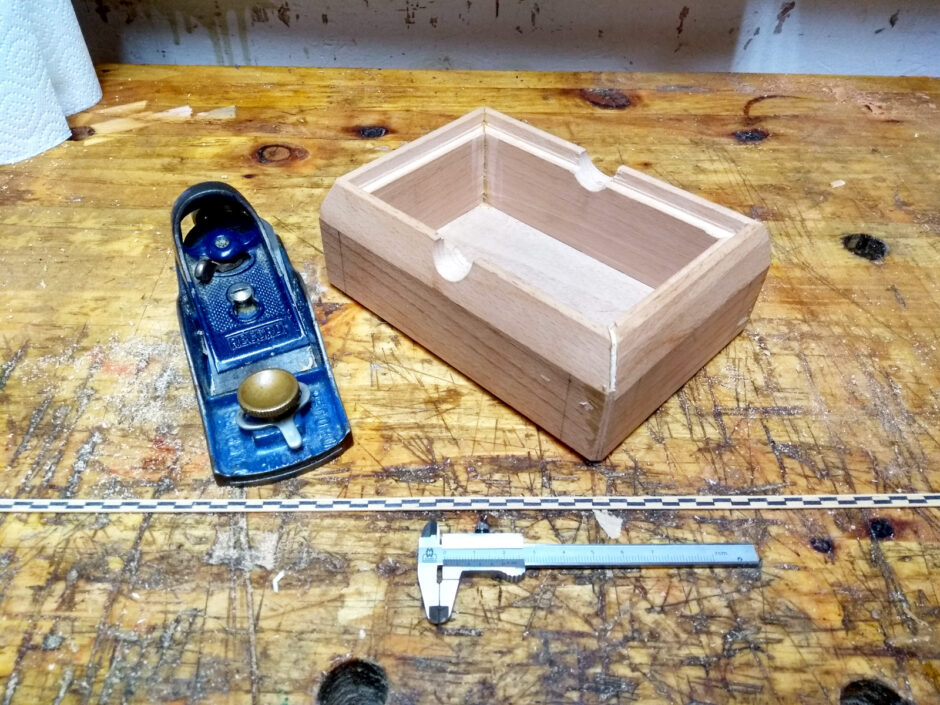
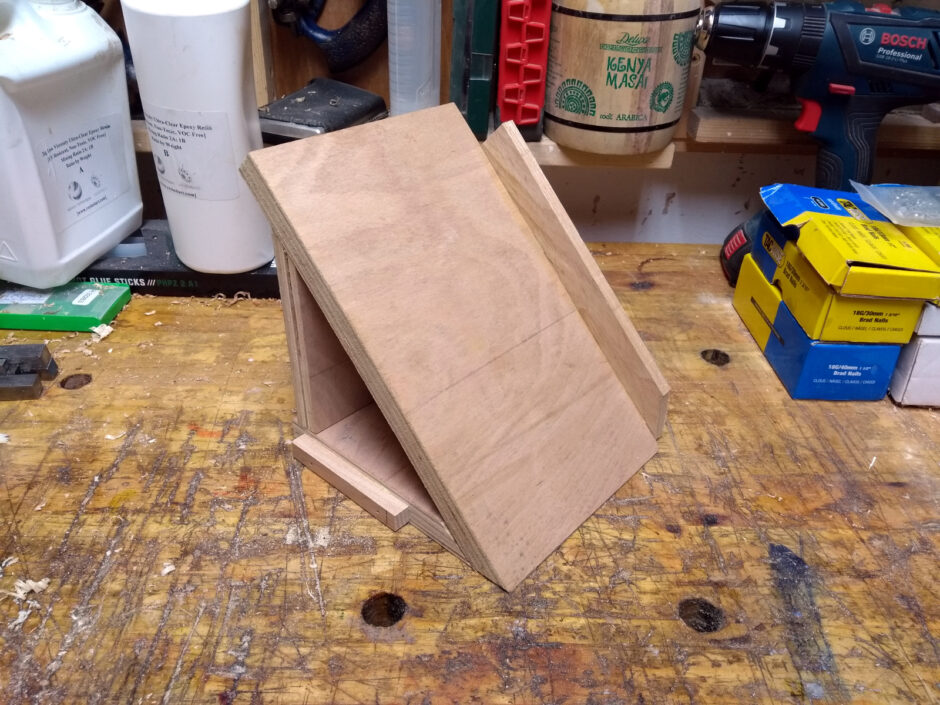
The idea is to plane the corners with the low-angle block plane to get a small flat spot and then the dreaded power router will make a pass and cut the groove for the banding to go into. But cutting a grove down into a narrow flat spot on the apex of two sides is awkward so I think a jig is needed.
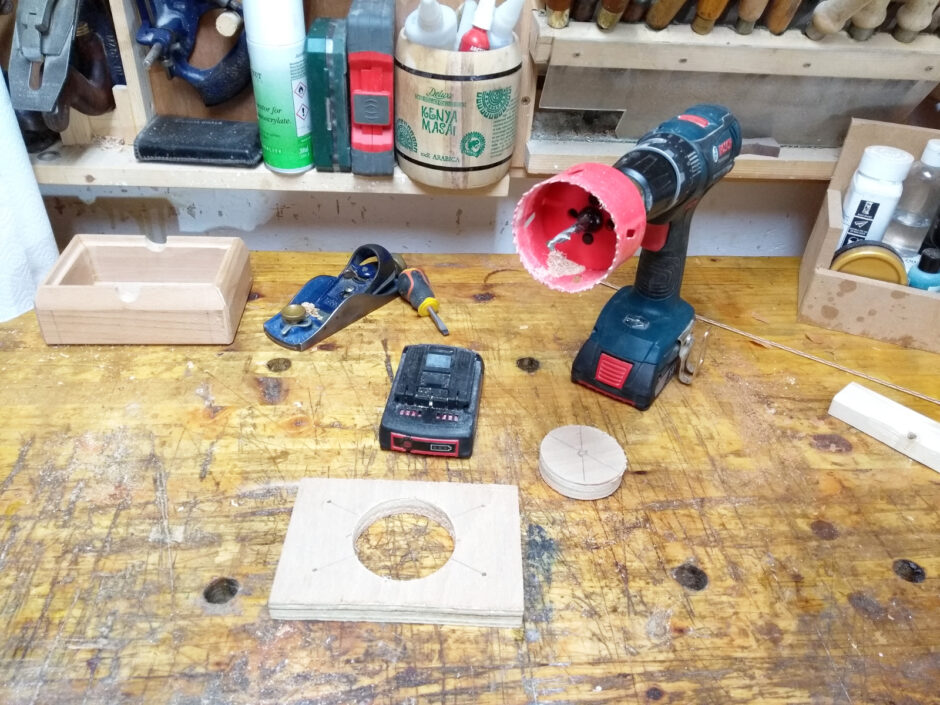
Bit of ply, mark a bolt pattern and a center spot, hole saw out a chunk, and now we need two rails which will have 45 degree slopes on them. Just grab a lath of softwood for that, but holding it on the donkey’s ear was awkward so masking tape goes on the donkey’s ear and on the lath and a bit of superglue goes on the tape and…
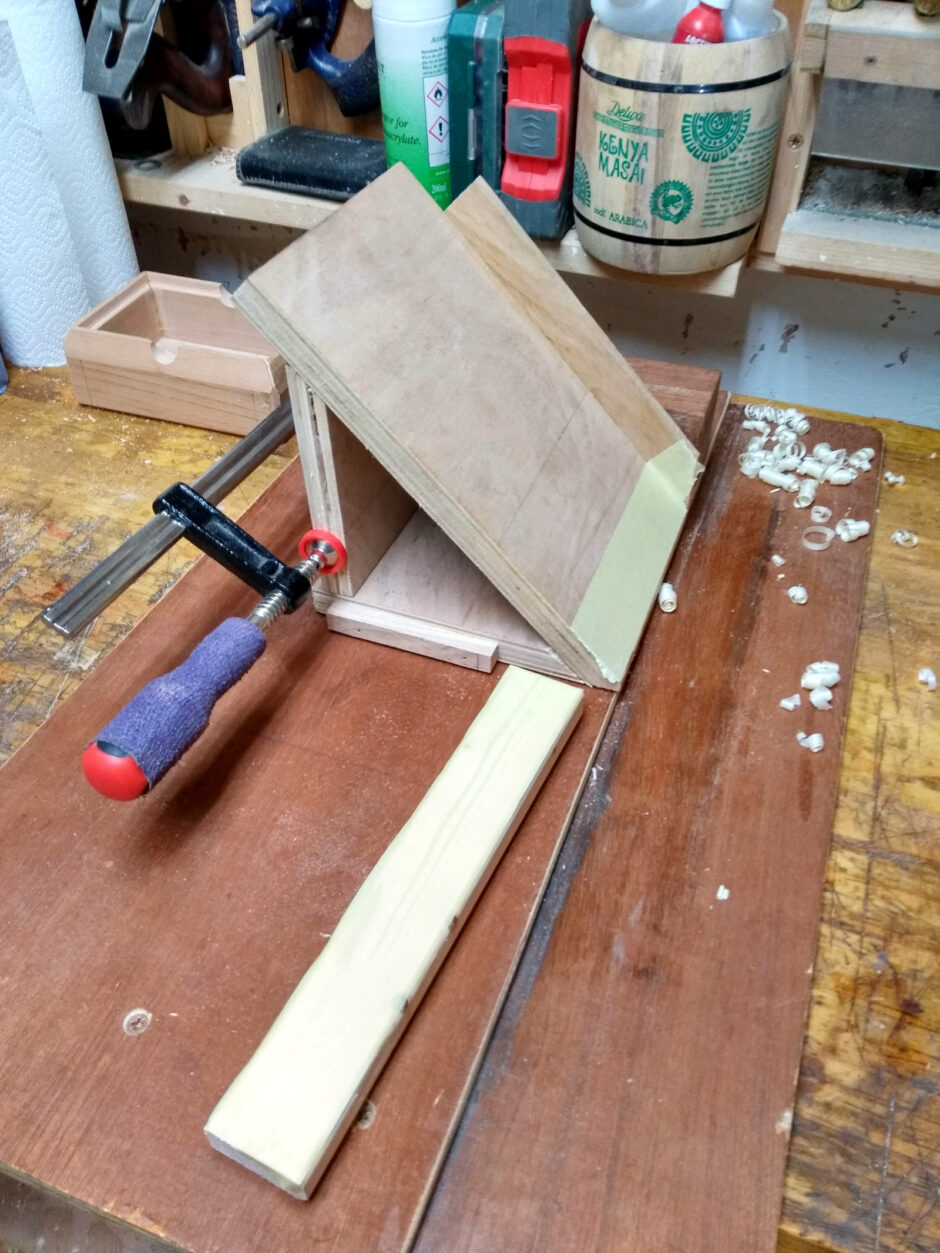

Nice and neat. Now crosscut in half and glue to the base of the jig with room for the router bit between and be careful to centralise it as much as possible.

And once that’s dried, it gets bolted to the base of the router, the box goes in the vice with the corner up and I route out a shallow groove and then it’s out with the inlay tools and I cut the banding to rough length and glue it in place using the syringe of glue.
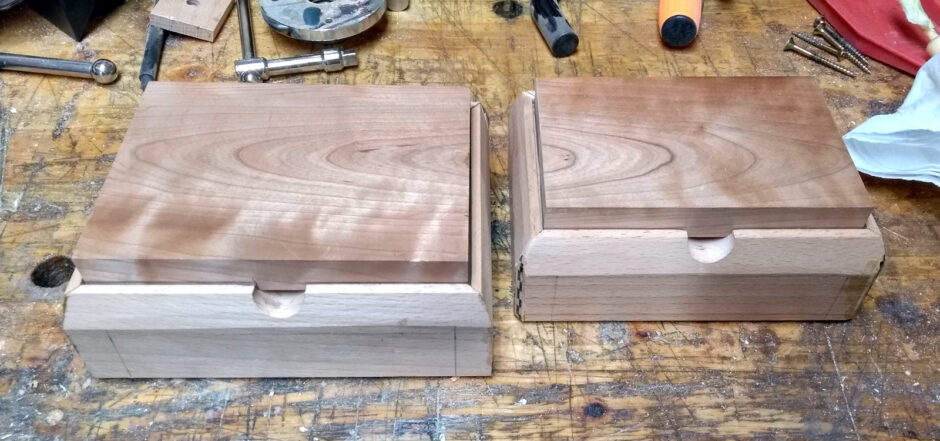
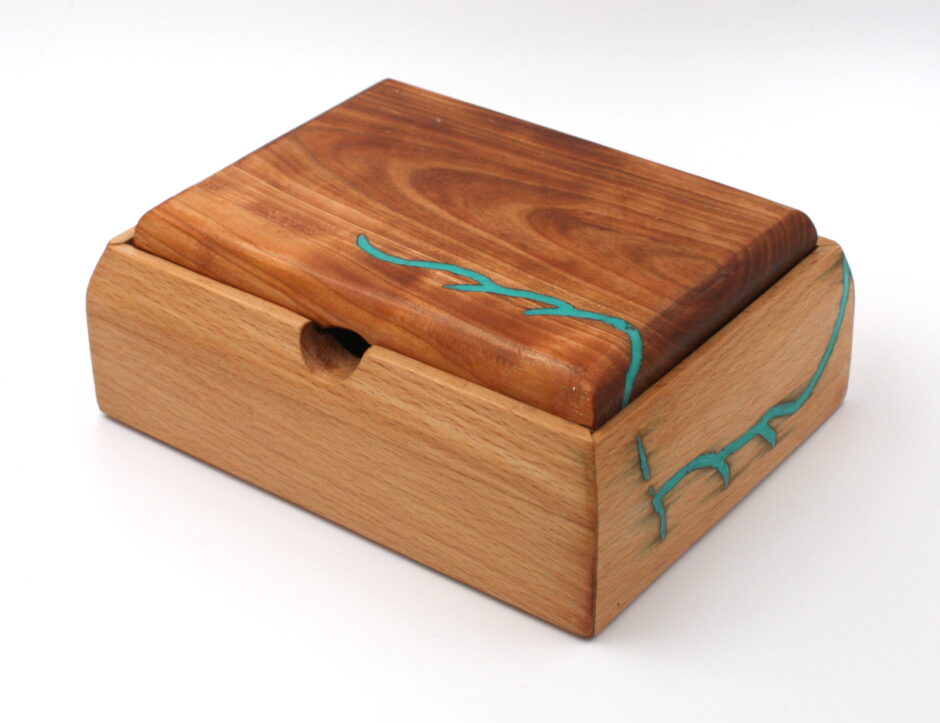
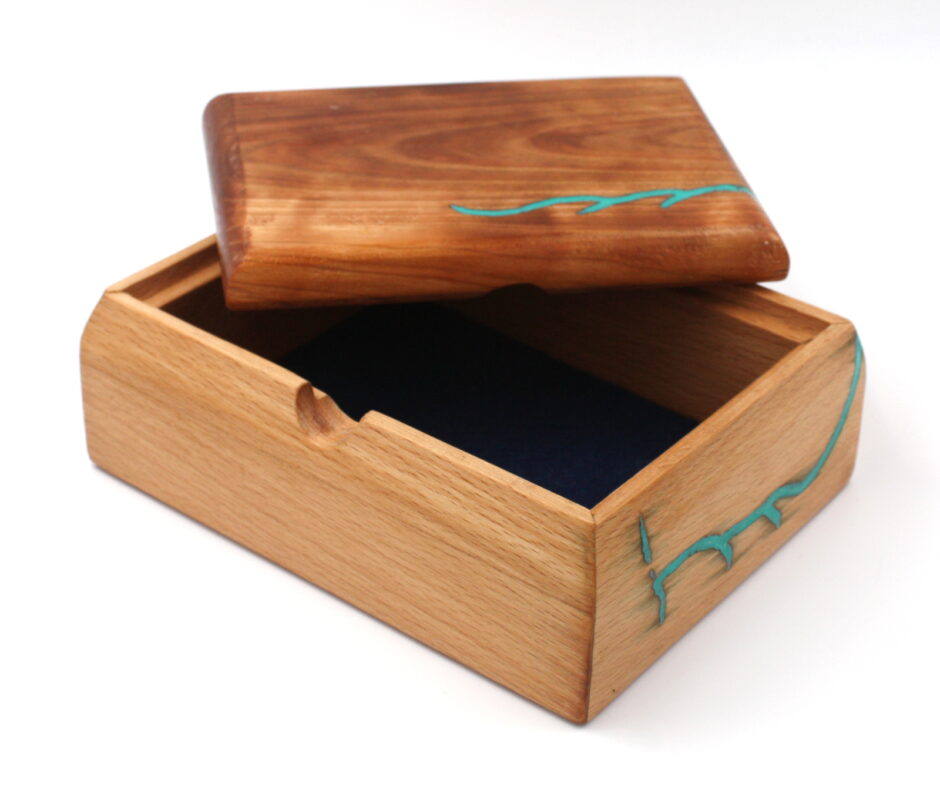
After trimming with the chisel and some sanding with 120 grit, it’s nicely blended in and the miter corner is hidden, including the messed-up one. Sssh. Don’t tell anyone.
After that, I carved out two matching counter-grooves on the underside of the lids where the thumbholes go with gouge and rasp and a sandpaper-wrapped dowel and then shaped the ends and sides of the lids with a handplane, and thought I was done. And then noticed that one of the lids had a serious check in it, running half-way into the lid and that was probably a structural issue. Plus, a small piece had splintered out of the mitered corner on one box. So I thought I’d try to mask and repair both in one go.
Draw along the check on the surface and rounded end of the lid with pencil and do it in half-arcs that intersect in an organic sort of way, then out with the dremel and a small ball bit and route out the wood along the lines down into the check by about 3mm or so in order to let the resin get down into the check proper and act as a structural fix while also looking a bit pretty. And of course, mix some colour and some glow-in-the-dark pigment into the resin because why would you do anything else?
The lid worked out grand. The side…. not as well. The resin leaked both out of the surrounding tape (well, that’s fixable) but also into the grain of the wood in places, which I’ve not seen before. Bother. A top-up pour of clear resin fixed the leak out of the tape, and then #04 plane and some 120 grit to tidy up and it was good to go.
Finishing was all that was left, and I went with a coat of poppyseed oil to start, just slathered on and the excess cleaned off and left to cure for a few days, then two coats of melamine lacquer was sprayed on and cut back with 0000 steel wool between each layer, and then some Yorkshire Grit over the top of that and buffed well to a nice gloss. Then out with the buffing wheel on the lathe and I tried something new, a coat of Hampshire Sheen (the original gloss stuff which the carpentry store still had in stock even though they don’t make it anymore) and buffed that off on the softest wheel I had (so some beeswax got mixed in there as well). Then I cut some felt to fit the bottom because the plywood could look nicer and glued it in place and that was that.
Came out nice:

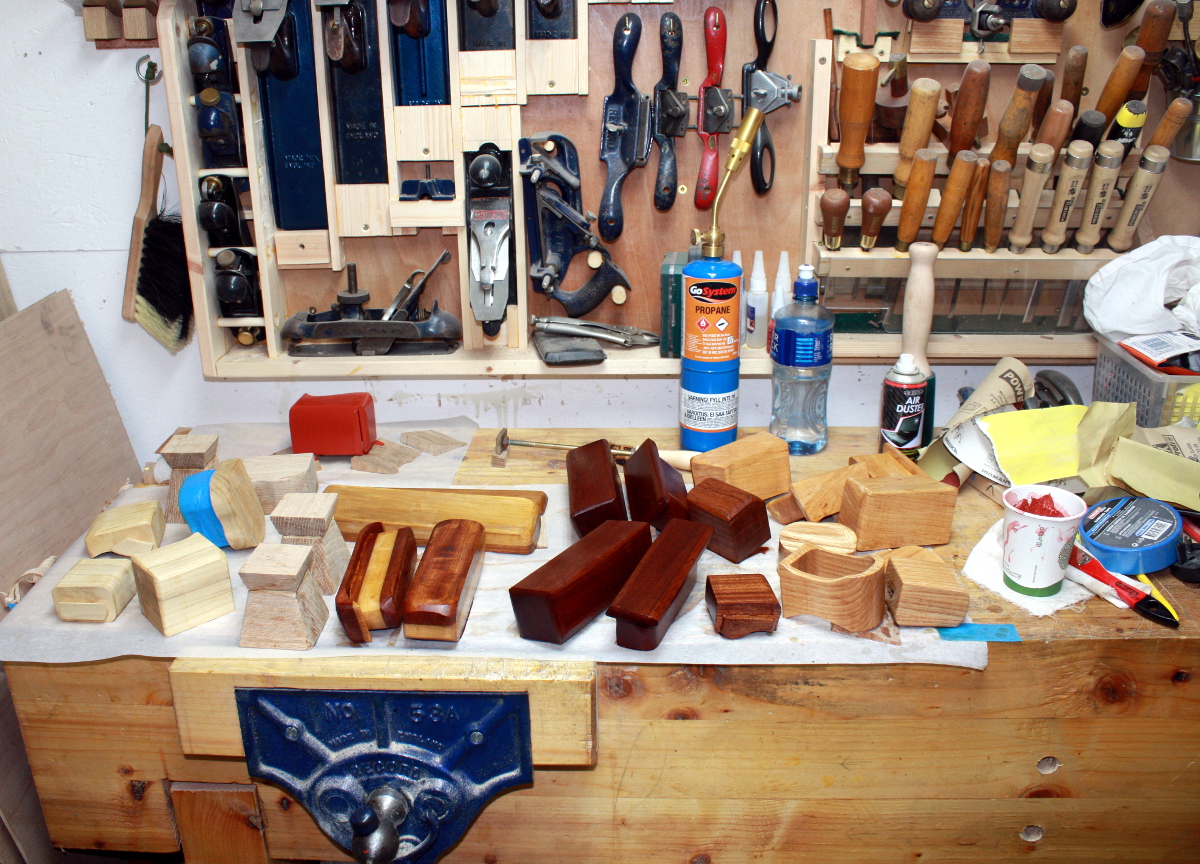 All the major work is done now, everything’s glued up (though the last of the oak boxes is still curing really) and the prep finishing is either done or in train…
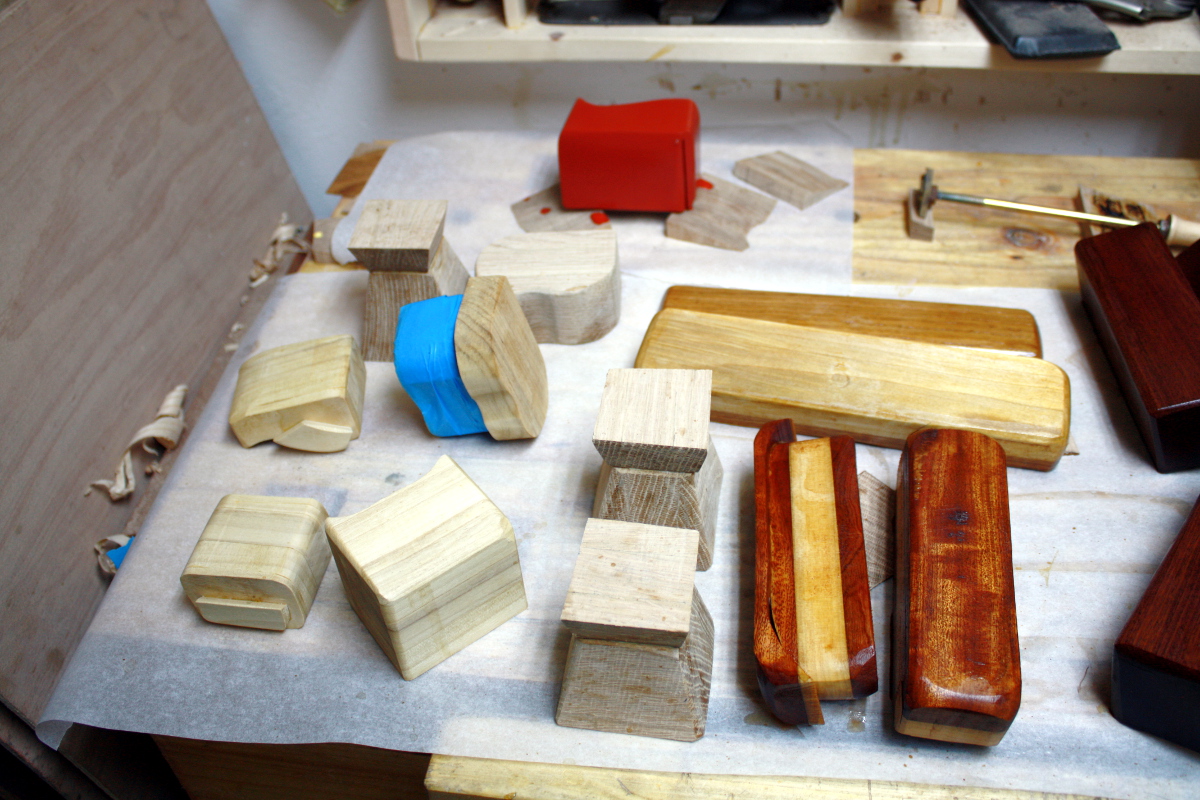 The poplar boxes have all had a coat of sanding sealer here (again, just blonde shellac cut down from a 2# cut to a half-pound cut), and the outer box of one has been test-finished with red milk paint (more on that in a moment). The oak boxes have all been given a coat of the oak tea (with surfactant) and they got another early this morning. The poplar drawer front on the oak-and-poplar box got a coat of sanding sealer.
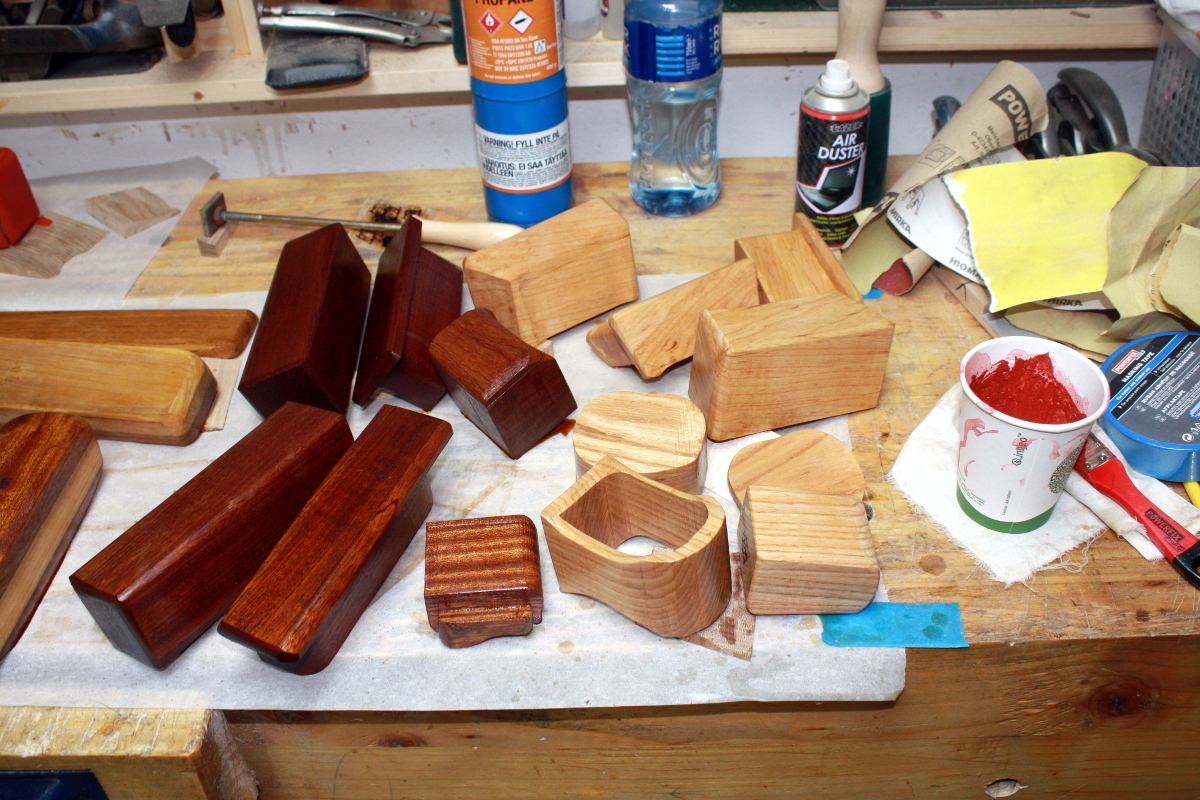 The oak-and-poplar pencil box, the sapele boxes and the ash boxes all got another coat of danish oil and after the excess was wiped off and it had had a while to set up, they all got a coat of shellac (blond 2# shellac for the ash boxes; garnet #2 shellac for the sapele and the oak&poplar boxes). Tonight they’ll get a quick light sanding from worn 240grit paper and we’ll see if they need another coat or if I’ll go straight to poly (I wouldn’t for furniture, but these are quickly-made trinkets…).
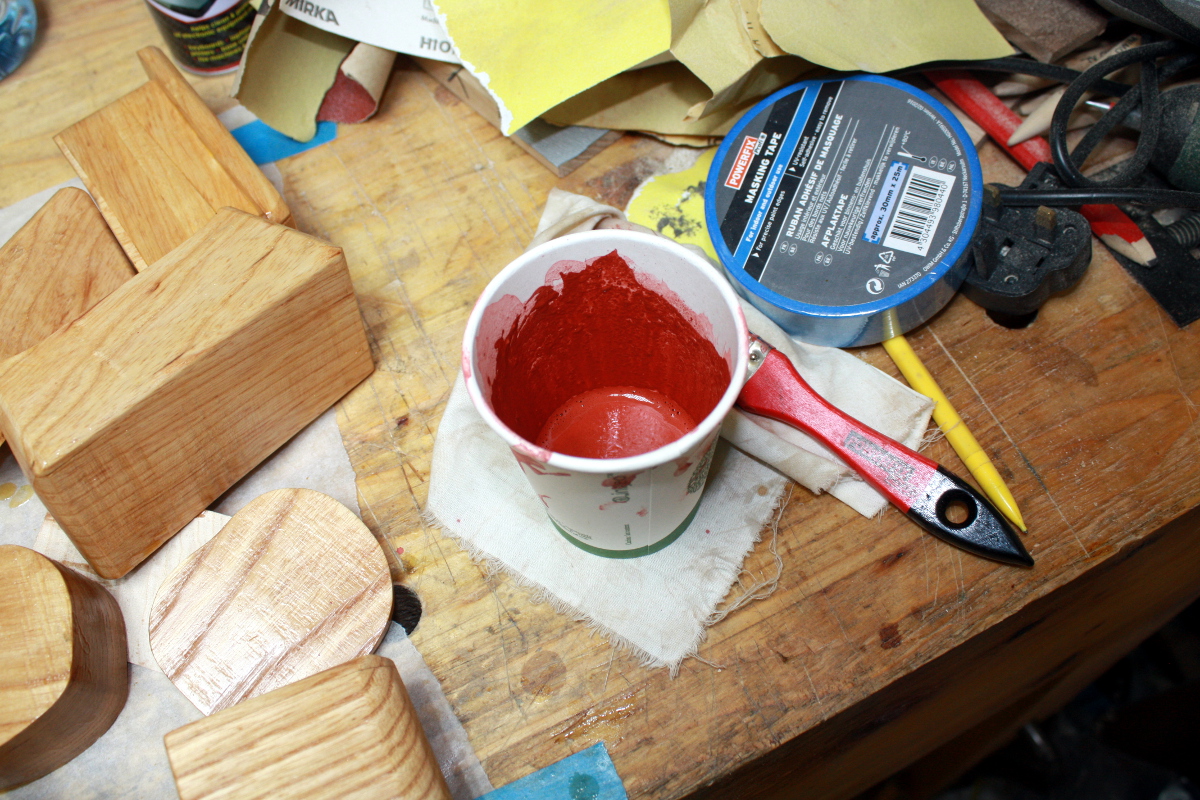
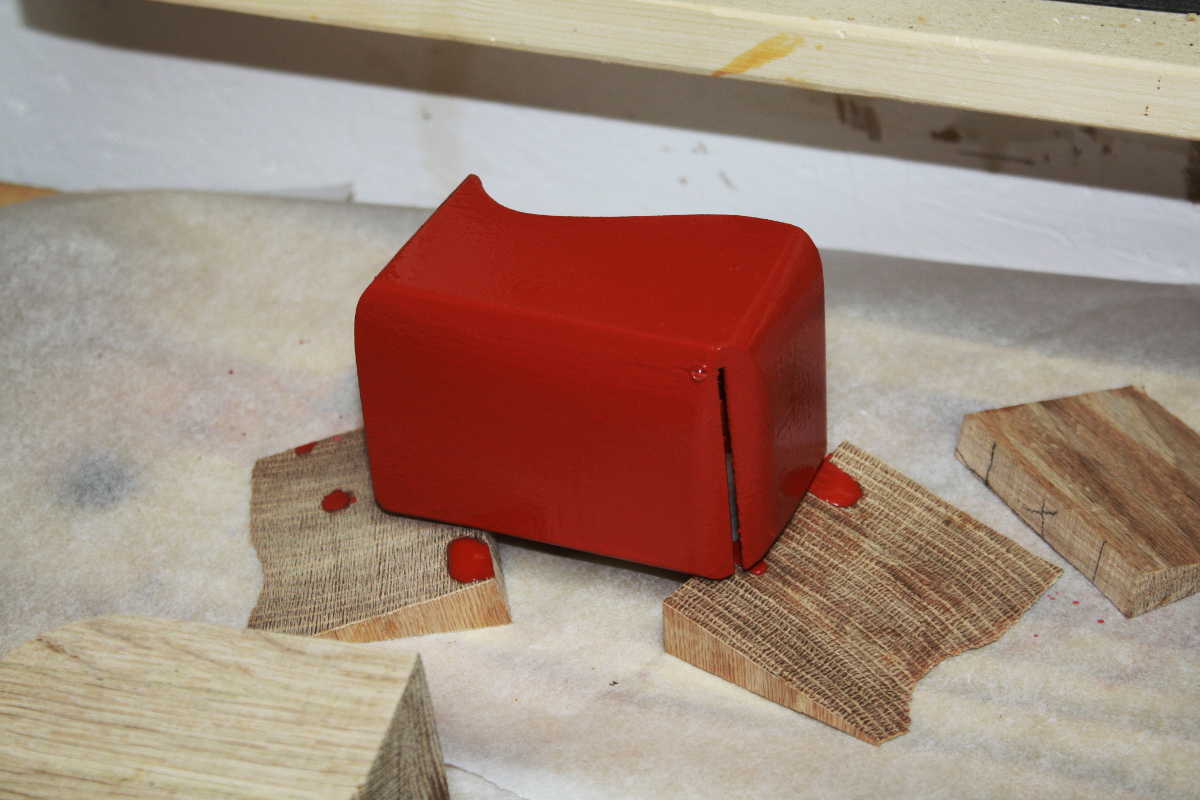 Haven’t messed with colour enhance filters here, I promise. There’s white balancing and that’s all (and the white wall and the parchment paper give a decent white sample for the filter to latch onto) so the colour’s pretty true – it really is that jarring when wet. It dries to a chalky light pink, but when you put a topcoat on it, it darkens up again. We’ll see how well it copes, it got a spray of poly this morning and I think it’ll need another tonight.